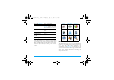
Philips9@9s_00_DiscoverYourPhone.fm Page 0 Friday, June 23, 2006 Discover Your Phone Back of the phone: camera lens 262k OLED main screen How to... Switch the phone On/Off Long press ). Enter your PIN code Enter your PIN code using the keypad and press , or L to confirm. Make a call Enter the phone number on the keypad and press ( to dial. End a call Press ). Voice memo key Answer a call Press ( when your phone rings. Charger /headset connector Reject a call Press ) when your phone rings.
Philips9@9s.book Page 1 Wednesday, May 31, 2006 7:34 PM Access the Names list Press - in idle mode. Access the Call list Press ( in idle mode. The Call list displays all calls missed, dialled and received. Access the Main Menu Press , or L Menu in idle mode. Go to previous menu Press R Back when available. Quickly return to idle Press ). Extras Media Album Entertainment page 14 page 19 page 23 Op.
Philips9@9s.book Page 2 Wednesday, May 31, 2006 Press , to access the Main Menu when in idle mode, then use the central navigation key which directions are represented in the present guide with the +, -, < or > signs to browse the icons and lists. When navigating in a list, a scroll bar located on the right hand side of the screen shows your current position in the list. Within lists, press , to access the options related to the selected item, press select R Back to go back one level.
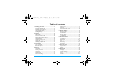
Philips9@9s.book Page 3 Wednesday, May 31, 2006 7:34 PM Table of contents 1. Getting Started ............................................5 2. 3. 4. Inserting the SIM card ......................................5 Switching on the phone ...................................6 Charging the battery ........................................7 Setting Hotkeys .................................................7 Calling ................................................................8 Make a call ..................
Philips9@9s.book Page 4 Wednesday, May 31, 2006 7:34 PM 9. Settings .......................................................... 42 12. Call Info ...................................................... 61 Time and date ................................................. 42 Autonomy ........................................................ 42 Security ............................................................. 43 Profiles .............................................................. 45 Sounds ............
Philips9@9s.book Page 5 Wednesday, May 31, 2006 7:34 PM 1. Getting Started Please read the safety instructions in the "Precautions" section before use. Remove the battery To remove the battery, pull the battery up from the bottom left corner. To use your phone, you must insert a valid SIM card supplied by a GSM operator or retailer. The SIM card contains your subscription information, your mobile telephone number, and a memory in which you can store phone numbers and messages.
Philips9@9s.book Page 6 Wednesday, May 31, 2006 7:34 PM Replace the back cover by sliding it down into its slots, until it stops. Remove the protective film covering the screen and the camera lens before using the phone. Slide the battery into its slot, metallic connectors facing downwards, until it stops. Then lock it by pushing it downwards. Switching on the phone To switch on the phone, long-press the ) key. Enter the PIN code if required.
Philips9@9s.book Page 7 Wednesday, May 31, 2006 7:34 PM When you switch on your mobile phone with your new SIM for the first time, you will be asked to customize your phone. This function will help you to set the following parameters: Summer time Set time Set date Melody for incoming calls Wallpaper Address Book Charging the battery Your phone is powered by a rechargeable battery.
Philips9@9s.book Page 8 Wednesday, May 31, 2006 2. Calling Make a call From the idle screen 1. In idle mode, enter the phone number using the keypad. To correct an error, press R
Philips9@9s_02_Calling.fm 1. 2. Page 9 Thursday, June 1, 2006 In idle mode, enter the phone number using the keypad or select a contact in the phonebook. Press ( then L Handsfree. If you are already on the phone, long press ( to switch to handsfree mode and back. Options during a call During a call, press , or L Options to access the following options. 9:32 AM To record a conversation during a call, select Record dialogue and press ,.
Philips9@9s.book Page 10 Wednesday, May 31, 2006 Quick call To access the Quick call feature, press + when in idle mode. It allows you to set your four most frequently dialled numbers. You can then quickly call one of them by selecting the corresponding icon or picture on the screen. This feature is also available from the main menu, in Settings > Shortcuts > Quick call. Setting a Quick call contact 1. 2. In idle mode, press + to access the Quick call screen.
Philips9@9s.book Page 11 Wednesday, May 31, 2006 7:34 PM Answering a second call When you receive a second call while being already in communication, the phone emits a beep alert and the screen displays Call waiting. You can then: Press , To answer the call (the first one is put on hold). Press ) To reject the call. Press , or L Options To open the options list. You can select End call to end the current call, then answer the incoming call.
Philips9@9s.book Page 12 Wednesday, May 31, 2006 3. Text Entry Text can be entered in editing screens in two different ways: by using T9® Predictive Text Input or basic text input. The techniques for using these two methods are discussed below. T9® text input 7:34 PM > 1 , Press any of the three keys to insert the selected word followed by a space. L Short press to backspace, long press to clear all text. 0 To shift letter case: Standard, lower or UPPERCASE letters.
Philips9@9s.book Page 13 Wednesday, May 31, 2006 7:34 PM Press R Spell to open a basic text editing screen. Enter the new word without spaces using the methods described below and press L OK when done. You are then returned to the message you were composing and the new word is inserted. Language You can switch input language while writing a message by long-pressing the # key. The available languages will depend on where you purchased your mobile phone.
Philips9@9s.book Page 14 Wednesday, May 31, 2006 4. Extras This menu contains features and options designed to help you keep you organised and informed while on the move. Calculator Your phone has a built-in calculator that you can use to perform basic calculations. Numbers are entered with the keypad and operators with the navigation keys as indicated in the table below: Addition Press > or the * key. Subtraction Press < or the * key twice. Multiplication Press + or the * key 3 times.
Philips9@9s.book Page 15 Wednesday, May 31, 2006 7:34 PM The reminder only applies to Meeting and To Do events. It will be updated when changing time zones (see “World clock” below). Changing a repeating event modifies all instances of this event. Deleting old events Events stored in your organiser can be displayed in Day view, Week view and Month view. Select a view format and press ,, then use < or > to display the previous or next day, week or month. This menu allows you to delete past events.
Philips9@9s.book Page 16 Wednesday, May 31, 2006 World clock Activate this option if you want to display both the local time and the time of another time zone on the idle screen. Press + or - to set the option On or Off. When On, you can display the zone of your choice via the menu Switch local / foreign. This feature is not available when the option No clock is selected in “Set date” on page 42. Switch local / foreign To display local to foreign zone and vice-versa.
Philips9@9s.book Page 17 Wednesday, May 31, 2006 7:34 PM Alarm clock Our mobile phone has a built-in alarm clock with a snooze feature. You can set up to three separate alarms and choose whether or not the alarm should repeat. To set an alarm, follow the steps below: 1. Select an alarm and set it On. 2. Then enter the time and press ,. 3. Then select the frequency: Once, daily, On weekdays. 4. Finally, select the type of alarm: the Buzzer or a melody from the sounds album and press ,.
Philips9@9s.book Page 18 Wednesday, May 31, 2006 7:34 PM • the infrared ports are facing each other, • they are at a less than 50 cm away from each other. • nothing obstructs the infrared beam. Sending data To send data via infrared from your mobile phone, you must first select the item to be sent: when selecting a picture, a sound, a name or an event, a sub-menu then gives you access to the Send via infrared option.
Philips9@9s.book Page 19 Wednesday, May 31, 2006 7:34 PM 5. Media Album Memory status This menu allows you to display the percentage of memory available in your phone. Various features share the memory capacity: pictures, sounds, recorded memos and voice tags for voice commands, stored messages, phonebook and organiser entries, games, etc. Press , to check the memory status. The display shows you the percentage of memory free and the phone’s total memory in Kilobytes (Kb).
Philips9@9s.book Page 20 Wednesday, May 31, 2006 As ringtone To set the selected sound as ringer. As SMS/MMS ringer To set the selected sound as the Messages ringer. This option must be activated in the menu Settings > Sounds (see page 46). Rename To Rename the selected sound file. Delete / Delete all To Delete the selected sound file or all files at once. Picture album This menu allows you to display and modify the images stored in your mobile phone. The options are described below.
Philips9@9s.book • Add text Page 21 Wednesday, May 31, 2006 To add text to the selected picture. Enter your text in the editing screen and press ,. Use the navigation keys to move the text on the screen: short press to move the text 1 pixel at a time, long press for 5 pixels. Press R Back to go back to the text editor, or L OK to validate and go to the next option. 7:34 PM View To display the selected file. Properties To display its properties (size, format, resolution, etc.).
Philips9@9s.book Page 22 Wednesday, May 31, 2006 7:34 PM When a picture is selected, press , or L Select to open the rotation options (90° or 180°). Automatic This menu allows you to display the pictures automatically in a slideshow. 1. Select the time value that will be applied between each picture of the slideshow (10, 15 or 20 seconds) and press , or L Select. 2. In the list that appears, select the pictures of your choice by pressing < or >.
Philips9@9s.book Page 23 Wednesday, May 31, 2006 7:34 PM 6. Entertainment Western Horoscope, Lunar Calendar and Chinese Festival features are available only in the Chinese language menu (see page 23). Your phone may or may not have the Chinese Language menu depending on where the phone was purchased. Countdown 1. 2. 3. When you enter Countdown menu, the screen countdown with a start time as 00:00:0. Enter the Countdown menu and enter the countdown time in HH:MM:SS format.
Philips9@9s.book Page 24 Wednesday, May 31, 2006 7:34 PM Auto launch Network Network access This menu gives you access to operator-specific settings, including DNS and proxy addresses. When available, all items of this menu are pre-configured, so that you shouldn’t have to change them. Bearer Java applications Allows you to set the automatic launch of Java On or Off. When On, a Java application will be automatically launched immediately following installation.
Philips9@9s_06_Entertainment.fm Page 25 Thursday, June 1, 2006 6:23 PM Stopwatch When you enter Stopwatch menu, the screen will display Stopwatch with a start time as 00:00:0. Press L Start or , to start the Stopwatch timer. The soft keys will become Start/Stop and Reset. Press R Reset to reset the Stopwatch. Then R Back to exit.
Philips9@9s.book Page 26 Wednesday, May 31, 2006 7. Op. Services This menu contains the services and features provided by your operator. Consequently, the menus described below may vary or may not be available, depending on your subscription. Contact your network operator for more details. The services provided may involve making a phone call or sending a SMS for which you may be charged. Op. Services + This menu option is reserved for operatorspecific services.
Philips9@9s.book Page 27 Wednesday, May 31, 2006 7:34 PM Bookmarks This menu allows you to store your favourite WAP site addresses, rename them and access them quickly from the list. Press L Options while browsing, then select Bookmarks: the name and URL fields will be automatically filled in with the information of the page you are browsing. Select Add bookmark and start entering the new name for the edit screen to appear. Press , , then proceed the same way to enter the URL address.
Philips9@9s.book Page 28 Wednesday, May 31, 2006 7:34 PM • Bearer allows you to select the type of network used by the selected profile when launching a connection (see page 42). • Proxy address and Proxy port allow you to define a gateway address and port number to be used when launching a WAP connection using the selected profile. • Security: to display the list of installed security Certificates (then display its details or delete it), the Session info or the Current certificate.
Philips9@9s.book Page 29 Wednesday, May 31, 2006 7:34 PM 8. Messages Settings My dictionary This feature allows you to enrich the T9 dictionary used for writing messages. For detailed information on entering with T9, please see “T9® text input” on page 12). Select to create and store a new word, or to erase the content of the dictionary at once. Delivery report When On, this option will inform you via SMS whether your own SMS was received or not.
Philips9@9s.book Page 30 Wednesday, May 31, 2006 MMS This menu allows you to Activate, Modify or Rename one of the available MMS profiles. Your mobile phone may have been pre-configured. To change the settings, choose an MMS profile in the list and select Modify to access the settings described below. Application settings Retrieval mode Allows you to choose from: • Manual: you connect manually to the server by selecting a notification in the Inbox, selecting Read to download, then Play.
Philips9@9s.book Page 31 Wednesday, May 31, 2006 7:34 PM Network settings Network access To choose a connection profile from the ones you have set (see “Access settings” on page 48). Bearer To select the type of network used when launching a connection: GSM, GPRS or GPRS first. MMS center To enter the MMS address of the server you will connect to. Gateway address Gateway port To enter the IP and Port numbers of the server’s gateway.
Philips9@9s.book Page 32 Wednesday, May 31, 2006 GPRS settings If using GSM is like a dial-up internet connection, a GPRS connection would be the equivalent of broadband. GPRS (or Global Packet Radio Service) is a protocol for sending data rapidly using a radio signal. To configure a GPRS connection, you may need to provide a a user name and password, although some GPRS connections function without them. You will need to provide the APN (or Access Point Name).
Philips9@9s.book Page 33 Wednesday, May 31, 2006 7:34 PM Advanced Topics POP3 Port The port number on the POP3 server. This is usually port 110. SMTP port The port number on the SMTP server. This is usually port 25. DNS address The IP address of your Domain Name Server. SMTP authent. SMTP authentication is usually set to Off. Contact your provider for more information.
Philips9@9s.book Page 34 Wednesday, May 31, 2006 If you exit the Create message > New Email menu before sending your e-mail or if you cancel the sending while it takes place, the e-mail content is deleted without being stored. Add contacts Create email 34 To select the recipient(s) of your e-mail, provided that you have entered e-mail addresses for contacts saved in your phone phonebook (see “Address Book” on page 57).
Philips9@9s.book Page 35 Wednesday, May 31, 2006 7:34 PM an image, only the image will be taken into account and vice-versa. Once you have selected one of the above options press , and you could send to the contact you have selected or add recipient. Pictures are chosen from the Picture album. Copyright protected pictures cannot be sent via MMS. Sounds can be chosen from the Sound Album melodies.
Philips9@9s.book Save as template Page 36 Wednesday, May 31, 2006 To save your message as a template, that you can use as a basis for other MMS (e.g. "Happy birthday" type of message. Preview MMS To preview the slide show you have created. Slide duration To change the value of slide duration set in Settings > Application settings, and to set a delay between each slide. Once your message is completed, select Send now and press ,.
Philips9@9s.book Page 37 Wednesday, May 31, 2006 7:34 PM The text of the e-mail itself can be viewed as an attachment, press , to read it (no advanced options in this case). A text file (text only, ".txt" format) is attached to the e-mail, press , to read it (no advanced options in this case). The application needed to manage this attachment isn’t available in your phone, or the e-mail is too large to be uploaded. The optimal image size is 128 x 160 pixels (the dimensions of the screen).
Philips9@9s.book Page 38 Wednesday, May 31, 2006 Reply To reply to the sender (whose address will be automatically added to the list). Proceed as described in “Inbox” on page 36. Forward To forward the downloaded e-mail to someone else. Proceed as described in “Inbox” on page 36. SMS This menu allows you to read SMS messages you have received. The messages are displayed in a list. At the end of the list, the item allows you to delete all the messages at once.
Philips9@9s.book Page 39 Wednesday, May 31, 2006 Store melody To save the melody that was sent with the SMS. This menu is only visible if there is a melody to extract. Store graphic To save the graphic and/or animation that was sent together with the SMS. This menu is only visible if there is an image to extract. SMS Inbox Sorting 7:34 PM SMS messages that have been read are automatically moved to the phone memory and sorted by time and date.
Philips9@9s.book Next / previous slide Save picture Page 40 Wednesday, May 31, 2006 To move to the next or previous slide. You can also press < or > when viewing the MMS in manual mode. Note that this option only appears if the MMS contains more than one slide. To detach the picture of the current slide and save it in the Picture album. Save sound To detach the sound of the current slide (if a sound is attached) and save it in the Sound album.
Philips9@9s.book Page 41 Wednesday, May 31, 2006 7:34 PM messages listed in this folder, or Edit the selected message to send it to someone else. At the end of the list, the items you to delete all the messages at once. Deleting old messages is useful to free memory space in order to receive new messages.
Philips9@9s.book Page 42 Wednesday, May 31, 2006 9. Settings This menu allows you to change the settings related to each available option (sounds, time and date, security, etc.) and to customise your phone. Time and date Set time Allows you to set the time using the keypad or with the navigation keys. You should select your Time zone and activate Daylight saving (if appropriate) before setting the time. Set date Allows you to set the date by pressing the appropriate numeric keys or the navigation keys.
Philips9@9s.book Page 43 Wednesday, May 31, 2006 7:34 PM When you switch on the power of the phone or open the clamshell, the keypad backlight is on, and the screen is powered at the maximum level. You can activate or de-activate the light sensor. Backlight Allows you to choose from different backlight durations. External LED The handset has an external LED, you can activate or de-activate it.When on, by default the light will blink, it will indicate that the phone is on.
Philips9@9s.book Page 44 Wednesday, May 31, 2006 Public names Allows you to consult, edit and modify your Public Names list via a PIN2 code. Call restriction Allows you to restrict the calls to the Public names list when Public only is selected. This feature is subscription dependent and requires a PIN2 code (see page 47). This option might also apply to WAP and e-mail connections over GPRS.
Philips9@9s.book Page 45 Wednesday, May 31, 2006 7:34 PM Blacklist This menu displays the list of contacts whose calls and SMS will be rejected. Select to add a name and the corresponding number to the list, then choose whether you want to reject SMS and/or Calls coming from this person. Select a name in the list and press , or L Select to Change the related information or Delete it. Select Details to display the blacklist details. You can also associate a hotkey with a profile (e.g.
Philips9@9s.book Car, Outdoors Meeting Silence 46 Page 46 Wednesday, May 31, 2006 7:34 PM Sounds Vibra alert Personal setting Ringtone High Backlight When this mode is On, all alerts are deactivated and the vibra alert is active. 10 sec The Silent mode also applies to key tones.
Philips9@9s.book Page 47 Wednesday, May 31, 2006 7:34 PM You cannot receive any MP3 ringers from other handsets. Messages ringer Allows you to set On or Off an alert for each time you receive a new message. When On, you can select the alert of your choice from the ringers list. Vibra alert Allows you to set the vibra alert On or Off when receiving a call, when an event set in the organiser is due, when you receive a message and when the alarm rings.
Philips9@9s.book Page 48 Wednesday, May 31, 2006 Backlight 7:34 PM Backlight is activated when receiving incoming calls or messages, browsing menus, etc. Select one of the available values. might be locked, preventing re-programming and renaming. Select an item in the list and press , to access the following options: Network Change name To rename the selected profile. Contact your phone operator to have full information about GPRS availability over its network and for an appropriate subscription.
Philips9@9s.book Page 49 Wednesday, May 31, 2006 7:34 PM GPRS connect This menu allows you to define how your mobile phone connects to the GPRS service. Always on For data calls Your phone automatically connects to the GPRS service (if available). This option allows quicker access to GPRS features, but increases energy consumption. Your phone will connect to the GPRS service only when required. This option reduces energy consumption, but increases the connection delay.
Philips9@9s.book Page 50 Wednesday, May 31, 2006 Voice command Allows you to set up a direct access to a specific function by linking it to a voice tag. You can associate a voice command to most functions supported by the hotkeys. Select , then browse the list to select a function and press , or L Select. 2. When Press , and speak appears, record your voice tag. Make sure you are in a quiet environment, choose a short and simple word and clearly pronounce it. 3.
Philips9@9s.book Page 51 Wednesday, May 31, 2006 7:34 PM Language This menu allows you to select a language for all menu texts. Use + or -to browse the list and select a language by pressing , or L Select.
Philips9@9s.book Page 52 Wednesday, May 31, 2006 10. Camera Your mobile phone features a built-in digital camera. You can take pictures, store them in your phone or transfer them to your PC via Infrared, use them as wallpaper or send them to your friends via MMS or Email. This chapter describes in detail how to use the camera. How to... This section describes how to perform the most common operations with your camera. 7:34 PM The table below details the operations of the various keys in camera mode.
Philips9@9s.book Store Page 53 Wednesday, May 31, 2006 7:34 PM To save the picture in your personal photos folder using the default numbering (you can then rename it from the folder itself ). Using the self-timer 1. 2. In Camera mode, press 0. Adjust your picture, and press , to start the countdown of 10 seconds (this value cannot be changed). Send by... To send the picture by MMS, E-mail or Infrared. Modify To save the picture and modify it (see “Picture album” on page 20). 3.
Philips9@9s.book Page 54 Wednesday, May 31, 2006 Camera menu 7:34 PM Properties Choosing this option displays the following properties of the selected image: Name, Size (in Kb), Resolution and Format. Rotate This option allows you to rotate an image; The options are: - 90 degrees, + 90 degrees, + 180 degrees. Changes are automatically applied. Rename Use this option to rename an image file. Delete / Delete all Use this option to delete some or all the files in your My photos folder.
Philips9@9s.book Page 55 Wednesday, May 31, 2006 7:34 PM When the camera is finished processing the images, they are displayed on screen as thumbnails. You may then press L Options to access the options described below. Save To save the selected image. Save all To save all the images in the group. Send by... To send the selected image by MMS, Email, or Infrared. Delete To delete the selected image. Delete all To delete all the images in the group.
Philips9@9s.book Page 56 Wednesday, May 31, 2006 Picture quality This menu allows you to adjust the quality of the pictures taken with your camera: Low, Medium, High. The lower the quality, the smaller will be the resulting image files, thereby allowing you to store more photos on your mobile phone. Default settings To reset all camera settings to their default values. A warning message appears: Do you really want to reset all parameters? Choose Yes or No.
Philips9@9s.book Page 57 Wednesday, May 31, 2006 7:34 PM 11. Address Book Contacts are stored in one of the two available phonebooks: in your SIM card (number of entries depending on capacity) or in your phone (up to 999 names). When entering new names, they will only be added to the phonebook you have selected. Copy to phone This option will copy the content of your SIM card into your phone.
Philips9@9s.book Page 58 Wednesday, May 31, 2006 The number of the selected contact will appear in a highlighted line, at the bottom of the screen. To search for a given name: 1 to 9 and # # or Press the key for the letter that you want to go to in the list (e.g. press 0 twice to access the letter “U”). The first record starting with this letter is selected in the list.
Philips9@9s.book Copy to SIM card Page 59 Wednesday, May 31, 2006 7:34 PM To copy a contact of your phone phonebook into the SIM phonebook (it is then always updated when switching phonebooks or when using another phone). Voice dial To set a voice tag that will call the contact when pronounced (see page 50). Make default The first number you enter becomes the default number which is automatically dialled when pressing ,. This option allows you to set another default number.
Philips9@9s.book 3. Page 60 Wednesday, May 31, 2006 Enter the relevant number, then select the type of number allocated to the name (Phone, Fax or Data) and press , to store this name in your phonebook. A number is limited to 40 digits, depending on your SIM card. Entering international prefix, country and area codes allows you to dial a number from any location. In the phone phonebook 1. 2. 3. 4. 5. 60 Select Add a contact in the list, then press L Select or ,.
Philips9@9s.book Page 61 Wednesday, May 31, 2006 7:34 PM 12. Call Info The menus described in this section are used for managing how your mobile phone handles calls and their related costs. Call times This menu allows you to track the cost and duration of your calls. Most options mentioned below are subscription dependent. Data counters The GPRS counter allows you to monitor the amount of data received via GPRS sessions. This feature is subscription and network dependent.
Philips9@9s.book Total cost Page 62 Wednesday, May 31, 2006 To display the accumulated cost and to set the counter to zero (may be protected by PIN/PIN2 codes). • Show how much has been spent based on the Charge rate. • Reset the current total cost. • Show balance to check the remaining credit (based on the Cost limit). • Cost limit off • Cost limit to enter the cost limit used in the Show balance menu. • Charge rate to set the rate per unit.
Philips9@9s.book Page 63 Wednesday, May 31, 2006 Unconditional Will divert all the incoming calls. If you select this option, you will not receive any calls until you deactivate it. Conditional Allows you to choose when you want to divert incoming calls: If no reply, If not reachable or If busy. Each option can be set independently. Status Will display the status of all call forwarding. 7:34 PM Before activating this option, you must enter your voice mailbox number (see next section).
Philips9@9s_Icons&Symbols.fm Page 64 Thursday, June 1, 2006 Icons & symbols In idle mode, several symbols can be displayed simultaneously on the main screen. If the network symbol isn’t displayed, the network is not currently available. You may be in a bad reception area, moving to a different location may help. Silent - Your phone will not ring when receiving a call. Vibra - Your phone will vibrate when receiving a call. 9:34 AM SMS full - Memory for messages is full.
Philips9@9s.book Page 65 Wednesday, May 31, 2006 7:34 PM Precautions Radio Waves Your cellular mobile phone is a low power radio transmitter and receiver. When it is operating, it sends and receives radio waves. The radio waves carry your voice or data signal to a base station that is connected to the telephone network. The network controls the power at which the phone transmits. • Your phone transmits/receives radio waves in the GSM frequency (900 / 1800 /1900 MHz).
Philips9@9s.book Page 66 Wednesday, May 31, 2006 the GSM technology, has been reviewed and safety standards have been drawn up to ensure protection from exposure to radio wave energy. Your cellular telephone complies with all applicable safety standards and the Radio Equipment and Telecommunications Terminal Equipment Directive 1999/5/EC. Always switch off your phone... Inadequately protected or sensitive electronic equipment may be affected by radio energy. This interference can lead to accidents.
Philips9@9s.book Page 67 Wednesday, May 31, 2006 7:34 PM transmit updated location information to the network. Setting the backlight for a shorter period of time as well as avoiding unnecessary navigating in the menus will also help to save the battery’s energy for longer phoning and stand-by performances. whether your particular device is susceptible to cellular phone interference.
Philips9@9s.book Page 68 Wednesday, May 31, 2006 7:34 PM Your mobile phone and your car Environmental care Studies have shown that speaking on the telephone while driving lowers your concentration, which can be dangerous. Adhere to the following guidelines: • Give your full attention to driving. Pull off the road and park before using the phone. • Respect the local regulations in countries where you drive and use your GSM phone.
Philips9@9s.book Page 69 Wednesday, May 31, 2006 7:34 PM Troubleshooting The phone does not switch on Remove/reinstall the battery. Then charge the phone until the battery icon stops scrolling. Unplug from charger and try to switch the mobile on. The display shows BLOCKED when you switch on Somebody tried to use your phone but didn’t know the PIN code nor the unblocking code (PUK). Contact your service provider.
Philips9@9s.book Page 70 Wednesday, May 31, 2006 You can’t receive and/or store pictures A picture may not be accepted by your mobile phone if it is too large, if its name is too long, or if it doesn’t have the correct file format. You have the feeling that you miss some calls Check your call divert options. During battery charge, the battery icon shows no bar and the outline is flashing Only charge the battery in an environment where the temperature does not go below 0°C (32°F) or above 50°C (113°F).
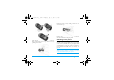
Philips9@9s.book Page 71 Wednesday, May 31, 2006 7:34 PM By-packed Accessories Some accessories, such as a battery and a charger, are included as standard in the package of your mobile phone. Additional accessories may also be provided or sold separately. Package contents may therefore vary. To maximise the performance of your Philips mobile phone and not to void the warranty, always purchase Philips Authentic Accessories that are specially designed for use with your phone.
Philips9@9s.book Page 72 Wednesday, May 31, 2006 Trademark Declaration JAVA is a trademark of Sun Microsystems, Inc. Tegic Euro. Pat. App. 0842463 72 T9 ® is a trademark of Tegic Communications Inc.
Philips9@9s.book Page 73 Wednesday, May 31, 2006 7:34 PM Limited warranty 1. Workmanship During The Limited Warranty Period? What Does This Limited Warranty Cover? During the limited warranty period, Philips or its authorized service representative will, at its option either repair or replace, without charge for parts or labour, a materially defective Product with new or refurbished parts or Product and return such repaired or replaced Product to the Consumer in working condition.
Philips9@9s.
Philips9@9s.book Page 75 Wednesday, May 31, 2006 7:34 PM ANY WARRANTY OF SATISFACTORY QUALITY MERCHANTABILITY OR FITNESS FOR A PARTICULAR PURPOSE. PHILIPS’ TOTAL LIABILITY FOR DAMAGES RELATING TO OR ARISING OUT OF THE PURCHASE OR USE OF THE PRODUCT, REGARDLESS OF THE TYPE OR CAUSE OF SUCH DAMAGE OR THE FORM OR CHARACTERISATION OF THE CLAIM ASSERTED (E.G. CONTRACT OR TOPIT), SHALL NOT EXCEED THE ORIGINAL PURCHASE PRICE PAID FOR THE PRODUCT.