INSTRUCTION MANUAL MANUAL DE INSTRUCCIONES Model Numbers / Nos. de Modelos: GR2011CW GR2012CB GR2013CSS GAS RANGE COCINA DE GAS BEFORE USE, PLEASE READ AND FOLLOW ALL SAFETY RULES AND OPERATING INSTRUCTIONS. AND SAVE FOR LOCAL GAS AND ELECTRICAL INSPECTOR’S USE. La sección en español empieza en la página 27 Avanti Products has a policy of continuous improvement on its products and reserves the right to change materials and specifications without notice. Avanti Products LLC P.O.
TABLE OF CONTENTS Range Safety 3 Important Safe guides 4 The Anti-tip Bracket 5 Help Us Help You … 6 Parts and Features 7-8 Before Using Your Gas Range 9 - 10 Important Precautions and Recommendations 11 - 13 How to use the top burners 14 - 15 How to use the Gas oven 15 - 19 Oven light 19 Care and Maintenance 20 - 23 Troubleshooting Guide 24 - 25 Wiring Diagram 25 Service for Your Appliance 25 Your Avanti Products Warranty 26 Instrucciones en Español 27 - 48 Registration Info
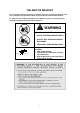
RANGE SAFETY Your safety and the safety of others are very important. We have provided many important safety messages in this manual and on your appliance. Always read and obey all safety messages. This is the Safety Alert Symbol. This symbol alerts you to potential hazards that can kill or injure you and others. All safety messages will follow the Safety Alert Symbol and either the words “DANGER”, “WARNING” or “CAUTION”.
IMPORTANT SAFE GUIDES Before the appliance is used, it must be properly positioned and installed as described in this manual, so read the manual carefully. To reduce the risk of fire, electrical shock or injury when using the appliance, follow basic precaution, including the following: • • • • • • It is recommended that a separate circuit, serving only your appliance be provided. Use receptacles that cannot be turned off by a switch or pull chain. Never clean appliance parts with flammable fluids.
THE ANTI-TIP BRACKET The range will not tip during normal use. However, the range can tip if you apply too much force or weight to the open door without the anti-tip bracket fastened down properly. To reduce the risk of tipping the appliance, the appliance must be secured by properly installed anti-tip devices packed with the appliance.
HELP US HELP YOU... Read this guide carefully. Write down the model and serial numbers. It is intended to help you operate and maintain your new Gas Range properly. You'll find them on a plate located on the front bottom wall of the Gas Range. Keep it handy to answer your questions.
PARTS & FEATURES 2 1 11 3 12 4 5 6 7 8 9 16 13 10 15 14 7 1 Backsplash 2 Oven Vent 3 Sealed Burners (Total 4) 4 Control Panel 5 Oven Door Handle 6 Oven Door 7 Drawer Handle 8 Drawer 9 Leveling Legs (Total 4) 10 Anti-tip Bracket 11 Cooktop 12 Pan Supports (Total 2) 13 Inlet Pipe 14 Regulator 15 Power Cord 16 Back Plate
COOKTOP 1. Auxiliary burner (AUX) - 2800 BTU/hr 2. Right semi-rapid burner (SR) - 4600 BTU/hr 3. Left semi-rapid burner (SR) - 4600 BTU/hr 4. Rapid burner (R) – 8800 BTU/hr Note: -The electric gas-lighting device is incorporated into the knobs. CAUTION: If the burner is accidentally extinguished, turn the gas off at the control knob and wait at least 1 minute before attempting to relight. CAUTION: Gas appliances produce heat and humidity in the environment in which they are installed.
BEFORE USING YOUR GAS RANGE WARNING!! HAVE THIS RANGE INSTALLED BY A QUALIFIED INSTALLER. Improper installation, adjustment, alteration, services, or maintenance can cause injury or property damage. Consult a qualified installer, service agency, or the gas supplier. Before Using Your Gas Range √Remove the exterior and interior packing.
Important: This appliance is designed and manufactured solely for the cooking of domestic (household) food and is not suitable for any non domestic application and therefore CANNOT be used in a commercial environment. The appliance guarantee will be void if the appliance is used within a non domestic environment i.e. a semi commercial, commercial or communal environment. Read the instructions carefully before installing and using the appliance.
IMPORTANT PRECAUTIONS AND RECOMMENDATIONS √ After having unpacked the appliance, check to ensure that it is not damaged and that the oven door closes correctly. In case of doubt, do not use it and consult your supplier or a professionally qualified technician. √ Packing elements (i.e. plastic bags, polystyrene foam, nails, packing straps, etc.) should not be left around within easy reach of children, as these may cause serious injuries.
IMPORTANT PRECAUTIONS AND RECOMMENDATIONS FOR USE OF ELECTRICAL APPLIANCES Use of any electrical appliance implies the necessity to follow a series of fundamental rules. In particular: ✓ Never touch the appliance with wet hands or feet; ✓ Do not operate the appliance barefooted; ✓ Do not allow children or disabled people to use the appliance without your supervision.
WARNING!! ELECTRICAL GROUNDING INSTRUCTIONS FOR PERSONAL SAFETY, THIS APPLIANCE MUST BE PROPERLY GROUNDED. This appliance is equipped with a three-prong grounding plug for your protection against shock hazard and should be plugged directly into a properly grounded socket. Do not cut or remove the grounding prong from the plug. • The gas range must be installed with all electrical connections in accordance with state and local codes.
HOW TO USE THE TOP BURNERS GAS BURNERS Gas flow to the burners is adjusted by turning the knobs which control the valves. Turning the knob so that the indicator line points to the symbols printed on the panel achieves the following functions: When knob is rotated to the maximum position it will permit the rapid boiling of liquids, whereas the minimum position allows the simmer warming of food or maintaining boiling conditions of liquids.
CHOICE OF BURNER DIAMETERS OF PANS WHICH MAY BE USED ON THE TOP BURNERS BURNER MINIMUM MAXIMUM Auxiliary 4" 23/32 (12 cm) 5" 1/2 (14 cm) Semirapid 6" 19/64 (16 cm) 9" 7/16 (24 cm) Rapid 9" 7/16 (24 cm) 10" 15/64 (26 cm) Do not use pans with concave or convex bases The symbols printed on the panel above the gas knobs indicate the correspondence between the knob and the burner.
OVEN BURNER Carries out normal “oven cooking”. The gas flow to the burner is regulated by a thermostat which allows to maintain the desired oven temperature. The control of the temperature is assured by a thermostatic probe positioned inside the oven. The probe must be always kept in its housing, in a clean condition, as an incorrect position or a dirty probe may cause an alteration in the control of the temperature.
IGNITION OF THE OVEN BURNER The thermostat allows the automatic control of the temperature. The gas delivery to the oven burner is controlled by a two way thermostatic tap (oven and broil burners) with flame-failure device. To light the oven burner operate as follows: 1) Open the oven door to its full extent. WARNING: Risk of explosion! The oven door must be open during this operation.
OVEN COOKING Before introducing the food, preheat the oven to the desired temperature For a correct preheating operation, it is advisable to remove the tray from the oven and introduce it together with the food, when the oven has reached the desired temperature. Check the cooking time and turn off the oven 5 minutes before the theoretical time to recuperate the stored heat. IGNITION OF THE BROIL BURNER The broil burner generates the infra-red rays for broiling.
OVEN LIGHT The range is equipped with a light that illuminates the oven to enable visually controlling the food that is cooking. This light is controlled by a knob on the control panel. BROILING Very important: the broil burner must always be used with the oven door closed. Position the oven rack on the second level from the top -Turn on the broil burner, as explained in the preceding paragraphs and let the broil burner preheat for about 5 minutes with the door closed.
CARE & MAINTENANCE GENERAL RECOMMENDATION Important: Before any operation of cleaning and maintenance disconnect the appliance from the electrical supply. It is advisable to clean when the appliance is cold and especially for cleaning the enameled parts.、 Avoid leaving alkaline or acidic substances (lemon juice, vinegar, etc.) on the surfaces. Avoid using cleaning products with a chlorine or acidic base.
Do not use steam jet cleaners because the humidity could infiltrate into the appliance making it dangerous. BURNERS AND GRIDS ✓ These parts can be removed and cleaned with appropriate products. ✓ After cleaning, the burners and their flame distributors must be well dried and correctly replaced. ✓ It is very important to check that the burner flame distributor and the cap has been correctly positioned - failure to do so can cause serious problems.
REMOVABLE STORAGE DRAWER ① Lift the left small hook upward, at the same time, push the right small hook downward.(see the picture ) ②Pull the drawer out. ③To replace the drawer, align the drawer with the rails and push inward. Do not store flammable material in the oven or in the bottom drawer. REMOVING THE OVEN DOOR To facilitate oven cleaning, it is possible to remove the door.
REPLACING THE OVEN LIGHT • • • • • Let the oven cavity and broil burner cool down. Switch off the electric supply. Remove the protective cover. Unscrew and replace the bulb with a new one suitable for high temperature (200°~ 500°F) having the same specifications: 120V 60Hz, 15W, E14. Replace the protective cover. NOTE: Oven bulb replacement is not covered by your guarantee. LEVELING THE RANGE The range must be level to obtain proper operating.
PROBLEMS WITH YOUR GAS RANGE? You can solve many common appliance problems easily, saving you the cost of a possible service call. Try the suggestions below to see if you can solve the problem before calling the servicer. TROUBLESHOOTING GUIDE FIND YOUR PROBLEM HERE POSSIBLE CAUSE HOW TO FIX IT Surface control has not been completely turned to the ON position. Burner ports are clogged. Surface burners do not light. Burners not positioned properly. Range not set for appropriate gas input.
Range not set for appropriate gas input. Smoke or odor on initial oven operation. This is normal. Poor installation. Range is not level. Weak or unstable floor. Kitchen cabinet misalignment may make range appear to be unleveled. Oven smokes excessively. See range conversion section of installation manual. Meat too close to broiler burner. Meat not prepared properly. Place oven rack in center of oven. Place a level on the rack. Adjust leveling legs.
YOUR AVANTI PRODUCTS WARRANTY WARRANTY – GAS RANGE LENGTH OF WARRANTY FULL ONE YEAR WARRANTY FROM DATE OF PURCHASE ON ALL PARTS EXCEPT GLASS PARTS. IN RENTAL OR COMMERCIAL USE, THE WARRANTY PERIOD IS 90 DAYS. FULL 30-DAY WARRANTY FROM DATE OF PURCHASE ON GLASS PARTS AND FINISH OF PORCELAIN ENAMEL, PAINTED OR BRIGHT METAL FINISHED PARTS WE WILL PAY FOR REPLACEMENT PARTS AND REPAIR LABOR TO CORRECT DEFECTS IN MATERIALS OR WORKMANSHIP. SERVICE MUST BE PROVIDED BY AN AUTHORIZED SERVICE COMPANY.
INSTRUCCIONES EN ESPAÑOL SEGURIDAD DE LA COCINA Su seguridad y la seguridad de otros son muy importantes. Hemos incluido muchos mensajes de seguridad en este manual y también en su artefacto. Siempre lea y siga todos los mensajes de seguridad. Este es el símbolo de Alerta de Seguridad. Este símbolo lo alerta de riesgos potenciales de los que pueden resultar en heridas o muertes.
MEDIDAS DE SEGURIDAD IMPORTANTES Antes de usar su electrodoméstico, debe posicionarlo e instalarlo tal como describimos en este manual, por lo tanto lea el manual cuidadosamente. Para reducir el riesgo de fuego, choque eléctrico o daño cuando use el electrodoméstico, siga estas precauciones básicas, incluyendo las siguientes: • • • • • Se recomienda que use un circuito separado (independiente) para su electrodoméstico. Use receptáculos que no se apaguen con un interruptor o cadena.
• Piezas de repuesto – Solo debe utilizar piezas de reemplazo autorizadas por Avanti para darle mantenimiento a la cocina. Piezas de repuesto están disponibles en los Distribuidores de Fabrica autorizados. Contáctese con el Centro de Servicio de Avanti más cercano a ud. EL ELEMENTO ANTI-VOLTEO La cocina no se voltea durante el uso normal. Sin embargo la cocina se puede voltear si aplica demasiada fuerza o peso a la puerta abierta. Para evitarlo use y asegure el elemento anti-volteo.
PIEZAS Y CARACTERISTICAS 2 1 11 3 12 4 5 1 Panel Anti-salpicaduras 2 Ventilación del horno 3 Hornillas 4 Panel del controles 5 Manija de la puerta del horno Puerta del horno 6 7 9 Manija de la gaveta de almacenamiento Gaveta de almacenamiento Patas niveladoras (4) 10 Elemento Anti-volteo 11 Superficie 12 Rejillas (2) 13 Línea de gas 14 Regulador de presíon de gas Cordón de electricidad 6 8 7 8 9 15 16 16 13 10 15 14 30 Panel trasero de la unidad.
COCINA 1. Hornilla auxiliar (AUX) 2. Hornilla derecha semi-rápida (SR) – 3. Hornilla izquierda semi-rápida (SR) 4. Hornilla Rápida (R) Nota: -El elemento para encender el gas está incorporado a las perillas. PRECAUCION: Si la hornilla se apaga por accidente, gire la perilla apagando el gas. Espere por lo menos un minuto antes de tratar de encenderla otra vez. PRECAUCION: Los electrodomésticos de gas, producen calor y humedad en el ambiente en el cual son instalados.
ANTES DE USAR SU COCINA A GAS ADVERTENCIA!! ASEGURESE QUE ESTA COCINA SEA INSTALADA POR UN TECNICO CALIFICADO. Instalación, ajustes, alteraciones, servicio o mantenimiento inapropiados pueden causar daños personales o a la propiedad. Consulte con un instalador calificado, agencia de servicios o proveedor de gas. Antes de usar su Cocina a gas ✓Retire el empaque exterior e interior. ✓Retire la película protectora que cubre la superficie de acero y de aluminio.
Se aconseja seguir las siguientes instrucciones: ✓ Limpie el interior del horno con un trapito limpio, humedecido con agua y detergente neutral, luego seque cuidadosamente. ✓ Coloque las rejillas y bandeja del horno en su lugar. ✓ Encienda el horno a la temperatura máxima para eliminar cualquier resto de grasa del CALENTADOR del horno. Haga lo mismo con el CALENTADOR de parrilla.
✓Para evitar cualquier posible riesgo, el electrodoméstico solamente debe ser instalado por un técnico calificado. Cualquier reparación hecha por personas no calificadas puede resultar en choque eléctrico o corto circuito. Para evitar cualquier daño posible a su persona o al electrodoméstico, no intente efectuar reparaciones ud mismo. Ese trabajo debe ser llevado a cabo solamente por personal calificado. ✓Peligro de quemaduras! El horno y los accesorios de cocina se calientan mucho durante la operación.
INFORMACION GENERAL ADVERTENCIA!! 1. Este electrodoméstico no se debe usar para calentar la habitación. Esta información está basada en consideración a la seguridad. 2. La pared detrás de este electrodoméstico y el piso bajo este electrodoméstico deben estar sellados y no tener aperturas. 3. Mantenga el área del electrodoméstico limpia y libre de materiales combustibles, gasolina, y otros vapores inflamables. 4. No obstruya el flujo de combustión y ventilación del aire. 5.
PIEZAS DE REEMPLAZO Solo debe utilizar piezas de reemplazo autorizadas por Avanti para darle mantenimiento a la cocina. Piezas de repuesto están disponibles en los Distribuidores de Fabrica autorizados. Contáctese con el Centro de Servicio de Avanti más cercano a ud. : ADVERTENCIA: MONOXIDO DE CARBONO El Monóxido de Carbono es un peligro posible cuando use cualquier electrodoméstico de gas.
COMO USAR LAS HORNILLAS HORNILLAS A GAS El flujo de gas a las hornillas se ajusta al girar las perillas que controlan las válvulas. Girando la perilla para que la línea indicadora apunte a los símbolos marcados en el panel logra las siguientes funciones: La posición de rotación máxima permite que los líquidos hiervan rápido, mientras que la posición mínima permite cocer a fuego lento. Para reducir el flujo de gas al mínimo, gire la perilla en sentido contra horario para señalar la posición LO.
Los símbolos marcados en el panel arriba de las presillas indica la correspondencia entre la perilla y la hornilla La hornilla más apropiada se debe elegir de acuerdo al diámetro y capacidad volumétrica del recipiente que se va a usar. Es muy importante que el diámetro de las ollas o sartenes coincida con el de la hornilla para asegurar el funcionamiento eficiente sin tener que desperdiciar gas.
CALENTADOR DEL HORNO Permite cocción normal del horno. El flujo de gas al CALENTADOR se regula con un termostato que permite que la temperatura del horno se mantenga constante. El control de la temperatura se asegura con un termostato localizado en el interior del horno. El termostato se debe mantener dentro de su cubierta y limpio ya que, estando en la posición incorrecta o acumulando suciedad, podrían alterar el control de temperatura.
ENCENDIDO DEL CALENTADOR DEL HORNO El termostato permite el control automático de la temperatura. El suministro de gas al calentador del horno se controla con una llave termostática de dos lados (calentador del horno y de la parrilla) con un elemento de llama-falla. Para encender el calentador del horno siga estos pasos: 1) Abra la puerta del horno completamente. ADVERTENCIA: Riesgo de explosión! La puerta del horno deber estar abierta durante esta operación.
COCINANDO EN EL HORNO Antes de introducir los alimentos, precaliente el horno a la temperatura deseada. Para una operación de precalentamiento, se recomienda retirar la bandeja del horno e introducirla al mismo tiempo con los alimentos cuando el horno haya llegado a la temperatura deseada. Verifique el tiempo de cocción y apague el horno 5 minutos antes que se termine el tiempo de cocción para recuperar el calor generado.
LUZ DEL HORNO La cocina está equipada con una luz que ilumina el horno la cual permite control visual para los alimentos que está cocinando. Esta luz se controla con un botón de presión en el panel de control. USANDO LA PARRILLA (BROILING) Muy importante: el calentador de la parrilla se debe usar siempre con la puerta del horno cerrada. Posicione la rejilla en el segundo nivel de arriba hacia abajo.
ADVERTENCIA!! ADVERTENCIA-NOTA MUY IMPORTANTE Nunca obstruya las aperturas de ventilación del panel anti-salpicaduras. No use la parrilla sin la bandeja de cocción. Importante: Siempre use guantes protectores apropiados cuando inserte o remueva la bandeja de parrilla, rejillas, ollas, cacerolas u otros utensilios de cocina en el horno. Atención: la cocina se calienta mucho durante la operación. Atención: la puerta del horno se calienta mucho durante la operación. Mantenga los niños fuera de alcance.
CUIDADO Y MANTENIMIENTO RECOMENDACIONES GENERALES Receptáculo polarizado de 3 puntas conectado a tierra. ADVERTENCIA: Riesgo de choque eléctrico Enchufe a un receptáculo de 3 puntas conectado a tierra. No remueva la tercera punta del enchufe. No use un adaptador. Fuego, choque eléctrico o muerte pueden resultar de no seguir estas instrucciones. Importante: Antes de cualquier operación de limpieza y mantenimiento desconecte el electrodoméstico de la corriente eléctrica.
DENTRO DEL HORNO Esto se debe limpiar regularmente, Con el horno tibio, limpie las paredes internas con un trapito mojado en agua jabonosa muy caliente u otro producto similar. VALVULAS DE GAS En el caso que haya fallas en las válvulas de gas, llame al Departamento de Servicio. NOTA: El bombillo del horno no está cubierto por la garantía. No use limpiadores de vapor de alta presión porque la humedad se puede infiltrar dentro del electrodoméstico volviéndolo peligroso.
En electrodomésticos con encendido eléctrico, verifique que el electrodo “S” esté siempre limpio para asegurar producción de chispas sin problemas. El enchufe de encendido debe ser limpiado cuidadosamente. INSTALACION Y RETIRO DE LA REJILLA DEL HORNO Figura 22 Las rejillas del horno vienen con un bloqueo de seguridad para evitar que se saquen del horno por accidente. Para sacarlas hálela hacia fuera y arriba. Asegúrese de insertarlas correctamente.
SACANDO LA PUERTA DEL HORNO – Para facilitar la limpieza del horno se puede remover la puerta. Por favor siga estas instrucciones cuidadosamente: – La puerta del horno se puede sacar muy fácilmente siguiendo estas instrucciones: – Abra la puerta completamente. (Figura 1) – Levante los ganchos de ambos lados de las bisagras. (Figura 2) – Mantenga la puerta tal como se indica en la Figura. – Suavemente cierre la puerta y levántela con las dos manos cuando los ganchos toquen la puerta.
INSTALACION DEL ELEMENTO ANTI-VOLTEO Para reducir el riesgo que la cocina se voltee debido a uso indebido de esta o de la puerta del horno, la cocina debe ser asegurada a su sitio instalando correctamente el elemento anti-volteo empacado con el electrodoméstico. • Coloque el elemento anti-volteo en el piso tal como se muestra en la figura. El elemento antivolteo se puede instalar en el lado izquierdo o derecho. • Marque en el piso el lugar donde van los dos orificios del elemento anti-volteo.
Registration Information Thank you for purchasing this fine Avanti product. Please fill out this form and return it to the following address within 100 days from the date of purchase and receive these important benefits: Avanti Products, LLC. P.O.Box 520604 – Miami, Florida 33152 Protect your product: We will keep the model number and date of purchase of your new Avanti product on file to help you refer to this information in the event of an insurance claim such as fire or theft.
PRINTED IN CHINA GR2011CW - 07232013 50