MICROWAVE OVEN INSTRUCTION MANUAL MANUAL DE INSTRUCCIONES Model / Modelo: MO1250TW BEFORE USE, PLEASE READ AND FOLLOW ALL SAFETY RULES AND OPERATING INSTRUCTIONS. La sección en español empieza en la página 19. Avanti has a policy of continuous improvement on its products and reserves the right to change materials and specifications without notice. Avanti Products, A Division of The Mackle Co., Inc. P.O. Box 520604 - Miami, Florida 33152 www.avantiproducts.
TABLE OF CONTENTS Help Us Help You 3 Parts and Features 4 Important Safety Instructions 5 Installation Instructions 6 Before Using Your Microwave Oven 6 Installation of Your Microwave Oven 6 Safety Precautions 6–7 Electrical Connection 8 Operating Your Microwave Oven 8 Control Panel 9 Operation Procedure 10 – 15 Cooking Techniques 16 Care and Maintenance 16 Cleaning Your Microwave Oven 16 Problems with Your Microwave Oven? 17 Troubleshooting Guide 17 Service for Your Microwav
HELP US HELP YOU… Read this guide carefully. Write down the model and serial numbers. It is intended to help you operate and maintain your new microwave oven properly. You'll find them on a label located on the rear wall of the microwave oven. Keep it handy to answer your questions.
Parts and Features MO1250TW 1 2 3 4 5 6 7 8 Door Safety Lock System Oven Window Roller Ring Turntable Shaft Door Release Button Control Panel Oven Air Vent Glass Tray 4
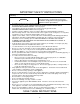
IMPORTANT SAFETY INSTRUCTIONS When using electrical appliances basic safety precautions should be followed, including the following: To reduce the risk of burns, electrical shock, fire, injury to persons, or exposure to excessive ∼WARNING∼ microwave energy when using your appliance, follow these basic precautions: • • • • • • • • • • • • • • • • • • • • • Read all instructions before using the appliance.
INSTALLATION INSTRUCTIONS 0B ¬ BEFORE USING YOUR MICROWAVE OVEN Remove the exterior and interior packing. Check to be sure you have all of the following parts: • Glass Tray • Turntable Roller Assembly (Roller or Roller Ring) • Instruction Manual • Inspect the oven after unpacking for any visual damage such as: • Misaligned Door • Damaged Door • Dents or Holes in Door Window and Screen • Dents in Cavity If any of the above is visible, DO NOT use the oven.
General Use • • • • • • Utensils • • • • • • • • • • Food • • • • • • • DO NOT attempt to tamper with or make any adjustments or repairs to door, control panel or any other part of the oven. Do NOT remove outer panel from oven. Repairs should only be done by qualified service personnel. DO NOT operate the oven empty. The microwave energy will reflect continuously throughout the oven if no food or water is present to absorb energy.
¬ 9BU oven without first stirring. ELECTRICAL CONNECTION GROUNDING INSTRUCTIONS This appliance must be grounded. In the event of an electrical short circuit, grounding reduces the risk of electrical shock by providing an escape wire for the electric current. This appliance is equipped with a cord having a grounding wire with a grounding plug. The plug must be inserted into an outlet that is properly installed and grounded.
10BU CONTROL PANEL UNIT FEATURES Pre-Programmed Cooking Modes Popcorn Baked Potato Pizza Beverage Frozen Dinner Reheat Fresh Vegetable Frozen Vegetable Soup Cook By Weight Defrost By Weight Speed Defrost Express Clock: 12 Hour Kitchen Timer UNIT SPECIFICATIONS Power Consumption: Output (Watts): Operation Frequency: Unit Dimensions (HxWxD): Oven Cavity Dimensions (HxWxD): Oven Capacity: Cooking Uniformity: Net Weight: 11 120V ~ 60Hz, 1450W 1000W 2450MHz 11 ¾” x 21 ¼” x 17 ¾” 7 3 9 /16“ x 14 /16 “ 7 x
CONTROL PANEL FEATURE DISPLAY PRE-PROGRAMMED COOKING MODES POWER COOK BY WEIGHT DEFROST BY WEIGHT SPEED DEFROST TIMER NUMBER PADS (0-9) CLOCK STOP / RESET START / MINUTE PLUS EXPRESS ¬ • • • • • • • • • • ¬ DESCRIPTION Electronic display shows Cooking Time, Cooking Power, Time Remaining in Cooking Cycle, and the Present Time. POPCORN POTATO PIZZA BEVERAGE FROZEN DINNER REHEAT FRESH VEGETABLE FROZEN VEGETABLE SOUP Allow you to reheat or cook food automatically without entering power level or time.
cycle. TIMER: Use for timing things without oven function. A long beep will sound at the end of the elapsed time. AUTO TIMER: After a DEFROST or COOK PROGRAM has completed, the oven will automatically continue to sound four beeps every two minutes until the oven door is opened or the STOP/RESET pad is touched. CHILD PROOF LOCK: Use to prevent unsupervised operation of the oven by children. The word LOCK will be shown in the display and the oven cannot be operated while the CHILD PROOF LOCK is set.
You can check the clock time while cooking is in cancel TIMER during timing process. progress by touching the CLOCK pad. NOTE: ONCE THE TIME HAS BEEN SET IT WILL CONTINUE TO SHOW UNTIL THE UNIT IS UNPLUGGED OR POWER LOST. SETTING A COOKING PROGRAM A. One-stage Cooking B. Multi-stage Cooking 1. Use the number pads to set a cooking time. For added convenience your oven offers the ability You can set a cooking time from one second to to operate in a “Multi-Stage” cooking cycle. Each 99 minutes and 99 seconds.
6. 7. Enter weight. Touch START/MINUTE PLUS pad. For weights less than 10 ounces you must precede the number with a 0. . If label gives weight in pounds only, change the fraction of a pound to ounces using the following chart (See page 14). Note: Weight must be in pounds and ounces. Ounce weights less than 10 must be preceded by a 0. If label gives weight in pounds only, change the fraction of a pound to ounces using the following chart (See page 14).
PIZZA Reheating a slice (or two thin ones) of pizza: 1. Touch PIZZA once. 2. CODE and 1:30 (1 minute and 30 sec.) appears. 3. Touch START/MINUTE PLUS. Heating a whole frozen pizza: 1. Touch PIZZA twice. 2. CODE and 2:30 (2 minutes and 30 sec..) appears. 3. Touch START/MINUTE PLUS. For the large 8 to 10 oz. potatoes: 1. Touch POTATO twice. 2. Enter number of potatoes by touching number pads from 1 to 4. Cooking times for large potatoes are as follows: 1 potato 3 min. 40 sec. 2 potatoes 7 min. 00 sec.
.66 to .71 .72 to .78 .79 to .84 .85 to .90 .91 to .97 above .97 11 12 13 14 15 go to next even Maximum weight for defrosting is 6 lbs. Turn food over when oven signals twice. Touch START/MINUTE PLUS to resume defrosting. After total defrosting time, 4 signals sound and END appears in display. Touch STOP / RESET or open oven door to clear END before starting another cooking function. FRESH VEGETABLE Use this option to cook portions (4 to 9 oz) of fresh vegetables: 1. Press the FRESH VEGETABLE button 2.
¬ COOKING TECHNIQUES Your microwave makes cooking easier than conventional cooking, provided you keep these considerations in mind. Stirring Stir foods such as casseroles and vegetables while cooking to distribute heat evenly. Food at the outside of the dish absorbs more energy and heats more quickly, so stir from the outside to the center. The oven will turn off when you open the door to stir your food.
PROBLEMS WITH YOUR APPLIANCE? You can solve many common appliance problems easily, saving you the cost of a possible service call. Try the suggestions below to see if you can solve the problem before calling the servicer. TROUBLESHOOTING GUIDE 3B PROBLEM Appliance does not operate. POSSIBLE CAUSE Not plugged in. The circuit breaker tripped or a blown fuse. The door is not closed properly. The circuit breaker tripped or a blown fuse. The appliance is unplugged.
YOUR AVANTI PRODUCTS WARRANTY Staple your sales receipt here. Proof of original purchase date is needed to obtain service under warranty. WHAT IS COVERED – LIMITED ONE-YEAR WARRANTY U Avanti Products warrants that the product is free from defects in materials and/or workmanship for a period of twelve (12) months from the date of purchase by the original owner.
U OUT OF WARRANTY PRODUCT Avanti Products is under no obligation, at law or otherwise, to provide you with any concessions, including repairs, pro-rates, or product replacement, once this warranty has expired.
INSTRUCCIONES EN ESPAÑOL 16B PRECAUCION • • • • • • • • • • • • • • • PARA REDUCIR EL RIESGO DE INCENDIO, DESCARGA ELECTRICA, O DAÑO CUANDO ESTE USANDO SU HORNO MICROONDAS, SIGA ESTAS INDICACIONES. LEA TODAS LAS INSTRUCCIONES ANTES DE USAR SU HORNO MICROONDAS. ALGUNOS PRODUCTOS TALES COMO HUEVOS ENTEROS Y ENVASES SELLADOS (POR EJEMPLO, FRASCOS DE VIDRIO) PUEDEN EXPLOTAR, POR LO QUE NO DEBEN SER CALENTADOS EN SU HORNO MICROONDAS. USE SU HORNO MICROONDAS SOLAMENTE PARA LO QUE SE INDICA EN ESTE MANUAL.
INDICACIONES PARA LA INSTALACION 15B ANTES DE USAR SU HORNO MICROONDAS • RETIRE LA ENVOLTURA EXTERIOR E INTERIOR • VERIFIQUE QUE TENGA LAS SIGUIENTES PARTES: • PLATO DE VIDRIO • ARO GIRATORIO • MANUAL DE USO • VERIFICAR QUE EL HORNO MICROONDAS NO TENGA LOS SIGUIENTES DAÑOS: • PUERTA MAL ALINEADA O DESCUADRADA • PUERTA DAÑADA • ABOLLADURAS O AGUJEROS EN LA PUERTA Y/O PANTALLA. • ABOLLADURAS DENTRO DEL HORNO. SI SU HORNO MICROONDAS MUESTRA ALGUNA DE LAS CARACTERISTICAS ARRIBA MENCIONADAS, NO LO USE.
MEDIDAS DE PRECAUCION USO GENERAL • NO INTENTE MANIPULAR, AJUSTAR O REPARAR LA PUERTA, EL PANEL DE CONTROL O CUALQUIER PARTE DE SU HORNO MICROONDAS. NO REMUEVA EL PANEL DE CONTROL DEL HORNO. LAS REPARACIONES DEBERAN SER REALIZADAS POR PERSONAL DE SERVICIO CALIFICADO. • NO UTILICE EL HORNO CUANDO ESTE VACIO. SI NO HAY ALIMENTOS O AGUA DENTRO DEL HORNO MICROONDAS, QUE PUEDAN ABSORBER TODA LA ENERGIA DE LAS MICROONDAS, ESTA SE REFLEJARA CONTINUAMENTE DENTRO DEL HORNO.
CONECTADO AL TOMACORRIENTE DE PARED. OPERANDO SU HORNO MICROONDAS AUNQUE SU HORNO MICROONDAS ESTE EQUIPADO CON CARACTERISTICAS DE SEGURIDAD, ES IMPORTANTE TOMAR NOTA DE LO SIGUIENTE: • NO TRABE O FUERZE LOS SEGUROS INTERNOS. • NO DEJE NINGUN OBJETO ENTRE LA CARA FRONTAL DEL HORNO Y LA PUERTA. NO DEJE QUE SE ACUMULEN RESIDUOS EN LAS SUPERFICIES SELLADAS. LIMPIE DICHAS SUPERFICIES FRECUENTEMENTE CON UN DETERGENTE SUAVE, ENJUAGUE Y SEQUELO. NUNCA USE DETERGENTE EN POLVO O ESPONJAS ABRASIVAS.
PANEL DE CONTROL (VEA PAGINA 9) 17B A CONTINUACION LE INDICAMOS LAS INSTRUCCIONES PARA EL MANEJO DE LOS COMANDOS DEL PANEL DE CONTROL: POWER (POTENCIA) SE USA PARA SELECCIONAR EL NIVEL DE POTENCIA TIMER (MEDIDOR DE TIEMPO) PARA COMIDAS EXTERNAS USTED PUEDE USAR ESTA FUNCION INDEPENDIENTEMENTE, AUN CUANDO EL HORNO ESTE EN USO. COOK (COCINAR) SE USA PARA COCINAR EN ETAPAS Y POTENCIAS DISTINTAS.
TIMER (MEDIDOR DE TIEMPO) • SE USA PARA PROGRAMAR EL TIEMPO DE COCINADO PERMITE PROGRAMAR HASTA 99 MINUTOS Y 99 SEGUNDOS STOP/RESET (TERMINAR/REINICIAR) • CANCELA EL NIVEL DE POTENCIA, EL TIEMPO DE COCCION Y DESCONGELADO PREVIAMENTE PROGRAMADOS. LA HORA DEL RELOJ NO PUEDE SER CANCELADA. START/MINUTE PLUS (INICIAR/AGREGAR UN MINUTO) • • INICIA, O AGREGA UN MINUTO A TODOS LOS PROGRAMAS. LA LUZ INDICADORA DE COCCION Y LA DEL HORNO SE ENCENDERAN Y EL VENTILADOR DE REFRIGERACION EMPEZARA A FUNCIONAR.
EL MENSAJE LOCK (BLOQUEADO) APARECERA EN LA PANTALLA. PARA CANCELAR LA FUNCION MANTENGA PRESIONADA LA TECLA STOP/RESET POR 3 SEGUNDOS, EL MENSAJE LOCK (BLOQUEADO) DESAPARECERA DE LA PANTALLA. PROGRAMAR EL RELOJ PROGRAMAR EL MEDIDOR DE TIEMPO 1. OPRIME LA TECLA MARCADA CLOCK 1. OPRIME LA TECLA TIMER. 2. PROGRAME EL TIEMPO USANDO LAS PARA UN RELOJ DE 12 HORAS. 2. USE LAS TECLAS CON NUMEROS PARA TECLAS CON NUMEROS.
SPEED DEFROST (DESCONGELADO RAPIDO) 4. OPRIME LA TECLA SPEED DEFROST 5. INGRESE EL TIEMPO DE DESCONGELAMIENTO OPRIMIENDO LAS TECLAS NUMERICAS. USTED DEBERA MARCAR EL TIEMPO EN MINUTOSY SEGUNDOS, DE IZQUIERDA A DERECHA. PUEDE DIGITAR DE UNO (MARQUE 5 PARA 5 SEGUNDOS) HASTA CUATRO DIGITOS (2405 PARA 24 MINUTOS, 5 SEGUNDOS). 6. OPRIME START / MINUTE PLUS NOTA: CUANDO EL TIEMPO DE COCCION HAYA FINALIZADO, EL HORNO EMIRITRA CUATRO VECES EL SONIDO BEEP Y EL MENSAJE “END” (FIN) MOSTRARA EN LA PANTALLA.
PROGRAMACION DE LA FUNCION COCCION RAPIDA 18B ESTA FUNCION LE PERMITIRA COCINAR O RECALENTAR COMIDAS AUTOMATICAMENTE SIN NECESIDAD DE INGRESAR EL NIVEL DE POTENCIA O EL TIEMPO DE COCCION. PARA PORCIONES PEQUEÑAS, SIMPLEMENTE PRESIONE LA TECLA QUE APLIQUE PARA EL TIPO DE COMIDA Y SEGUIDAMENTE LA TECLA START/MINUTE PLUS. PARA PORCIONES MAS GRANDES, PRESIONE LA MISMA TECLA DOS VECES.
1. PRESIONE LA TECLA PIZZA DOS VECES. LOS MENSAJES CODE (CODIGO) Y 2:30 (2 MINUTOS Y 30 SEGUNDOS) APARECERAN EN LA PANTALLA. 2. PRESIONE START/MINUTE PLUS 3 PAPAS 4 PAPAS 10 MIN. 20 SEC. 13 MIN. 40 SEC. 3.
BEBIDAS (BEVERAGE) COMIDAS CONGELADAS (FROZEN DINNER) PARA ENVASES DE 5 A 7 ONZAS. 1. PRESIONE LA TECLA BEVERAGE UNA VEZ. 2. INGRESE EL NUMERO DE ENVASES, DE 1 A 4, USANDO LAS TECLAS NUMERICAS. LOS TIEMPOS DE COCINADO PARA BEBIDAS SON LOS SIGUIENTES: CANTIDADES 1 TAZA 2 TAZAS 3 TAZAS 4 TAZAS PARA UNA O DOS COMIDAS CONGELADAS PEQUEÑAS (DE 7 A 9 ONZAS): 1. PRESIONE LA TECLA FROZEN DINNER UNA VEZ 2. PARA UNA PORCION, PRESIONE START/STOP. PARA 2 PORCIONES, PRESIONE EL “2” EN EL TECLADO NUMERICO. 3.
RECALENTAR (REHEAT) OPRIMA LA TECLA REHEAT CODE Y 3:00 (3 MIN.00 SEC.) MOSTRARA EN LA PANTALLA 3. OPRIMA LA TECLA START / MINUTE PLUS 33B 1. 2. NOTA: USE PLATOS O CASEROLAS ALGO MAS GRANDE QUE LA INDICADA CONTINUE REPETIDAMENTE SI RECALENTAMIENTO NO ES SUFICIENTE. NOTA: ESTA SELECCION TE PERMITE RECALENTAR PLATOS DE COMIDAS FRIAS CON UN BUEN RESULTADO. VEGETALES FRESCOS (FRESH VEGETABLE) PARA PORCIONES DE 4 A 9 ONZAS 1. PRESIONE LA TECLA FRESH VEGETABLE UNA VEZ. 2.
4 portions. 5 min. 00 sec 4. OPRIME START/MINUTE PLUS.
CUIDADO Y MANTENIMIENTO LIMPIEZA DE SU HORNO MICROONDAS APAGUE Y DESCONECTE EL ENCHUFE DE PARED ANTES DE LIMPIAR SU HORNO. MANTENGA EL INTERIOR DE SU HORNO MICROONDAS LIMPIO. LOS ALIMENTOS SALPICAN O DERRAMAN PARTICULAS Y LIQUIDOS QUE SE ADHIEREN A LAS PAREDES DEL HORNO, ES RECOMENDABLE LIMPIARLAS CON UN PAÑO HUMEDO. PUEDE USAR UN DETERGENTE MUY SUAVE SI EL HORNO SE ENCUENTRA MUY SUCIO. NO RECOMENDAMOS EL USO DE DETERGENTES O ABRASIVOS FUERTES.
UBICADO EN UN LUGAR TOTALMENTE PLANO.
REGISTRATION INFORMATION 5B Thank you for purchasing this fine Avanti product. Please fill out this form and return it to the following address within 100 days from the date of purchase and receive these important benefits: Avanti Products, A Division of The Mackle Co., Inc. P.O.
MO1250TW-01182012 PRINTED IN CHINA 39