INSTRUCTION MANUAL Model Number: D110 CLOTHES DRYER CAUTION: BEFORE USE, PLEASE READ AND FOLLOW ALL SAFETY RULES AND OPERATING INSTRUCTIONS. Avanti has a policy of continuous improvement on its products and reserves the right to change materials and specifications without notice. Avanti Products P.O. Box 520604 - Miami, Florida 33152 www.avantiproducts.
TABLE OF CONTENTS Appliance Safety 3 Important Safeguards 4 Help Us Help You 5 Parts and Features 6 Important Safety Instructions 7 Installation Instructions 7 Before Using Your Dryer 7 Wall Mounting Instructions 8 – 10 Leveling Legs 11 Electrical Connection 11 Control Panel 11 Operating Your Appliance 12 Drying Time Reference 12 Sorting Fabrics 13 Fabric Care Sheet 14 Care and Maintenance 15 Cleaning Your Appliance Exterior 15 Cleaning the Filters 15 Troubleshooting Guid
APPLIANCE SAFETY Your safety and the safety of others are very important. We have provided many important safety messages in this manual and on your appliance. Always read and obey all safety messages. This is the Safety Alert Symbol. This symbol alerts you to potential hazards that can kill or injure you and others. All safety messages will follow the Safety Alert Symbol and either the words” DANGER”, “WARNING” or “CAUTION”.
IMPORTANT SAFEGUARDS Before the appliance is used, it must be properly positioned and installed as described in this manual, so read the manual carefully.
HELP US HELP YOU... Write down the model and serial numbers. Read this guide carefully. You'll find them on a plate located on the back wall of the appliance. It is intended to help you operate and maintain your new appliance properly. Please write these numbers here: Keep it handy to answer your questions.
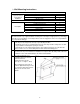
PARTS AND FEATURES 6
Important Safety Instructions aWARNINGa • • • To reduce the risk of fire, electrical shock, or injury when using your appliance, follow these basic precautions: Read all instructions before using the appliance. DANGER or WARNING: Risk of child entrapment. Child entrapment and suffocation are not problems of the past. Junked or abandoned appliances are still dangerous. . . even if they will “just sit in the garage a few days.
¾ Wall Mounting Instructions Tools and parts required for Plaster and or Wood Installation Description Tools Required (Not Included) Drill & Drill Bit Phillips Head Screw Driver Expanding Wall Anchor Wooden Slats Wall Mounting Kit Includes the following: Wall Hanging Bracket 1” Phillips Head Screws Plastic Spacers ½” Phillips Flat Head Screws Exhaust Pipe ½” Phillips Round Head Screws 1 1 8 2 2 4 2 2 1 3 ** It is recommended to complete the following procedure with at least 2 people ** As wall materials
d) Install the wall mounting brackets to the wooden slats installed in the previous step. Using the (4)1” Phillips Round head screws included, affix the mounting bracket to the wooden slats as shown in the diagram to the right. e) Install the exhaust pipe as shown in the illustration using the (3) ½” long Phillips Flat head screws included. • For a downward exhaust join the sections (1) pointing downward.
f) Install the lower wall spacers (included) using the (2 ) ½” long Phillips Round head screws (included). These spaces are required when installing the unit on the wall to allow the necessary ventilation for efficient operation. Failure to install the spacers will both reduce the ventilation needed to operate your unit as well as put the appliance in tilted position on the wall which could present a possible unstable wall installation. g) Mounting the dryer to the wall hanging assembly.
¾ Adjusting the leveling legs To install and adjust the leveling legs see the illustration to the right. If the floor is uneven adjust the legs (do not insert pieces of wood, or any other objects under the legs) • Adjust the height level of the legs accordingly. Place the dryer on a sturdy flat surface. If the dryer is placed on an uneven or weak surface, noise or vibration will occur.
¾ OPERATING INSTRUCTIONS ¾ DRYING TIME REFERENCE ** LOAD WEIGHTS AND RESPECTIVE DRYING TIMES ARE APPROXIMATE ** Drying Capacity 3 (Three) Lbs 5 (Five) Lbs 7 (Seven) Lbs 9 (Nine) Lbs Drying Times High Heat 30 Minutes 60 Minutes Low Heat 55 Minutes 110 Minutes 120 Minutes 200 Minutes 12
¾ Sorting Fabrics For the best drying results, clothes should be sorted properly. Separate the lint shedders (chenille and terry cloth) from the lint collectors (synthetics, flannel and fabrics with a nap, such as velveteen and corduroy). Separate non-colorfast from light colored items, heavy fabrics from light weight fabrics and permanent press from heavy, bulky items. Do not tumble dry Read all permanent care labels carefully.
Fabric Care Chart 14
CARE AND MAINTENANCE ¾ Cleaning the Exterior • Wipe the dryer surfaces, including the control panel, with a soft cloth and non-abrasive household detergents. • Use a soft cloth to dry the surfaces. • Do not pour water on the dryer. ¾ Cleaning the Filters Unplug the power cord prior to any cleaning. Cleaning the Lint Filter: a) Removing the Lint Filters: Remove by pulling outward using the four (4) grip holes in the filter assembly.
PROBLEMS WITH YOUR DRYER? You can solve many common appliance problems easily, saving you the cost of a possible service call. Try the suggestions below to see if you can solve the problem before calling the servicer. TROUBLESHOOTING GUIDE PROBLEM Timer knob will not rotate Dryer does not operate. Drum does not rotate Laundry not completely dry POSSIBLE CAUSE Not plugged in. The circuit breaker tripped or blown fuse. Door is not closed. Clean the Filter Reduce the amount of clothing loaded in the dryer.
Staple your sales receipt here. Proof of original purchase date is needed to obtain service under warranty. YOUR Avanti Products WARRANTY WHAT IS COVERED LIMITED ONE-YEAR WARRANTY For one year from the date of purchase by the original owner, Avanti Products will, at its option, repair or replace any part of the appliance that proves to be defective in material or workmanship under normal use.
Registration Information Thank you for purchasing this fine Avanti product. Please fill out this card and return it within 100 days of purchase and receive these important benefits: ¾ Protect your product: We will keep the model number and date of purchase of your new Avanti product on file to help you refer to this information in the event of an insurance claim such as fire or theft. ¾ Promote better products: We value your input.
PRINTED IN CHINA 20