INSTRUCTION MANUAL MANUAL DE INSTRUCCIONES Model Numbers/ No. de Modelos: W711 / W712PS PORTABLE WASHER LAVADORA PORTATIL BEFORE USE, PLEASE READ AND FOLLOW ALL SAFETY RULES AND OPERATING INSTRUCTIONS. La sección en español empieza en la página 22. Avanti has a policy of continuous improvement on its products and reserves the right to change materials and specifications without notice. Avanti Products, A Division of the Mackle Co., Inc. P.O. Box 520604 - Miami, Florida 33152 www.avantiproducts.
TABLE OF CONTENTS Appliance Safety 4 Important Safeguides 5 Help Us Help You / If You Need Service 6 Parts, Features, and Accessories 7 Important Safety Instructions 8 Installation Instructions 9 Before Using Your Portable Washer 9 Selecting a Location 9 Installing the Noise Damper Plate 10 Connecting the Water Supply Hoses / Sink Faucet Connection 10 – 11 Disconnecting the Water Supply Hoses / Positioning the Drain Hose 11 Electrical Connection / Extension Cords 12 Control Panel / F
APPLIANCE SAFETY Your safety and the safety of others are very important. We have provided many important safety messages in this manual and on your appliance. Always read and obey all safety messages. This is the Safety Alert Symbol. This symbol alerts you to potential hazards that can kill or injure you and others. All safety messages will follow the Safety Alert Symbol and either the words “DANGER”, “WARNING” or “CAUTION”.
IMPORTANT SAFEGUIDES Before the appliance is used, it must be properly positioned and installed as described in this manual, so read the manual carefully. To reduce the risk of fire, electrical shock or injury when using the appliance, follow basic precaution, including the following: Plug into a grounded 3-prong outlet, do not remove grounding prong, do not use an adapter, and do not use an extension cord. Replace all panels before operating.
HELP US HELP YOU... Read this guide carefully. Write down the model and serial numbers. It is intended to help you operate and maintain your new portable washer properly. You'll find them on a plate located on the rear outside wall of the portable washer. Keep it handy to answer your questions.
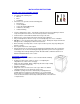
PARTS & FEATURES 7
IMPORTANT SAFETY INSTRUCTIONS To reduce the risk of fire, electrical shock, or injury when using your portable washer, follow these basic precautions: WARNING Read all instructions before using the portable washer. Do not wash articles that have been previously cleaned in, washed in, soaked in, or spotted with gasoline, dry-cleaning solvents, or other flammable or explosive substances, as they give off vapors that could ignite or explode.
INSTALLATION INSTRUCTIONS BEFORE USING YOUR PORTABLE WASHER Remove the exterior and interior packing. You will need the following tools: Wrench Pliers Screwdriver Check to be sure you have all of the following parts: 2 Inlet Hoses 1 Faucet Adapter 1 Noise Proof Plate With Screws 1 Drain Hose Assembly 1 Water Inlet Plug SCREWDRIVER WRENCH PLIERS Remove shipping brace.
INSTALLING THE NOISE DAMPER PLATE Affix the noise proof plate by using the two screws provided. CONNECTING THE WATER SUPPLY HOSES The water supply hose must be connected to the washing machine at one end and to the water faucet at the other. Do not stretch the water supply hose. If the hose is too short and you do not wish to move the water faucet, replace the hose with a longer, high-pressure hose. Select appropriate faucet as shown in the figures below.
SINK FAUCET CONNECTION For normal kitchen-sink tap only use the inlet hose with cold water inlet. Connect the inlet hose to the male hose thread adapter by turning it clockwise to be fixed tightly. Make sure to insert the rubber ring enclosed. Then connect tightly to your sink. Note: Some faucets may require you to also use the female hose thread adapter between the male adapter and your sink faucet as shown below. Make sure the rubber ring is inserted and connect to your sink.
ELECTRICAL CONNECTION Warning Improper use of the grounded plug can result in the risk of electrical shock. If the power cord is damaged, have it replaced by an authorized Avanti Products service center. This appliance should be properly grounded for your safety. The power cord of this appliance is equipped with a threeprong plug which mates with standard three prong wall outlets to minimize the possibility of electrical shock.
CONTROL PANEL 1 2 3 4 5 6 7 8 9 10 11 12 13 CYCLE INDICATOR LIGHTS WATER LEVEL SELECTION INDICATOR LIGHTS ELECTRONIC DISPLAY WASH PROGRAM SELECTION INDICATOR LIGHTS WATER TEMPERATURE SELECTION INDICATOR LIGHTS POWER ON / OFF BUTTON FUNCTION SELECTOR BUTTON WATER LEVEL SELECTOR BUTTON DELAY WASH PROGRAM INDICATOR LIGHT DELAY WASH PROGRAM SELECTOR BUTTON WASH PROGRAM SELECTOR BUTTON WATER TEMPERATURE SELECTOR BUTTON START / PAUSE SELECTOR BUTTON 13
OPERATING YOUR PORTABLE WASHER PREPARATION 1. Connect the water inlet hose 3. Insert the plug into the to the water faucet. Don’t socket. For safety the plug switch on the power if the should have ground water pressure is lower than connection. 0.05MPa and higher than 0.5MPa. 4. Insert the end of drain hose into the hook shelf, and hang the drain hose over a drain outlet. 2. Ensure the drain hose has been installed properly. 5. Open the water faucet. 6. Put the wash load into the tub evenly. 7.
BEFORE WASHING Make sure that you follow all manufacturer instructions for washing: 15
OPERATING INSTRUCTIONS PRESS THE POWER BUTTON. PRESS THE WATER LEVEL BUTTON. Choose appropriate water level according to wash load quantity. WATER TEMPERATURE CHOICE. Press the water temperature selection button, you can choose from cold, warm, and/or hot water. NOTE: The washer will provide a cold rinse in all TEMPERATURE settings. Indicator Light Shown COLD HOT WARM Description When the “COLD” indicator light is ON, it means the washing machine will only use water supplied by the cold water inlet.
Press down the power button. Press the cycle button to select the SPIN function until only SPIN indicator is ON. Press the START/PAUSE to start the course. And the LED display will show the remaining time of the entire course. AUTOMATIC WASH PROGRAMS NORMAL – For normal laundry (Approximately 42 Minute cycle). Press the power button. Press the program button to select the NORMAL program until the NORMAL indicator is ON.
Close the lid, or the washing machine will buzz during wash and spin cycle. In the event the clothing loaded becomes unbalanced, the safety switch will be triggered causing the washing machine to automatically refill with water to adjust the imbalance. Note: Clothes easily discolored should be washed separately so as to prevent inter-dyeing.
CARE AND MAINTENANCE CLEANING YOUR PORTABLE WASHER Clean the surface of your portable washer regularly with soft fabric. Clean the inner tub regularly, especially immediately after starch or bleach operation. Clean the filter in the inlet valve or inlet hose regularly in order to prevent it from clogging. Unplug the powercord. Rem ove the inlethose and clean the filterwith a brush. Clean the surface of the washing m achine with a soft cloth regularly.
PROBLEMS WITH YOUR PORTABLE WASHER? You can solve many common portable washer problems easily, saving you the cost of a possible service call. Try the suggestions below to see if you can solve the problem before calling the servicer. TROUBLESHOOTING GUIDE PROBLEM Washer does not operate. No water or insufficient water supply. The washing machine does not drain. Washing machine vibrates or is too noisy. Washing machine does not spin.
YOUR AVANTI PRODUCTS WARRANTY Staple your sales receipt here. Proof of original purchase date is needed to obtain service under warranty. WHAT IS COVERED – LIMITED ONE-YEAR WARRANTY Avanti Products warrants that the product is free from defects in materials and/or workmanship for a period of twelve (12) months from the date of purchase by the original owner.
INSTRUCCIONES EN ESPAÑOL Conexión Eléctrica ADVERTENCIA EL USO INAPROPIADO DEL ENCHUFE A TIERRA PUEDE OCASIONAR RIESGO DE UN CHOQUE ELECTRICO. SI EL CORDON SE DAÑASE, LLEVELO A UN CENTRO DE SERVICIO AUTORIZADO POR AVANTI PRODUCTS PARA QUE SE REEMPLACE. Para su seguridad, esta lavadora debe estar apropiadamente conectada a tierra.
ADVERTENCIA SIGA ESTAS PRECAUCIONES BASICAS PARA REDUCIR EL RIESGO DE FUEGO, CORTO CIRCUITO O DAÑOS AL USAR SU LAVADORA PORTATIL. NO LIMPIE LA LAVADORA PORTATIL CON LIQUIDOS INFLAMABLES. EL VAPOR PUEDE CREAR FUEGO O UNA EXPLOSION LEA TODAS LAS INSTRUCCIONES ANTES DE USAR SU LAVADORA PORTATIL. RIESGOS DE QUE LOS NIÑOS QUEDEN ATRAPADOS DENTRO DE LOS EQUIPOS NO SON PROBLEMAS DEL PASADO, NO PERMITA QUE OPEREN, JUEGUEN O ENTREN DENTRO DE LA LAVADORA.
LEJOS DE LAS FUENTES DE CALOR TALES COMO CARBON O GAS. ASEGURESE QUE LA LAVADORA NO ESTE APLASTANDO EL CORDON ELECTRICO. LAS APERTURAS DE VENTILACION DEBEN ESTAR LIBRES DE OBSTRUCCIONES TAL COMO ALFOMBRA. INSERTE LA BANDEJA A PRUEBA DE RUIDO EN LA BASE DE LA LAVADORA 1. REMOVER LA PLATAFORMA A PRUEBA DE RUIDO DE LA CAJA. 4. RECUESTE LA LAVADORA PARA COLOCAR LA PLATAFORMA A PRUEBA DE RUIDOS, FIJANDOLA CON DOS TORNILLOS. 3.
PANEL DE CONTROL 1 2 3 4 5 6 7 8 9 10 11 12 13 LUZ INDICADORA DE CICLO LUZ INDICADORA DE NIVEL DE AGUA PANTALLA ELECTRONICA LUZ INDICADORA DE PROGRAMA DE LAVADO PRE-PROGRAMADO LUZ INDICADORA DE TEMPERATURA DEL AGUA BOTON PARA ENCENDER / APAGAR LA UNIDAD BOTON PARA SELECCIONAR EL CICLO DE LAVADO BOTON PARA SELECCIONAR EL NIVEL DE AGUA LUZ INDICADORA PARA PROGRAMA DE LAVADO ATRASADO BOTON PARA PROGRAMAR EL LAVADO ATRASADO BOTON PARA SELECCIONAR EL MODO DE LAVADO PRE-PROGRAMADO BOTON PARA SELECCIONAR LA TEMP
IMPORTANTE: EN ESTA SITUACION, NO PROGRAME LA OPCION CALIENTE (HOT) COMO TEMPERATURA DE LAVADO. 1. CONECTE LA MANGUERA A EL GRIFO DE 2. REMUEVA LA TAPA DEL CONECTOR DE AGUA FRIA Y CONECTE EL OTRO SUMINISTRO DE AGUA A LA LLAVE, EXTREMO DE LA MANGUERA DE GIRANDO LA TUERCA DEL CONECTOR SUMINISTRO DE AGUA AL CONECTOR DE DE LA MANGUERA HACIA LA DERECHA. AGUA FRIA EN LA VALVULA MEZCLADORA DE AGUA. ANILLO SELLADOR GIRANDO LA TUERCA DEL CONECTOR HACIA LA DERECHA.
COLOCANDO LA MANGUERA DE DRENAJE CONECTE LA MANGUERA DE DRENAJE A LA SALIDA DE AGUA DE LA LAVADORA Y AJUSTELA CON UNA GRAMPA AJUSTABLE INCLUIDA. COMO PUEDE DRENAR HACIA ARRIBA O HACIA ABAJO, LA MANGUERA DE DRENAJE PUEDE SER COLOCADA EN EL PISO, EL BAÑO O LA BAÑERA, SIEMPRE QUE LA ALTURA NO SEA MAYOR A 70 CM. EL PUNTO MAS ALTO DE LA MANGUERA DE DRENAJE DEBE SER 70 – 120 CM SOBRE EL NIVEL DEL PISO, DE LO CONTRARIO LA LAVADORA NO PODRA FUNCIONAR CORRECTAMENTE. MODO DE EMPLEO PREPARACION 1.
MAS ALTO DE AGUA, LA LAVADORA EMPEZARA A FUNCIONAR UNA VEZ QUE HAYA LLEGADO AL NIVEL DE AGUA DESEADO. ANTES DE LAVAR PREPARE LA CARGA DE ROPA A LAVAR. MEZCLE PIEZAS PEQUEÑAS Y GRANDES PARA OBTENER MEJORES RESULTADOS. DEPOSITE LAS PIEZAS DENTRO DEL CILINDRO. NO EMPAQUE LAS PIEZAS NI LAS ENVUELVA. LAS PIEZAS DEBEN MOVERSE LIBREMENTE DENTRO DEL AGUA PARA OBTENER MEJORES RESULTADOS. LAS PIEZAS DEBEN RODAR, HUNDIRSE Y REAPARECER. CUANDO LAVE PIEZAS MUY GRANDES, NO LLENE MUCHO EL CILINDRO DE AGUA.
Registration Information Thank you for purchasing this fine Avanti product. Please fill out this form and return it to the following address within 100 days from the date of purchase and receive these important benefits: Avanti Products, A Division of The Mackle Co., Inc. P.O.
W711 – VER3.