
User Guide
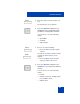

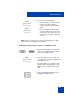

Table Of Contents
- Revision history
- Contents
- Welcome
- Regulatory and safety information
- Using your Avaya 1120E IP Deskphone
- Getting started
- Before you begin
- Connecting the components
- Removing the stand cover
- Connecting the AC power adapter (optional)
- Connecting the handset
- Connecting the headset (optional)
- Selecting the headset tuning parameter
- Connecting the LAN ethernet cable
- Installing additional cables
- Wall-mounting the IP Deskphone (optional)
- Entering text
- Entering text using the IP Deskphone dialpad
- Enabling and disabling the # Ends Dialing feature
- Configuring the dialpad to alphanumeric dialing
- Entering text using the USB keyboard
- Accessing the Avaya 1120E IP Deskphone
- Configuring the Avaya 1120E IP Deskphone
- Making a call
- Receiving a call
- The Address Book
- Call Inbox
- Call Outbox
- Instant Messaging
- While on an active call
- Additional features
- Using the Friends feature
- Feature keys
- Feature key programming
- Feature key autoprogramming
- Using Call Forward
- Configuring Do Not Disturb
- Configuring a Presence state
- Configuring Privacy settings
- Multiple Appearance Directory Number
- Audio Codecs
- PC Client softphone interworking with the IP Deskphone
- Automatic remote software updates
- Multiuser
- Advanced features
- Visual indicators
- Multi-Level Precedence and Preemption
- Quick reference
- Third party terms
- Terms you should know
- Index
Advanced features
318
Next
Back
4. Choose one of the following:
— Use the dialpad to enter a telephone
number or SIP address (URI) for the
new contact. Press the Next
context-sensitive soft key to
continue.
— Press the Back context-sensitive
soft key to return to the previous
menu.
Yes
No
Back
5. Do one of the following to complete the
entry:
— Press the Yes context-sensitive soft
key to add the new entry to an
address book group.
— Press the No context-sensitive soft
key to add the entry to the address
book without adding it to a group.
— Press the Back context-sensitive
soft key to return to the previous
menu.
If you choose to add the new contact to a
group, a list of all your existing groups is
displayed, and the screen prompts you
to select a group.
6. Press the Up/Down navigation key to
highlight the required entry.