
User Guide
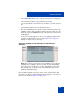


Table Of Contents
- Revision history
- Contents
- Welcome
- Regulatory and safety information
- Using your Avaya 1120E IP Deskphone
- Getting started
- Before you begin
- Connecting the components
- Removing the stand cover
- Connecting the AC power adapter (optional)
- Connecting the handset
- Connecting the headset (optional)
- Selecting the headset tuning parameter
- Connecting the LAN ethernet cable
- Installing additional cables
- Wall-mounting the IP Deskphone (optional)
- Entering text
- Entering text using the IP Deskphone dialpad
- Enabling and disabling the # Ends Dialing feature
- Configuring the dialpad to alphanumeric dialing
- Entering text using the USB keyboard
- Accessing the Avaya 1120E IP Deskphone
- Configuring the Avaya 1120E IP Deskphone
- Making a call
- Receiving a call
- The Address Book
- Call Inbox
- Call Outbox
- Instant Messaging
- While on an active call
- Additional features
- Using the Friends feature
- Feature keys
- Feature key programming
- Feature key autoprogramming
- Using Call Forward
- Configuring Do Not Disturb
- Configuring a Presence state
- Configuring Privacy settings
- Multiple Appearance Directory Number
- Audio Codecs
- PC Client softphone interworking with the IP Deskphone
- Automatic remote software updates
- Multiuser
- Advanced features
- Visual indicators
- Multi-Level Precedence and Preemption
- Quick reference
- Third party terms
- Terms you should know
- Index
Advanced features
331
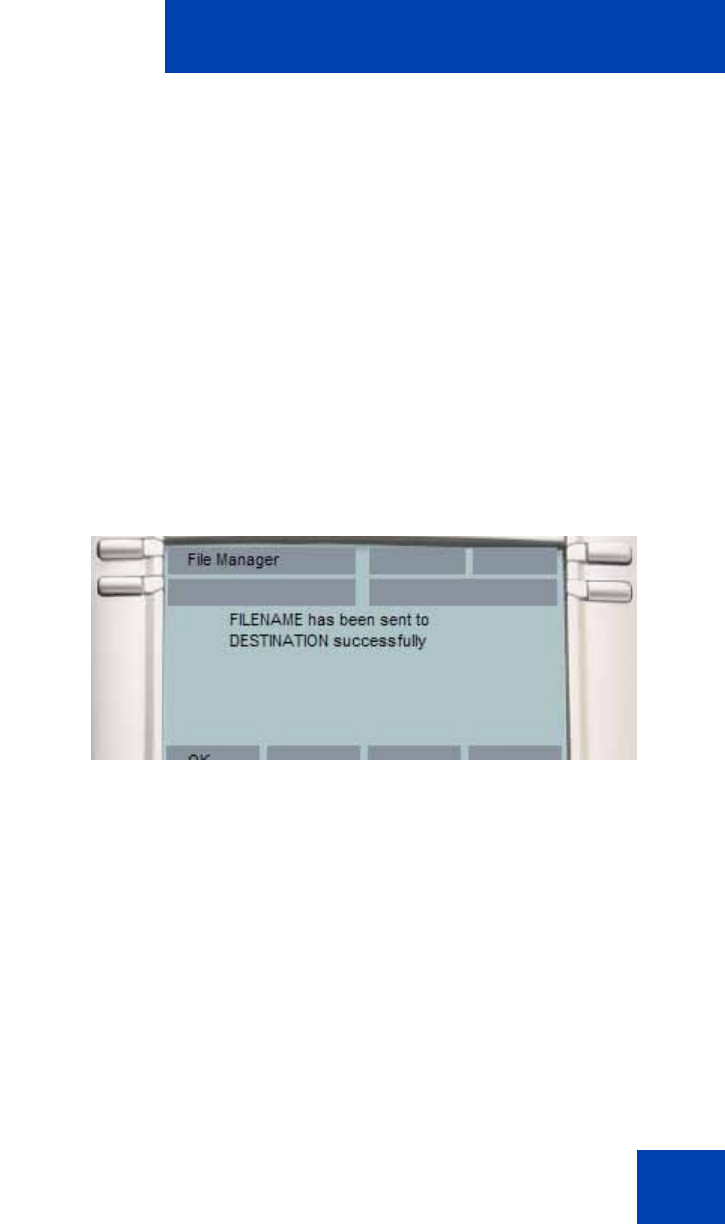
•Select Flash Disk device. The contents of the device are displayed.
• Select the file you wish to copy and then press Send.
• You are prompted to select the device you wish to send the selected
file.
• Select the IP Deskphone as the destination device.
• The file is validated based on the file extension and the passing of the
validation routines and a handler is called for the file. In this case, the
image file copies the images directory of the flash file system on the
IP Deskphone.
• A success message appears on the screen displaying that the file is
copied to the IP Deskphone successfully. Figure 74 on page 331
displays a sample success message.
Figure 74: Sample success message for File Manager
operation
Note: After a file is selected, there can be multiple reasons why the
handling cannot complete. The file size may exceed allowed limits,
there may not be enough space on disk, a file with the same name
may already exist, or actions on the selected file type may not be
allowed (configuration flag).
Error conditions display a message on the screen, and any action that
may take some time to complete displays the In progress… message on
the screen as shown in Figure 75 on page 332.