
User Guide

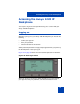

Accessing the Avaya 1220 IP Deskphone
56
session. However, the first time you use your Avaya 1220 IP Deskphone,
you need to complete some of the following procedures:
• “Automatic login” on page 56
• “Setting the domain” on page 56
• “Selecting a language” on page 58
• “Logging on to your IP Deskphone” on page 59
• “Configuring the duration of the login” on page 63
• “Selecting a location” on page 65
• “User Profile” on page 66
• “Overwriting your personal Address Book” on page 67
Note: The system automatically logs you back on after a power
outage or software upgrade. The system administrator configures this
feature on a network-wide basis.
Automatic login
Before you first receive your Avaya 1220 IP Deskphone, your system
administrator can configure your IP Deskphone with your user logon and
password. If this is the case, after you plug in the IP Deskphone you can
use it without further configuration.
Note: If the IP Deskphone is configured with automatic logon, you
can not use the log off function, and you need a password to access
some features and functions. Contact your system administrator or
service provider for further information.
Setting the domain
Before the log on process, if you need to change the domain or confirm
that the domain you log on to is correct, press the Domain context-
sensitive soft key from the logon prompt. The current domain appears on
the Avaya 1220 IP Deskphone LCD screen. You can edit the domain that
is listed or press the Domain context-sensitive soft key to access a list of
available domains to which you can choose to connect.