Avaya 3100 Mobile Communicator - Client for Windows Mobile User Guide Avaya 3100 Mobile Communicator Release 3.1 Document Status: Standard Document Number: NN42030-107 Document Version: 03.
© 2007–2010 Avaya Inc. All Rights Reserved. Notices While reasonable efforts have been made to ensure that the information in this document is complete and accurate at the time of printing, Avaya assumes no liability for any errors. Avaya reserves the right to make changes and corrections to the information in this document without the obligation to notify any person or organization of such changes.
Contents Contents Welcome . . . . . . . . . . . . . . . . . . . . . . . . . . . . . . . . . . . . . . . . . . . . . . . . . . . . . . . . . . . . . . . . 7 Your new Avaya 3100 MC - Client for Windows Mobile . . . . . . . . . . . . . . . . . . . . . . . . . . . . 7 New in this release . . . . . . . . . . . . . . . . . . . . . . . . . . . . . . . . . . . . . . . . . . . . . . . . . . . . . . . . . 7 Features . . . . . . . . . . . . . . . . . . . . . . . . . . . . . . . . . . . . . . . . . . . . . . . . . . .
Contents Logging on and logging off . . . . . . . . . . . . . . . . . . . . . . . . . . . . . . . . . . . . . . . . . . . . . . . . . . 37 Turning off auto-login . . . . . . . . . . . . . . . . . . . . . . . . . . . . . . . . . . . . . . . . . . . . . . . . . . . 38 Hiding Avaya 3100 MC - Client for Windows Mobile . . . . . . . . . . . . . . . . . . . . . . . . . . . . . . 39 Overview of the main pane . . . . . . . . . . . . . . . . . . . . . . . . . . . . . . . . . . . . . . . . . . . . . . . . .
Contents Adding a new group . . . . . . . . . . . . . . . . . . . . . . . . . . . . . . . . . . . . . . . . . . . . . . . . . . . . 63 Changing a group name . . . . . . . . . . . . . . . . . . . . . . . . . . . . . . . . . . . . . . . . . . . . . . . . 65 Deleting a group . . . . . . . . . . . . . . . . . . . . . . . . . . . . . . . . . . . . . . . . . . . . . . . . . . . . . . 65 Instant Conferences . . . . . . . . . . . . . . . . . . . . . . . . . . . . . . . . . . . . . . . . . . . . . . . . . . . . . .
Contents 6 NN42030-107 Avaya 3100 Mobile Communicator 3.1 Standard 03.
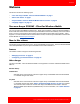
Welcome Welcome This section contains the following topics: • “Your new Avaya 3100 MC - Client for Windows Mobile” on page 7 • “New in this release” on page 7 • “Avaya 3100 MC - Client for Windows Mobile feature overview” on page 9 • “Language support” on page 10 Your new Avaya 3100 MC - Client for Windows Mobile You can use Avaya 3100 Mobile Communicator - Client (Avaya 3100 MC - Client) for Windows Mobile to achieve real-time communication with the Avaya 3100 Mobile Communicator Gateway and commu
Welcome November 2009 Standard 03.03. This document is issued to support Avaya 3100 Mobile Communicator Release 3.1. Technical information was updated. November 2009 Standard 03.02. This document is issued to support Avaya 3100 Mobile Communicator Release 3.1. Call Intercept information was updated. October 2009 Standard 03.01. This document is issued to support Avaya 3100 Mobile Communicator Release 3.1. July 2009 Standard 02.08. This document is issued to support Avaya 3100 Mobile Communicator Release 3.
Welcome September 2008 Standard 02.01. This document is issued for Avaya 3100 Mobile Communicator Release 3.0. May 2008 Standard 01.03. This document is upissued for Avaya 3100 Mobile Communicator Release 2.1. Reissued with the new date only. April 2008 Standard 01.02. This document is upissued for Avaya 3100 Mobile Communicator Release 2.1. It addresses the group call options in “Responding to an Instant Conference reminder” on page 66. April 2008 Standard 01.01.
Welcome • Communicate using any of the following methods: — Dial a number from the keypad. — Select a number on the Quick Dial list. — Select a buddy and choose how you want to contact them (voice call or IM). — Select a record in the history log, native address book, voice mail or IM sessions pane and start a new communication session. • Display the Avaya 3100 MC - Client for Windows Mobile in either landscape or portrait view.
Welcome • Japanese • Norwegian • Swedish When you install the client loads using the over the air download method, the system recommends a software load that matches the operating system, features, and language of your device. You can download the recommended software or you can select software for another language (as long as your device supports the chosen language).
Welcome 12 NN42030-107 Avaya 3100 Mobile Communicator 3.1 Standard 03.
Getting Started Getting Started This section contains the following topics: • “Before you begin” on page 13 • “Enterprise requirements” on page 13 • “Supported network connections and devices” on page 13 • “Network specifications” on page 15 • “Network specifications” on page 15 • “Subscriber Identity Module (SIM) card” on page 16 • “Battery life” on page 16 Before you begin Before you install Avaya 3100 MC - Client for Windows Mobile, familiarize yourself with the navigation and data entry m
Getting Started For feature support details, see Table 2 "Network connectivity features" on page 14. Table 2: Network connectivity features Feature support Device type Operating system Cell only Windows Mobile 6.0 or later Possible network connection • Voice over cell • Data over cell Network roaming Voice call handoff No No Avaya 3100 MC - Client for Windows Mobile supports the following devices.
Getting Started For a list of the latest supported devices, see the Avaya 3100 Mobile Communicator Product Bulletin at www.avaya.com. Note 1: Select and use headsets that are designed to reduce excessive sound pressure levels or acoustic shocks. Check that headsets meet National or International Acoustic and Safety requirements. Note 2: Some devices have a physical keypad, and do not use the touch screen for numeric entry.
Getting Started • 5 message waiting indicator updates per day. The following calculation shows data usage per month, assuming 20 work days per month: Logon and logout attempts ((5 * 1000) + (5 * 900)) * 20 = 190 000 bytes 3 calls per hour (2 inbound, 1 outbound) during an 8 hour day ((2 * 800) + (2 * 900) + 1000) * 8 * 20 = 704 000 bytes 5 message waiting indicator updates 500 * 2 = 10 000 bytes Client polling (every 270 seconds or 13.3 an hour) 13.
Installing Avaya 3100 MC - Client for Windows Mobile Installing Avaya 3100 MC - Client for Windows Mobile This section contains the following topics: • “Installing or upgrading Avaya 3100 MC - Client for Windows Mobile” on page 18 • “Uninstalling Avaya 3100 MC - Client for Windows Mobile” on page 21 • “Obtaining the Log file” on page 22 • “Modifying the Microsoft ActiveSync settings” on page 22 • “Determining the Avaya 3100 MC - Client for Windows Mobile software version” on page 23 This section
Installing Avaya 3100 MC - Client for Windows Mobile Installing or upgrading Avaya 3100 MC - Client for Windows Mobile Install or upgrade Avaya 3100 MC - Client for Windows Mobile using one of the following methods: • “Installing or upgrading from a computer” on page 18 • “Installing the software over the air” on page 19 • “Upgrading the software over the air” on page 20 • “Performing an upgrade for a major release” on page 20 Consult with your system administrator for the preferred installation or
Installing Avaya 3100 MC - Client for Windows Mobile Installing or upgrading the software from a computer 1. Before starting, obtain the URL for the Web Administration Console User Portal from your administrator. 2. If Avaya 3100 MC - Client for Windows Mobile is currently installed and running, select Menu, Exit. 3. On your computer, open a Web browser. 4. In the address field, input the User Portal URL. For example: http://:8282/adminserver/userportal.
Installing Avaya 3100 MC - Client for Windows Mobile Installing (initial) the software over the air 1. If Avaya 3100 MC - Client for Windows Mobile is currently installed and running, select Menu, Exit. 2. On the mobile device, open an Web browser (Internet Explorer Mobile is recommended). 3.
Installing Avaya 3100 MC - Client for Windows Mobile Upgrading Avaya 3100 MC - Client for a major release 1. Record your configuration in the following table. Table 6: Upgrade configuration parameters Parameter Value Login Name Login Password Primary Server IP/Host Primary Server Port Connection Type Mobile Phone Number 2. Uninstall the current version of the software using “Uninstalling Avaya 3100 MC - Client for Windows Mobile” on page 21 3.
Installing Avaya 3100 MC - Client for Windows Mobile 3. Click Remove. 4. Click Yes and follow the prompts to remove the Avaya 3100 MC - Client for Windows Mobile installation directory and files. Obtaining the Log file The Avaya 3100 MC - Client includes a log of application activity that can be used for debugging purposes. Obtaining the log file 1. Connect the mobile device to your computer with a USB cable. 2. Start Microsoft ActiveSync on your computer. 3.
Installing Avaya 3100 MC - Client for Windows Mobile Table 7: Connection settings fields Field Description This computer is connected to: Specify how the computer connects: • Automatic: select this option to allow ActiveSync to automatically select the connection type. • Work Network: select this option if you are connecting to the network while you are at work. • The Internet: select this option if you are connecting to the network while you are out of the office (for example, at home).
Installing Avaya 3100 MC - Client for Windows Mobile 24 NN42030-107 Avaya 3100 Mobile Communicator 3.1 Standard 03.
Configuring Avaya 3100 MC - Client for Windows Mobile Configuring Avaya 3100 MC - Client for Windows Mobile This section contains the following topics: • “Initial configuration” on page 25 • “Advanced Configuration settings” on page 27 Initial configuration The first time you start Avaya 3100 MC - Client for Windows Mobile, you are prompted to enter your basic log on information and then log on to the system.
Configuring Avaya 3100 MC - Client for Windows Mobile Table 8: Required parameters Parameter Description Connection Type - use secure connection Specify the connection type that the Avaya 3100 MC - Client uses when it communications with the Avaya 3100 Mobile Communicator Gateway. • To use a secure HTTPS connection, select the check box. • To use a regular HTTP connection, clear the check box.
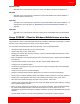
Configuring Avaya 3100 MC - Client for Windows Mobile 1111. For the recommended phone number format, see Figure 1 "Recommended telephone number format" on page 27. Figure 1: Recommended telephone number format Advanced Configuration settings After you successfully log on, you can customize the performance of your Avaya 3100 MC - Client by updating the advanced settings. Note: Some advanced settings are automatically downloaded from the Avaya 3100 Mobile Communicator Gateway.
Configuring Avaya 3100 MC - Client for Windows Mobile Table 9: Advanced pane fields Field Secondary server port Description Enter the port number used for client connections on the secondary Avaya 3100 Mobile Communicator Gateway external network interface. For example, enter 8443 for HTTPS or 8080 for HTTP. Note: This setting is automatically downloaded from the Avaya 3100 Mobile Communicator Gateway and should not need to be updated. Contact your system administrator for details.
Configuring Avaya 3100 MC - Client for Windows Mobile Table 9: Advanced pane fields Field Device Standby Enable Description If this check box is selected, your Windows mobile device enters standby mode whenever it is switched off (the power button is pressed or the activity timer expires). In standby mode, the backlight, touchscreen and audio are off, but the system remains active and the Avaya 3100 MC - Client can still receive calls and messages.
Configuring Avaya 3100 MC - Client for Windows Mobile 2. Select Menu, Options, Call settings. 3. Complete the fields using the information in Table 10 "Call Settings pane fields" on page 30 as a guide. Figure 2: Call settings pane fields Table 10: Call Settings pane fields Field Description Screening Mode Use the select box controls to select a call screening mode: • Screen On (default): When call screening is enabled, you decide how to handle your incoming calls on a call-by-call basis.
Configuring Avaya 3100 MC - Client for Windows Mobile Table 10: Call Settings pane fields Field Description Voicemail Number The list of valid voice mail service numbers used to access the voice mail in your Enterprise is downloaded automatically from the Avaya 3100 Mobile Communicator Gateway after your initial configuration. You can select from the list, as specified by your administrator, or simply select the number as tagged for your office or region.
Configuring Avaya 3100 MC - Client for Windows Mobile Table 10: Call Settings pane fields Field Description Keyboard Mapping Configure the Keyboard (alpha to digit) map if the device has a hardware keyboard that does not include a dedicated number pad. The map facilitates the dialing of telephone numbers and symbols using the keyboard alpha-numeric keys.
Configuring Avaya 3100 MC - Client for Windows Mobile Owner Information settings Use the Owner Information pane to configure your display name and alternate contact numbers. Configuring your owner information 1. Select Menu, Logout. 2. Select Menu, Options, Owner Information. 3. Complete the fields using the information in Table 11 "Owner Information pane fields" on page 33 as a guide.
Configuring Avaya 3100 MC - Client for Windows Mobile Table 11: Owner Information pane fields Field Description Home Phone Number Enter your home number. You can direct a call to this contact number when: Custome1 Number Custom2 Number • you call someone using the Call From menu option • you receive an incoming call and call screening mode is enabled Enter your first custom number, such as a temporary business number.
Configuring Avaya 3100 MC - Client for Windows Mobile Figure 4: Buddy settings Table 12: Buddy Settings pane fields Field Description Auto Presence Enabled Select this check box to have the Avaya 3100 MC - Client receive automatic presence notifications from mobility enabled buddies when their status changes. Note: Auto Presence Enabled uses extra airtime and reduces battery life if the Avaya 3100 MC - Client for Windows Mobile connects to the network for every status update. 4. Select Done.
Configuring Avaya 3100 MC - Client for Windows Mobile Figure 5: Instant Messaging settings Table 13: Instant Messaging pane fields Field Description New IM Alert If this check box is selected and you receive a new instant message, the New IM Alert appears allowing you to ignore the message or to reply to it. If you choose to ignore the message, you can review it later in the IM Session.
Operating Avaya 3100 MC - Client for Windows Mobile Operating Avaya 3100 MC - Client for Windows Mobile This section contains the following topics: • “Starting and exiting” on page 37 • “Logging on and logging off” on page 37 • “Hiding Avaya 3100 MC - Client for Windows Mobile” on page 39 • “Overview of the main pane” on page 40 • “Navigating panes” on page 41 • “Call Alert mode and Phone Volume” on page 43 • “Native dialpad” on page 43 Starting and exiting This section describes how to start
Operating Avaya 3100 MC - Client for Windows Mobile 1. To log on, select Menu, Login. The Login status indicator changes to Online. Logging on while the Avaya 3100 MC - Client device is cradled Depending on how Microsoft ActivSync is configured, you may lose wireless network connectivity when you cradle your device. If this happens, you can reestablish a connection by logging off and logging on again. Your data traffic is then transmitted over the USB connection.
Operating Avaya 3100 MC - Client for Windows Mobile Log on status messages Various status messages display as the Avaya 3100 MC - Client attempts to log on to the system. Message urgency is indicated by colored icons: • Blue icon—For information purposes only. No corrective action is required. • Yellow icon—Warning. You may need to reconfigure the application or device settings. • Red—Error. Before you can log on to the system, you must reconfigure the application or device settings.
Operating Avaya 3100 MC - Client for Windows Mobile Overview of the main pane After you configure Avaya 3100 MC - Client for Windows Mobile (see “Initial configuration” on page 25), the Main pane appears whenever you start the application. The Main pane provides access to the full functionality of the Avaya 3100 MC - Client for Windows Mobile. Main pane components Phone pane Access the Phone pane to place calls or to manage telephony features such as call hold and call transfer.
Operating Avaya 3100 MC - Client for Windows Mobile Navigating panes Use the controls on your Windows Mobile device to navigate through panes and menus, enter data, and to select options. Use the left and right buttons to use menu bar commands. Use the START button to open the Start menu. Controls available depend on the device that you are using (PDA or Smartphone). See Figure 14 "Device controls and functions" on page 41.
Operating Avaya 3100 MC - Client for Windows Mobile To collapse a pane, select the collapse arrow or soft key, or double-click the title bar. Summary and Detail views Select the left tab button to view summary information on a pane. To view detailed information on a pane, select the right tab button. Talk and end buttons Use the TALK (green) and END (red) buttons to access features.
Operating Avaya 3100 MC - Client for Windows Mobile Square screen If your Windows mobile device has a square touchscreen, the Avaya 3100 MC - Client displays in portrait mode at all times, with the following limitations: • Scrolling is required to access some screen components. • The integrated numeric keypad is not available on the Call Dialpad pane (use the hardware keyboard instead).
Operating Avaya 3100 MC - Client for Windows Mobile 44 NN42030-107 Avaya 3100 Mobile Communicator 3.1 Standard 03.
Advanced functions Advanced functions This section contains the following topics: • “Placing calls” on page 45 • “Calling individuals” on page 46 • “Receiving calls” on page 51 • “Using the Mid-Call features” on page 52 • “Managing buddies” on page 54 • “Configuring your Presence Status” on page 59 • “Searching for people” on page 61 • “Working with Groups” on page 63 • “Instant Conferences” on page 65 • “Managing instant messages” on page 69 • “Tracking IM sessionHistory (Call Logs)”
Advanced functions Figure 7: Direct outbound mode. Call-me-First mode In Call-me-First mode, your calls are completed in two steps. First, the enterprise telephony system calls you. After you answer, the system calls the other party. See Figure 8 "Call-me-First mode" on page 46. Figure 8: Call-me-First mode Call Intercept The Avaya 3100 Mobile Communicator can intercept calls made from the native device dialer, so that calls can go through the Avaya 3100 Mobile Communicator Gateway.
Advanced functions 1. Expand the Phone pane. 2. Select Menu, Input Method, Use Keypad. 3. Dial the contact extension or Public Switched Telephone Number (PSTN) number. Note 1: To enter the plus (+) sign, press and hold the 0 key on the dialpad. Note 2: To facilitate dialing, configure the Alpha to Digit map. For more information, see “Call settings” on page 29 4.
Advanced functions 1. Expand the Phone pane. 2. Select Menu, Input Method, Use Quick Dial List. 3. Scroll through the Quick Dial List and highlight a record. 4. If required, enter a dialing prefix to the entry. 5. Do one of the following to select your number: — To use your mobile number in Direct Outbound mode, press the green call button or select Menu, Call. — To use your mobile number in Call-me-First mode, select Menu, Call me First, and select Call from the menu.
Advanced functions The native phone appears and the system places the call on the cellular network. CAUTION If the native phone does not appear, hide or close the Avaya 3100 MC - Client, press the green Call button on your device, and redial the emergency number in the native phone. Calling from the Buddy list When you place a call from the Buddy List, you can select a buddy and use any of the buddy’s configured telephone numbers. Calling a buddy 1. Expand the Buddy List. 2.
Advanced functions Figure 11: Calling from buddy list Calling from the History or Search panes You can place calls from the History or Search panes. 1. Expand the History or Search panes. 2. Search and highlight the contact that you want to call. 3. Select Menu, Call . 4. Enter a prefix before the number, if one is required. 5. Do one of the following to select your number: — To use your mobile number in Direct Outbound mode, press the green call button or select Menu, Call.
Advanced functions 3. Select and hold the Select button. OR Tap and hold the screen. The contact menu appears. 4. Select to Call Work, Home or Mobile with Avaya 3100 MC - Client. The number appears in the Avaya 3100 MC - Client for Windows Mobile. 5. Enter a prefix before the number if one is required. 6. Do one of the following — To use your mobile number in Direct Outbound mode, press the green call button. Alternatively, select Menu, Call.
Advanced functions 1. While a call is connected on the desktop telephone, press the Handoff key. 2. Answer the call on the Avaya 3100 MC - Client. 3. Hang up your desktop telephone. Moving a call from the Avaya 3100 MC - Client to the desktop telephone You can move a call from your Avaya 3100 MC - Client to your desktop telephone. 1. While a call is connected on the Avaya 3100 MC - Client, press the Handoff key on your desktop telephone. 2.
Advanced functions Call transfer Transfer calls while you are connected to the network. The following transfer types are available: • Blind: Transfer the call without talking to the other party. • Supervised: Talk to the other party before transferring the call. Transferring a call 1. While a call is connected, select Feature. 2. Dial the number to transfer the call. 3. Select Hold & Call. The call is placed on hold. The held call hears music, if configured on the system. 4.
Advanced functions Note: You can execute a variety of dialpad controls (for example, *5) while you are engaged in a threeparty conference. However, if any of the participants are engaged in a second conference, the dialpad controls are no longer available. Managing buddies Buddies are people that you call frequently. Each buddy has a name and at least one contact location (extension or telephone number).
Advanced functions Table 16: Adding a new buddy Field Settings Mobile Number Enter the mobile phone number for your buddy. Select it when you place an advanced call to the buddy. Other1 Enter an additional phone number for your buddy such as a second office number. Select it when you place an advanced call to the buddy. Other2 Enter an additional phone number for your buddy such as a second home number. Select it when you place an advanced call to the buddy.
Advanced functions Adding a buddy from the History pane 1. Expand the History pane. 2. Scroll to and highlight the entry for the person you want to add. 3. Select Details. 4. Select Menu, Add to Buddies. Your new buddy is added to the local address book. Figure 13: Importing a buddy from the History paneImporting a buddy from the Search pane Search for people in your mobile device address book, and in the corporate directory maintained by your organization.
Advanced functions Importing a buddy from the native address book You can import buddies from the native address book. Using the native contact search, you can select an individual entry and add it to the Avaya 3100 Mobile Communicator Web UI for Windows Mobile as a buddy. You can add buddies from your SIM card using this mechanism. Importing a buddy from the native address book 1. Navigate to the Contacts pane. OR Select Start, Contacts. 2. Scroll to the entry for the person to add. 3.
Advanced functions Figure 14: Viewing presence status of buddiesViewing the presence status of a group of buddies 1. Expand the Buddy list. 2. Scroll and highlight a group. 3. Select Menu, Query Presence. The Buddy list updates with the current presence status for the selected buddies. Buddy presence status indicators Buddy presence status indicators follow the same scheme as your presence status indicators. For more information, see “Configuring your Presence Status” on page 59.
Advanced functions Adding a buddy to a group Add all of your buddies to the groups you define on the Avaya 3100 MC - Client for Windows Mobile. Groups facilitate user management, and enable you can place Instant Conferences. For details on how to create and use groups, see “Working with Groups” on page 63. Adding a buddy to one or more groups 1. Expand the Buddy List pane. 2. Scroll to and highlight the buddy you want to add. 3. Select Menu, Edit Buddy. 4. Select the Part of Groups box.
Advanced functions • Yellow—Available but unable to respond • Red—Not available and cannot respond Presence status indicators are as follows: Table 17: Presence status and availability indicators Presence Status Availability Notes Available Green Default Away Yellow Extended Away Yellow Busy Yellow Do Not Disturb Red All incoming calls to the device are ignored, but will ring on other devices of clients that the user is logged in to. If not answered, the call will forward to voice mail.
Advanced functions Figure 15: Changing your presence statusConfiguring a custom message 1. Expand the My Status pane. 2. From the Online Status pane, enter a value in the Custom Note field. 3. Select Menu, Set Status. Your custom note is appended to the configured presence status. Your online buddies can immediately see your new status. Canceling a custom message 1. Expand the My Status pane. 2. From the Online Status pane, clear the Custom Note field. 3. Select Menu, Set Status.
Advanced functions Searching the local directories 1. Expand the Search pane. 2. Enter as much of the contact’s name as you know. You can enter one name (first or last) or both names (with a space between the names). For example, — Enter mar to search for Mary Smith or Jim Martins. — Enter jo sa to search for John Sanders or Sam Johnson. As soon as you start typing, the search results list displays. Every letter that you type causes the list to be updated with entries from the local directory.
Advanced functions Viewing search details Viewing detailed information for a person on the search results list 1. Expand the Search pane. 2. Perform a search. 3. Highlight the entry you want to examine. 4. Select the Details button. 5. On the Search Detail pane, review the following information: — Presence status (if available) — Full Name — Company Name — Home Number — Work Number — Mobile Number — Other1 — Other2 Working with Groups By using groups, you can associate buddies who have similarities.
Advanced functions 1. Expand the Buddy List. Figure 17: Adding a new groupSelect Menu, New Group. 2. Enter the name of the new group. Figure 18: Adding the name of the new groupSelect Menu, Done. Your new group is added to the local address book. Note: You must add buddies to the group before placing a group call. For more information, see “Adding a buddy to a group” on page 59 64 NN42030-107 Avaya 3100 Mobile Communicator 3.1 Standard 03.
Advanced functions Changing a group name Changing the name of a group 1. Expand the Buddy List. 2. Highlight the group you want to edit. 3. Select Menu, Edit Group. 4. Change the group name. 5. Select Menu, Done. The group name is updated in the local address book. Deleting a group Deleting a group 1. Expand the Buddy List. 2. Highlight group you want to delete. 3. Select Menu, Remove Group. The group is deleted from the local address book. Buddies in the group are reassigned to the All group.
Advanced functions On a regular telephone, users accept the Instant Conference by pressing the # key or reject it by hanging up. On the Avaya 3100 MC - Client for Windows Mobile, users select one of the following menu options: — Accept here to join in the Instant Conference immediately on the mobile device. — Accept to join in the Instant Conference immediately on another device. — Join later to be prompted to join the Instant Conference at a later time.
Advanced functions Table 18 "Instant conference dialpad controls" on page 67 contains the list of Instant Conference dialpad controls. Table 18: Instant conference dialpad controls Dialpad control Function Comments ** Starts the help system. The help system plays a recorded list of command descriptions. For example, “Press 6 to mute or unmute yourself.” The functions you can perform depend on your status as either an Instant Conference initiator or participant. *1 Terminates an Instant Conference.
Advanced functions Table 18: Instant conference dialpad controls Dialpad control Function Comments *8 An announcement lists all of the participants in an Instant Conference. All Instant Conference participants can use this feature to find out who is in the call. When a roll call is in progress you cannot hear the other participants talking. *9 Stops the help system. The help system stops playing the recorded list of command descriptions.
Advanced functions — Accept to join in the Instant Conference immediately on another device. — Join Later to be prompted to join the Instant Conference at a later time. To configure your reminder notification interval, see “Initial configuration” on page 25. — Decline to reject the Instant Conference. A tone is heard each time someone joins the Instant Conference. Deleting an Instant Conference entry 1. Expand the Instant Conference pane. 2. Scroll through the list and highlight a record. 3.
Advanced functions Sending an instant message to a buddy 1. Expand the IM Session, Buddy list, History or Search panes. 2. Highlight a name or log entry. 3. Select Menu, Send IM. Note: This menu item is not available if you and your buddy are not on the same Avaya 3100 Mobile Communicator Gateway. The IM Sessions pane appears; presence information appears if it is available. 4. On the IM Sessions pane, do one of the following: — Type your message in the Send IM Messages field.
Advanced functions Table 19 "Instant message alerts" on page 71 illustrates the type of alert you receive, depending on the current state of the Avaya 3100 MC - Client. Table 19: Instant message alerts Configuration Current Pane Audible tone New IM Alert disabled IM Sessions Yes, if you enable tone notification on the device. If someone sends you a message while you are typing them a message, their message is added to the IM Sessions pane.
Advanced functions Tracking IM Sessions The IM Sessions pane lists the last 50 messages that you exchange with as many as three of your buddies. Older records are deleted automatically. Managing IM Sessions 1. Expand the IM Sessions pane. 2. Select a buddy tab and do one of the following: — Select a date folder to review the messages that you have exchanged. — Select Menu, Send IM, type a message or select a canned message, and then select Menu, Send to send an instant message.
Advanced functions Expand the History pane on the Main pane. The following figures show the possible icons. Figure 21: Voice call icons Figure 22: Instant message icons Figure 23: Instant Conference icons Figure 24: System notification icons Sorting and filtering History entries Sort entries in the History pane by name, record type (for example, system notification, call), or time received. Filter the list to display only missed calls, incoming calls, or outgoing calls. 1. Expand the History pane. 2.
Advanced functions The entries display according to the specified filter preference. Viewing detailed log information 1. Expand the History pane. 2. Highlight the entry you want to examine. 3. Select Details. 4.
Advanced functions Managing voice mail You can check if you have new messages and quickly call the voice mail system to access your mailbox. Tracking the status of your messages The Main pane and Voice Mail pane indicate if you have new messages. Calling the voice mail system Calling voice mail 1. Expand the Voice Mail pane. 2. Select Call VoiceMail. Avaya 3100 MC - Client for Windows Mobile calls the voice mail system. 3. Enter your voice mailbox number and password when prompted. 4.
Advanced functions 76 NN42030-107 Avaya 3100 Mobile Communicator 3.1 Standard 03.
Troubleshooting Troubleshooting This section contains the following topics: • “Data connection between Avaya 3100 MC - Client for Windows Mobile and Avaya 3100 MC Gateway” on page 77 Data connection between Avaya 3100 MC - Client for Windows Mobile and Avaya 3100 MC Gateway To verify that the data connection between Avaya 3100 MC - Client for Windows Mobile and Avaya 3100 Mobile Communicator Gateway is established: 1.
Troubleshooting Figure 27: Avaya 3100 Mobile Communicator Gatewaysplash screen 78 NN42030-107 Avaya 3100 Mobile Communicator 3.1 Standard 03.
Acronyms Acronyms Table 20 lists the acronyms used in this guide.
Acronyms 80 NN42030-107 Avaya 3100 Mobile Communicator 3.1 Standard 03.
Quick reference Quick reference You can print this chapter to carry for quick reference. Getting started The Avaya 3100 Mobile Communicator - Client for Windows Mobile provides enterprise collaboration functionality to a Windows Mobile mobile device using a data (Internet) connection over the cellular network. Avaya 3100 MC - Client for Windows Mobile allows real-time communication with the Avaya 3100 Mobile Communicator Gateway and Avaya Communication Server.
Quick reference Dialing calls Dialing a number: 1. Expand the Phone pane. 2. Select Menu, Input Method, Use Keypad. 3. Dial the contact extension or PSTN number. Note: To enter a + sign, press and hold the 0 key on the dialpad. 4. Specify your own number by doing one of the following: • To use your mobile number in Direct Outbound mode, press the green Call button or select Menu, Call. • To use your mobile number in Call-me-First mode, select Menu, Call-me-First, and then select Menu, Call.
Quick reference Calls to an emergency number Calling an emergency number 1. Ensure that the cellular connection is active. 2. 3. 4. 5. Expand the Phone pane. Select Menu, Input Method, Use Keypad. Dial the emergency number (for example, 911). Press the green Call button or select Menu, Call.
Quick reference Instant messages Sending an instant message to a buddy 1. Navigate to the Buddy List, History or Search panes. 2. Highlight a buddy, log entry, or search entry. 3. Select Menu, IM. 4. On the IM Sessions pane, do one of the following: — Type your message in Send IM Messages field. — Select Menu, Canned Messages, . 5. Select Menu, Send.