IP Office 5410/2410 Phone User Guide Issue 3f (7th October 2005)
Table of Contents The 2410 Telephone................................................................................................................... 4 Overview..................................................................................................................................................... 4 Call Appearance Keys ................................................................................................................................ 6 System Features...............................
Table Of Contents Diverting Calls .......................................................................................................................................... 30 Do Not Disturb .......................................................................................................................................... 30 Voicemail ..................................................................................................................................................
The 2410 Telephone Overview This guide covers the use of the Avaya 2410 and 5410 phones, on Avaya IP Office. Both phones are similar, however the 5410 is only supported on the IP Office whereas the 2410 is supported on a range of Avaya phone systems.
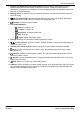
The 2410 Telephone 1. Display, Call Appearance and Feature buttons: Call Appearance Keys allow the user to handle multiple calls and the display shows call information. Details on system features (allocated by your System Administrator) can also be displayed. See Call Appearance Keys and Overview of the Function Keys. 2. Message lamp: Lit when the user has voicemail messages. Can also be set to flash when the phone is ringing. 3. 4.
2410user Call Appearance Keys Normally, the first page of the main call handling screen contains three keys set as 'call appearance' keys. These are allocated to you by your System Administrator and are indicated as a=, b= and c=. Your System Administrator can change a call appearance key with: • A Bridged Appearance A bridged appearance key matches the status and operation of the Call Appearance Key on a pre-defined colleague’s telephone.
The 2410 Telephone System Features System Features can only be set against soft Function Keys by your System Administrator. However, your System Administrator may allocate you two ‘self administrator’ features that will enable you to add System Features to your soft Function Keys. Refer to Overview of the Function Keys for details of the System Feature that can only be allocated to you by your System Administrator.
Basic Call Handling Features Answer a Call When a call arrives at your phone, you hear a ringing tone and a blinking bell icon ( ) appears on the associated call appearance. To answer an incoming call Do one of the following: • If you are not active on another call, answer the call using your handset, headset, or speakerphone (see Speakerphone). • If you are active on a call already, place the active call on hold (see Hold), and then answer the incoming call by selecting the call appearance key.
Basic Call Handling Features Clearing a Call To clear an established call either: 1. Replace the handset or Drop. You will hear dial tone, unless you are in ‘call center mode’ of working when you 2. Press will then hear silence. Headset Working When a headset is to be used on your phone, it must be plugged in to the headset socket on the base of your phone. To activate the headset and switch off the handset, press Headset. The lamp beside the button is illuminated when headset working is activated.
2410user Speakerphone The two-way built-in speakerphone allows you to make and answer calls without lifting your handset. Keep in mind that two-way speakerphones may not operate satisfactorily in every environment (such as in very noisy locations). To make or answer a call without lifting the handset, or to use the speakerphone with any feature 1. Press Speaker. The LED beside the button illuminates. 2. Make or answer the call, or access the selected feature. 3.
Basic Call Handling Features Redial The Redial feature automatically redials a previously dialed extension or outside number (up to 24 digits). Your phone will store the up to ten of the last numbers dialed. Note: If you have dialed the same number twice in succession, it will only have one appearance in the redial list. To redial previously dialed number: 1. Press Redial. Use and to step through the entries. When you have located the required number, press the associated key.
2410user Transfer The Transfer feature allows you to transfer a call from your telephone to another extension or outside number. To transfer the current call to another extension: 1. With a call in progress, press Transfer 2. When you hear dial tone, dial the number to which the call is to be transferred. 3. Do one of the following: • To transfer the call without announcing it, either hang up or press Transfer again. The transfer is complete. The transfer is complete.
Basic Call Handling Features Conference The Conference feature allows you to conference other parties (including yourself) into a call. Notes: 1. The number of parties allowed in a conference is controlled by your telephone system. 2. Two Call Appearance keys are required for the conference feature. To add another party to a call 1. Press Conference. 2. Dial the number of the person you want to add to the call. 3. Wait for an answer.
Using Speed Dials Overview of Speed Dials The phone can store up to 48 personal speed dials. The list of these speed dials is accessed by pressing SpDial. If SpDial is not shown, press and softkey. • Caution: Speed dials are stored on the phone. Consequently, any loss of power to the phone will result in loss of the stored speed dials. • The speed dial list is sorted alphabetically. • Press • Press the appropriate letter key to move direct to the first page with a matching name.
Using Speed Dials Adding a New Speed Dial 1. Press SpDial. If SpDial is not shown, press any Soft Key. • Press Add. If a message stating that the speed dial list is full appears, you must first delete an existing entry before adding any new entry. See Deleting a Speed Dial. • You can switch between Name and Number entry by pressing the item you want to edit. The options also change accordingly. key next to the 2. With Name selected, begin entering text using the telephone keypad.
2410user Deleting a Speed Dial 1. Press SpDial. If SpDial is not shown, press any Soft Key. 2. Press Delete. 3. Select the speed dial entry you want to delete. • Press and to display different pages of speed dials or key the first letter of the required name to jump to the page with a matching entry. 4. When the required entry is displayed, press the adjacent confirmation will appear. 5. Press Yes to delete the entry or 6. Select another entry to delete or press or key.
Using the Call Log Overview of the Call Log The phone maintains a call log, accessed by pressing Log. This log can store up to 48 entries. These can be a combination of incoming answered calls, incoming unanswered calls and outgoing calls You can select which types of calls are included in the log. You can also use call log entries to make return calls or convert the entry into a speed dial for future use. • WARNING: Calls that are made using pin codes and other information will appear in the call log.
2410user Using the Call Log You can make calls directly from the call log. Whilst in the call log you can still make a call by going offSpeaker and dialing a new call. Similarly, you can still receive calls and handle them hook, pressing using the dial pad key functions. Viewing the Call Log 1. Press Log. If Log is not shown, press any Soft Key. 2. At default, Missed calls are displayed first. You can select from InAns or Outgo. Alternatively, press More and select All to display all three options.
Using the Call Log Deleting a Call Log Entry 1. Press Log. If Log is not shown, press any Soft Key. 2. At default, Missed calls are displayed first. You can select from InAns or Outgo. Alternatively, press More and select All to display all three options. To return to Missed or InAns or Outg, press Back and make your selection. 3. Press and to display different pages of log entries. 4. When you locate the entry you want to call, press the or key next to the entry. 5. Press Delete.
Changing Options Changing Ringer Options The IP Office uses 'distinctive ringing' for different types of calls - a repeated single ring for internal calls, a repeated double ring for external calls and a single ring followed by two short rings for ringback calls. These options are fixed by the IP Office. The phone's own menus allow its ringer sound to be personalized so you can recognize it from other ringing phones. To change the ringer sound: You can choose from among eight different ring sounds.
Changing Options Adjusting the Display Contrast You can adjust the contrast level on the telephone display. You can choose from among fifteen levels of contrast. 1. Press Exit to exit any other mode, then press any of the 2. Press Option. 3. Press Contrast. A menu with the current contrast setting appears. 4. Use the and keys below the display. keys to adjust the level of contrast. 5.
2410user Language When the phone is first installed, it is set to display screen text in English. You can select the language that you would prefer from the following: • English, German (Deutsch), French (Français), Spanish (Español), Italian (Italiano), Dutch (Nederlands), Portuguese (Português) or Japanese (Katakana characters). Note: This does not alter your user language setting on the telephone system. 1. Press Exit to exit any other mode, then press any of the 2. Press Option.
Changing Options Default Phone/Erase All Settings The Erase All option allows you to reset all personalized settings entered through the phone's Option menus (except contrast level). It also deletes all entries in the phones Call Log and Speed Dial lists. 1. Press Exit to exit any other mode, then press any of the 2. Press Option. 3. Press a or keys below the display. key until a menu entitled "Select item(s) to erase" is displayed. key next to an items to select/de-select it for erasure.
Function Keys Overview of the Function Keys Both the , Function Keys and Soft Keys can be used to access a range of system features. The display adjacent to the key shows the feature name. Some of these features are default features supported by the phone (e.g. SpDial, Log, Option and Label on the Soft Keys) and are always available. Others are system features that can only be programmed by the System Administrator for Function Keys. The main screen has three pages.
Function Keys Function Key Programming If any one of the keys on the telephone is programmed with an Admin or Admin 1 feature, it allows you to program further features against other function keys. Both Admin and Admin1 are allocated to your function keys by your System Administrator and would appear on a menu screen that is similar to the following: The two tables below list the user programmable features available from Admin and Admin1.
2410user Shorthand Programming Mode 1. Press Admin or Admin 1. See Display Key Programming. 2. The Admin or Admin1 menu appears as follows: Admin Pages With the exception of Expl1?, the names shown are the features that you can assign to soft keys. When Admin has been selected you can display the full name of the feature by pressing Expl?. See Longhand Programming. Admin1 Page • Similarly, when Admin1 is pressed, you can assign any one of the functions shown to a soft key. 3.
Function Keys Longhand Programming 1. Press Admin or to switch to longhand programming mode. 2. Pressing Expl? 3. Press Next Admin 1. See Display Key Programming. . until the required function required is shown, then press Selct . 4. If the function requires some data to be entered, [ is shown at the bottom of the display. Enter the data using the normal telephone keypad. 5. The upper part of the display reverts to showing the functions currently assigned to each key. 6.
2410user Changing Function Key Labels You can replace the default label shown for any function key with you own custom label of up to 13 characters. 1. Press Exit to exit any other mode, then press any of the 2. Press Label. keys below the display. • Edit allows you replace the current labels, see the steps below. • Inspect displays the default labels. • Restore replaces any custom labels with the default labels. • Done exits the button labelling options. 3. Press Edit. 4.
System Features Introduction As well as your phones specific features, you can access a number of system features by dialing short codes. These instructions are for the system's default configuration. They assume that you are using the default feature codes. It also assumes that you have full access to all features and the public telephone network.
2410user Call Forwarding Your calls can be forwarded to another extension or an external number either when you are away from your desk (on no answer), when your extension is busy, and all calls (for example when you go on holiday). • To switch forward direct station (i.e. not Hunt Group) calls on dial *01, to switch it off dial *02. • To switch forward on busy on dial *03, to switch it off dial *04. • To switch forward on no answer on dial *05, to switch it off dial *06.
System Features Voicemail Note that not all systems support voicemail or have voicemail installed. • To switch voicemail on dial *18, to switch it off dial *19. • To retrieve your voicemail, use the code *17. Your voicemail may be set up to deliver your messages by calling you whenever you hang up: this feature is known as Voicemail Ringback. • To turn Voicemail Ringback on dial *48; to turn it off dial *49.
2410user Default Feature Codes The following are the normal default feature codes available to all users. Your System Administrator may add additional codes for other features and for speed dials. The N where shown, should be replaced by the appropriate number. For example, with *07*N#, replace N with the extension to which you want your calls forwarded when you have forwarding switched on.
Index 0 07*N 32 1 1.
2410user Dial Speed Dial Number 14 Dial 14 Dial Physical Extn 32 Dir 25 Directed Call Pickup 25 Display Contrast Adjusting 21 Display Contrast 21 Display, Call Appearance 4 Diverting Calls 30 Diverting 30 Do Not Disturb 30 Done pressing 21 Done 16, 18, 19 Done 21 Done 21 Done 28 DPkUp 25 Drop 8, 12, 13 E Editing Speed Dial 16 Editing 14 Editing 16 Either Logging 17 Email 31 End speakerphone 10 End 10 English 22 Entering 1.
Index Press Hold 11 Press Keep 26, 27 Press Label 28 Press Language 22 Press Log 18, 19 Press Log Setup 19 Press Next 27 Press Option 19, 20, 21, 22, 23 Press Redial 8, 9, 11 Press Repla 26, 27 Press Ring Options 20 Press Save 18 Press Self Test 21 Press SpDial 14, 15, 16 Press Speaker 10 Press Transfer 12 Press Yes 16 Pressing Add 14 Call Appearance button 11 Done 21 Exit 21 Expl 26, 27 Log 17 Message button 13 RBak 29 Save 19 SpDial 14 SpDial softkey 10 Speaker 8, 18 Pressing 8 Pressing 10 Pressing 11 Pre
2410user Voicemail On 32 Voicemail Pro 31 Voicemail ringback 31 Voicemail Ringback Off 32 Voicemail Ringback On 32 Volume Controls 4 W WARNING 17 Which Calls Setting 19 Which Calls 19 Y Yes 5410/2410 Phone User Guide IP Office Flash Message Lamp 20 set 20 Show Phone Screen 20 Yes 19 Yes 20 Yes 22 Yes/No 19, 22 Your Own Functions Programming 24 Your Own Functions 24 Your Speed Dial List 18 Page 36 Issue 3f (7th October 2005)
2410user Performance figures and data quoted in this document are typical, and must be specifically confirmed in writing by Avaya before they become applicable to any particular order or contract. The company reserves the right to make alterations or amendments to the detailed specifications at its discretion. The publication of information in this document does not imply freedom from patent or other protective rights of Avaya or others.