IP Office 4.
Introduction © 2006 Avaya Inc. All Rights Reserved. Notice While reasonable efforts were made to ensure that the information in this document was complete and accurate at the time of printing, Avaya Inc. can assume no liability for any errors. Changes and corrections to the information in this document may be incorporated in future releases. Documentation Disclaimer Avaya Inc.
Table Of Contents Introduction ................................................................................................................................ 1 About this Guide.......................................................................................................................................1 What's New ..............................................................................................................................................1 IP Office Embedded VoiceMail .............
Introduction About this Guide This guide describes how to install and configure Avaya IP Office Embedded VoiceMail. This guide is for Avaya professional services staff, business partners, and system integrators but can be used by anyone who has been trained to install or configure IP Office Embedded VoiceMail. These instructions assume that you are familiar with IP Office Manager. Further information about Avaya IP Office is available from www.avaya.com/support and also from www.avaya.
Embedded Voicemail Installation Guide IP Office Embedded VoiceMail Overview IP Office Embedded VoiceMail is supported on the IP Office Small Office Edition, IP Office 406 V2 and IP Office 500 control units. Embedded VoiceMail does not require an IP Office license. It provides basic voicemail mailbox operation without requiring a permanent voicemail server PC. It also provides multiple auto-attendant support for incoming calls.
Introduction Embedded VoiceMail Mailbox Features Supported Features Hunt group and user voicemail for the leaving and collection of messages. Auto attendant. For security a voicemail access code can be assigned to any mailbox. This can be changed by the mailbox user or the system administrator. Message waiting indication to suitable phones and IP Office Phone Manager. Message waiting indication for hunt group mailboxes can be assigned to specified users. Internal ringback on new messages.
Embedded Voicemail Installation Guide Languages Supported Embedded VoiceMail supports a range of language prompt sets. The following languages are supported for Embedded VoiceMail. The matching folder name is shown in () brackets.
Installing Embedded VoiceMail Overview The installation process can be divided into the following steps: 1. Gather Setup Information The Setup Information section contains a number of forms which can be used to gather customer information about required settings. Completing these forms before installation will assist in speeding up the installation process. 2. Hardware Installation The physical installation of the memory card. This process varies according to the IP Office control unit type.
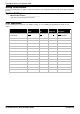
Embedded Voicemail Installation Guide Setup Information Using the following tables to gather customer information before installation will assist and speed up the installation process. System Settings Maximum Record Time: ___________________ (5 to 180 seconds, default 120 seconds). User Mailboxes Use the following form to plan the user mailbox settings. See User Mailbox Configuration for details of each feature.
Installing Embedded VoiceMail Hunt Group Mailboxes See Hunt Group Mailboxes for details of each feature and Message Waiting Indication for how to enter the values. Name Voicemail Code Voicemail On Users to receive group message waiting indication Possible Values (default underlined) Blank or 4 to 15 digits On or Off None Embedded VoiceMail Installation IP Office 4.
Embedded Voicemail Installation Guide Auto Attendant Setup Auto Attendant Name: ____________________ (Up to 12 characters) Route to Auto Attendant: ______________________________________ ______________________________________________________________ (Detail which calls should go to the auto attendant and the routing to be used) Maximum Inactivity: ________________ (5 to 20 seconds, default 8 seconds) Fallback Destination: ____________________ Time Profiles Remember that IP Office configuration
Installing Embedded VoiceMail Menu Actions Action Key 0 1 2 3 4 5 6 7 8 9 0 * # Transfer to Attendant Normal Transfer Replay Greeting Blind Transfer Dial By Number Not Defined Fax Embedded VoiceMail Installation IP Office 4.
Embedded Voicemail Installation Guide IP406 V2 Installation The following instructions detail the process for installing Embedded VoiceMail for an IP406 V2 system. 1. Check that the following requirements have been met. Hardware: IP Office 406 V2 control unit. No voice compression channels are required. Avaya supplied 512MB Memory (Compact Flash) Card. Configuration: PC, connected to the IP Office network with the IP Office Manager application installed. 2.
Installing Embedded VoiceMail Small Office Edition Installation The following instructions detail the process for installing Embedded VoiceMail for a Small Office system. 1. Check that the following requirements have been met. Hardware: IP Office Small edition control unit with VC (voice compression) channels. Note - Existing systems cannot be upgraded to add additional voice compression channels. Avaya 64MB Small Office Memory (Compact Flash) Card.
Embedded Voicemail Installation Guide IP 500 Installation The following instructions detail the process for installing Embedded VoiceMail for an IP500 system. 1. Check that the following requirements have been met. Hardware: IP Office 500 control unit. No voice compression channels are required. Avaya supplied 512MB Memory (Compact Flash) Card. Configuration: PC, connected to the IP Office network with the IP Office Manager application installed. 2.
Installing Embedded VoiceMail Upgrading Prompts For IP Office 3.0 and higher, Embedded VoiceMail memory cards are supplied with the necessary prompt files preinstalled. Previous releases required that the prompts be initially transferred using TFTP from a PC running IP Office Manager. All the prompts for Embedded VoiceMail can be found in the LVMSound folder on the IP Office Administrator Applications CD.
Embedded Voicemail Installation Guide Upgrade to version 4.0 The instructions to upgrade assume that the files are stored on the CD. If you have extracted the files onto your hard disk please replace the reference to the CD with the directory that the files were extracted into. To upgrading a Small Office or IP 406v2: 1. Install the 4.0 software and wait for the 'Voicemail Activated' message to be displayed on the SysMonitor utility. 2.
Configuring Embedded VoiceMail System Configuration The system configuration for Embedded VoiceMail is common to all the IP Office systems that support Embedded VoiceMail memory cards. To configure an IP Office for Embedded VoiceMail: 1. Open IP Office Manager and receive the IP Office configuration. 2. In the Navigation Pane click System and select the system. 3. View the System tab. The Locale setting should match the language for spoken prompts required from the Embedded VoiceMail.
Embedded Voicemail Installation Guide User Mailbox Configuration Embedded VoiceMail creates a mailbox for each user on the IP Office system. Calls are routed to the mailbox whenever the user's extension is busy or does not answer within the users allocated no answer time. This includes calls that are forwarded to another internal destination.
Configuring Embedded VoiceMail To change voicemail configuration for an individual: 1. Open IP Office Manager and receive the IP Office configuration. 2. In the Navigation pane click User and select the individual user. 3. View the Voicemail tab. 4. (Optional) Enter a voicemail code between 4-15 digits in the Voicemail Code field. This is required when users retrieve voicemail messages remotely, for example from another user's extension or from an external telephone.
Embedded Voicemail Installation Guide Remote Mailbox Access The standard methods for remote mailbox access apply to users or to hunt groups. Remote Mailbox Access is defined as: Accessing a mailbox from an extension that does not match the mailbox number. External caller access to voicemail to collect messages from a mailbox. WARNING Where remote access is setup for any mailbox there must be a mailbox access code is set for the user or hunt group.
Configuring Embedded VoiceMail Hunt Group Mailbox Configuration Overview Embedded VoiceMail creates a mailbox for each hunt group on the IP Office system. Calls are sent to the mailbox only when each available group member has been rung for the group's set ring time. The group mailbox can be configured either through the mailbox (refer to the Embedded VoiceMail User Guide) or through the hunt group settings in the IP Office Manager.
Embedded Voicemail Installation Guide Message Waiting Indication By default no message waiting indication is sent to any user for a hunt group mailbox. The following process shows how to give a user message waiting indication from a hunt groups mailbox. The method of indication will depend on the type of telephone the user has and whether they are using IP Office Phone Manager. 1. Start IP Office Manager and receive the IP Office configuration. 2. Click User to display the list of existing users. 3.
Configuring Embedded VoiceMail Hunt Group Mailbox Access By default no user has access to a hunt group mailbox until specifically configured for such access. Hunt group mailboxes can be accessed using the following methods: Message Waiting Indication Users who have been assigned hunt group message waiting indication are also given methods to access the hunt group mailbox. The method will depend on the telephone and/or software they are using. For more information, see Message Waiting Indication. 1.
Embedded Voicemail Installation Guide Configuring Queues If hunt group queuing options are enabled, a call will be held in a queue when all available extensions in the hunt group are busy. Queuing is configured for each hunt group in IP Office Manager. When queuing is selected, announcements can be played to the queued caller. For more information, see Configuring Queue Announcements. To configure queuing for a hunt group: 1. Open IP Office Manager. 2.
Configuring Embedded VoiceMail Configuring Queue Announcements When a callers is in a queue, announcements can be played to the queued caller. The announcements are activated in IP Office Manager. For more information, see the IP Office Manager help. To configure your announcements: 1. Open IP Office Manager. 2. In the Navigation pane click HuntGroup and select the hunt group. 3. View the Announcements tab. 4. Check Announcements On.
Embedded Voicemail Installation Guide Auto Attendant Configuration Overview In addition to basic voicemail operation, you can create auto attendants using Embedded VoiceMail. Up to 4 auto attendant services are supported. The IP406 V2 and IP500 support up to 4 simultaneous calls to Embedded VoiceMail services. The Small Office Edition supports up to 10 simultaneous calls to Embedded VoiceMail depending on available voice compression channels.
Configuring Embedded VoiceMail Create an Auto Attendant The following process shows by example the setup for an auto attendant for Embedded VoiceMail. In this example the auto-attendant should give callers the option to press 0 for reception (hunt group 200) or 1 for sales (hunt group 301). For more information, see the IP Office Manager help. To create an auto attendant: 1. Start IP Office Manager and load the required configuration. 2. Click Auto Attendant. Any existing Auto Attendants are listed. 3.
Embedded Voicemail Installation Guide 8. The option to press 1 for sales (hunt group 301) is entered by: Click within the Key 1 row. Click Edit. Select the action Normal Transfer from the available options. Select the required destination, for this example the group Sales. Click OK. 9. Click OK to save the auto attendant. Short codes are automatically created for the auto attendant and the codes can be viewed in the Auto Attendant tab. 10.
Configuring Embedded VoiceMail Recording Prompts When a new auto attendant is created, a number of short codes are automatically added to the system short codes table. One short code is created for each auto attendant action. The short codes allow the recording of the various auto attendant prompts. The short code telephone number indicates the name of the auto attendant service and which prompt the short code records. For example, an auto attendant called 'Example' is created.
Embedded Voicemail Installation Guide Routing Incoming Calls to an Auto Attendant An integral voicemail auto attendant created can be specified as a destination in the IP Office Incoming Call Routes table. Internal callers can access an auto attendant through a programmed DSS button or Phone Manager speed dial. To route incoming calls to an auto attendant: 1. Start IP Office Manager and load the required configuration. 2. Click Incoming Call Route and select the required route. 3. View the Standard tab.
Configuring Embedded VoiceMail Transferring Calls to an Auto Attendant Normally calls are directed to an auto attendant by an IP Office incoming call route. However it can also be useful to transfer calls received at an internal extension to an auto attendant. You can transfer calls to an Auto Attendant by: Using Programmed Buttons. Using Phone Manager. Using SoftConsole. Using Short Codes.
Embedded Voicemail Installation Guide Using SoftConsole To create an auto attendant speed dial: 1. Click the required BLF Group tab. 2. Right-click the speed dial panel and select New > BLF Group Member. The New BLF Group Member window opens. 3. In the Name field, enter a name for the Auto Attendant. 4. In the Number field, enter AA:Name where Name matches the name of the auto attendant. 5. Click OK. To transfer a call using the Speed Dial: 1.
Configuring Embedded VoiceMail Using Auto Attendant to Access Voicemail A useful function in auto attendants is to let callers access their own voicemail mailbox. This can be achieved by first creating a short code and then using the short code as an auto attendant destination. To create a short code for remote access: 1. Start IP Office Manager and load the required configuration. 2.
Miscellaneous Monitoring Embedded VoiceMail The IP Office Monitor application can be used to observe the operation of Embedded VoiceMail. 1. From the Start menu select Programs > IP Office. 2. Select Monitor. 3. From the File menu, click Select Unit. The Select System to Monitor window opens. 4. Enter the Control Unit IP Address and password. Depending on the IP Office system's configuration, the password required is either the system password or the separate monitor password if set. 5.
Embedded Voicemail Installation Guide Short Codes Default Short Codes Embedded VoiceMail supports many of the same short codes available for VoiceMail Lite and VoiceMail Pro. The following default system short codes can be used with Embedded VoiceMail. Collect Messages: *17 Can be used by users to access the mailbox associated with their extension. Voicemail On/Off: *18/*19 Switches the diverting of callers to the user's mailbox on/off.
Miscellaneous Button Programming The same features used for Embedded VoiceMail short codes can also be assigned to telephone buttons. 1. Start IP Office Manager and receive the IP Office configuration. 2. Click User to display the list of existing users. 3. Click the required user. 4. Click the Button Programming tab. 5. Click the button line that you want to change. Click Edit. The Edit Button fields are shown at the bottom of the form. 6. Click at the end of the Action field.
Embedded Voicemail Installation Guide Visual Voice A user can be given a display menu to user for access to their mailbox. The menu provides the user with options to listen to messages, send messages, change their greetings and password. Note The Visual Voice feature is not available on all telephones. For more information, see the appropriate telephone guide. To give a user access to Visual Voice: 1. Start IP Office Manager and receive the IP Office configuration. 2.
Miscellaneous Backing Up and Restoring Messages The messages on the memory card used for Embedded VoiceMail can be backed up and restored. Note however that restore is a complete restore, overwriting the current mailbox messages and greetings. It is not possible to backup and restore selected mailboxes, messages and/or greetings. Backup and restore requires a PC with a memory card reader able to show the card as an additional removable drive.
Embedded Voicemail Installation Guide Loading Other Files onto the Memory Card The Compact Flash memory card used with the Small Office Edition, IP406 V2 and IP 500 systems can be used to store files other than those used for Embedded VoiceMail. For example it can store the holdmusic.wav file. Compact Flash memory cards that are not supplied by Avaya can be used for this type of file storage. However they cannot be used for Embedded VoiceMail.
Index A Actions Transfer...............................................................31 Announcements .......................................................23 Auto Attendant Actions ............................................25 Auto Attendant Configuration Overview ....................5 Auto Attendant DSS Key Create .................................................................29 Auto Attendant Remote Access...............................31 Auto Attendant Speed Dial Create ...........................
Performance figures and data quoted in this document are typical, and must be specifically confirmed in writing by Avaya before they become applicable to any particular order or contract. The company reserves the right to make alterations or amendments to the detailed specifications at its discretion. The publication of information in this document does not imply freedom from patent or other protective rights of Avaya or others.