
User Guide
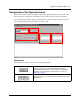


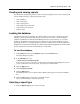
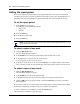


Table Of Contents
- Business Communications Manager
- Attendant Console User Guide
- Contents
- Chapter 1
- Introduction to Attendant Console
- Chapter 2
- Getting started
- Chapter 3
- Using the Attendant Console window
- Chapter 4
- Handling calls
- Answering calls as an attendant
- Using the Target list box
- Transferring a call
- Parking, holding and screening calls
- Screening calls
- Contacting employees using Voice Call
- Linking and Joining calls
- Creating a conference call
- Handling a callback call
- Making a call from your extension
- Handling calls at an employee’s telephone
- Chapter 5
- Maintaining caller and employee information
- Chapter 6
- Generating reports
- Glossary
- Index
90 Chapter 6 Generating reports
P0936571 02.1
Printing a report
When a report is in the Report Viewing area, the Print button is available.
To print a report
1 Click the Print button.
The report prints to the default printer. You can change default printer the from the Printers
folder. Access the Printers folder from the Windows Start menu or Control Panel. Refer to
Attendant Console Help for further information.
2 Choose the pages and number of copies of the report to print.
3 Click the OK button and the report prints
or
click the Cancel button to cancel printing the report.
Note: If you change a report parameter in one of the report controls, the Create Report
button is available and the Print button is unavailable. Do not change any report
parameters before you print the report. If you change a report parameter, you must
regenerate the report before you can print it.