
User's Manual

Page 1
Configuring BayStack and Business Policy Switches
with the Preside Network Configuration System
This card summarizes how to get started using the Preside Network Configuration System (Preside NCS) to configure the
BayStack and Business Policy Switches (BPS) in your network. This document is intended for network engineers who have
some familiarity with Nortel Networks Layer 2 switches.
The Business Policy Switch 2000 requires version 1.2 software. The BayStack 350, 410, and 450 switches require versions
1.3–3.1 software.
Task list
The following summarizes an example of the configuration tasks you can complete using Preside NCS:
• “Configuring the switch IP address”
• “Importing or creating a switch configuration”
• “Adding stack units and media dependent adapters (MDAs)“
• “Configuring ports”
• “Configuring VLANs”
• “Configuring spanning tree groups (STGs)”
• “Configuring an Simple Network Management Protocol (SNMP) trap receiver”
• “Configuring an Extensible Authentication Protocol over LAN (EAP)”
• “Configuring media access control (MAC) security”
• Configuring QoS parameters:
— “Creating interface groups”
— “Accepting default mapping values”
— “Setting up filters“
— “Maintaining policing statistics“
— “Allowing or denying packet reordering“
— “Configuring actions“
— “Configuring meters“
— “Configuring policies”
— “Assigning mapping values”
If you are familiar with the BayStack Console Interface (CI), see the “Mapping Switch Console Interface commands to Preside NCS GUI
properties” table to locate the Preside NCS properties that you want to configure.
Each of the above tasks is explained in more detail in the procedures that follow.
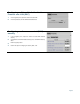
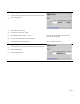
Configuring the switch IP address
NOTE: If you have a properly configured BootP server in your network, it detects
the switch IP address automatically; you do not need to configure the IP address.
1
Connect a serial console and apply power to the switch. After the Nortel
Networks logo screen appears, press [Ctrl]-Y to access the Console
Interface (CI).
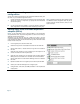
2
At the CI Main Menu, choose IP Configuration/Setup.
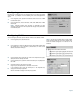
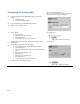
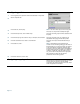
3
Type the in-band IP address or stack IP address, subnet mask, and default
gateway of the switch.
Press [Return] after each entry.
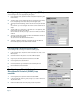
For a standalone switch, you enter the in-band IP
address. For a stack configuration, you enter the stack
IP address.
Click Task list to return to the list of tasks.