
User's Manual
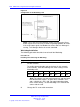
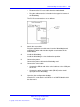
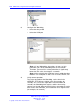
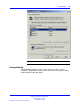
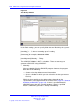
Table Of Contents
- New in this release
- Nortel DECT Messenger Administrator Guide
- Preface
- Nortel DECT Messenger overview
- eCONFIG
- Adding a DECT device to the Messenger system
- DECT Messenger Customer Engineer Manual
- Preface
- DECT Messenger overview
- DECT Messenger in a WAN or MAN network
- Licensing
- Detailed module descriptions
- What is required to run DECT Messenger
- DATABASES in DECT Messenger
- Installing and getting started
- Using eCONFIG
- Using eTM
- eDMSAPI Inbound
- eLOCATION
- Connecting National Instruments modules
- Understanding Security features
- Using eBackup
- Setting up e-mail integration (eSMTP_Server/eSMTP)
- Using eSMTP Server
- Using eSMTP
- Sending SMS messages
- V.24 - RS232 connections (eCAP, eESPA)
- Using Import/Export menu
- eLOG
- Checking diagnostics
140 DECT Messenger Customer Engineer Manual
Step Action
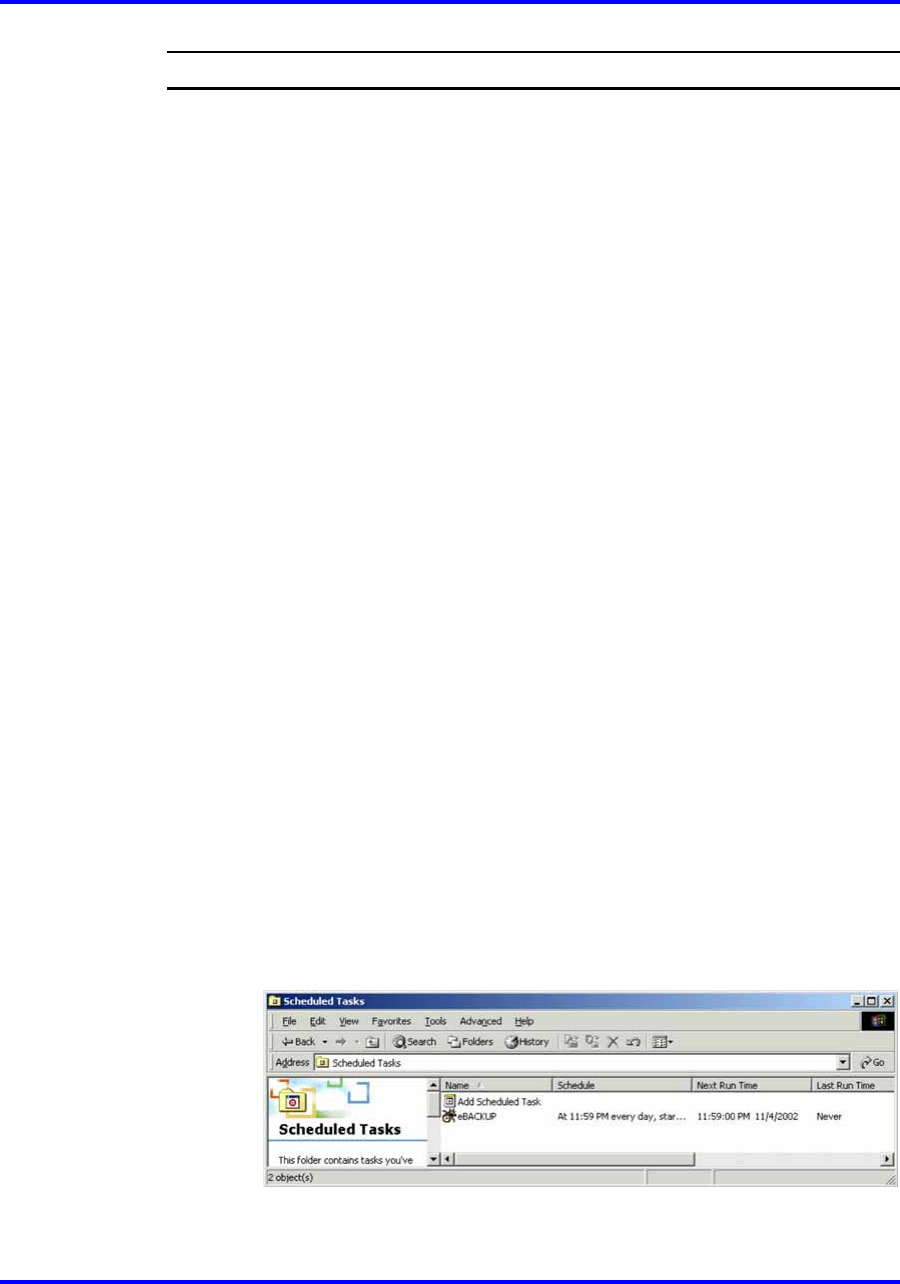
1 Open the Scheduled Tasks wizard.
Click Start on the Windows task bar, and choose Settings >
Control Panel > Scheduled tasks > Add scheduled task. The
Scheduled Task wizard is displayed.
2 Open the Scheduled Tasks window.
In the Scheduled Task wizard, click Next. Now you are in the
Window, where you must select a program.
3 Browse to the eBackup program.
Use Browse to go to the eBACKUP.exe program in the
C:\SOPHO Messenger@net\Exe\eBACKUP.exe, and click open.
C:\SOPHO Messenger@net\Exe\eBACKUP.exe
/Path:C:\SOPHO Messenger@net /Log drive:C /Site:1
/Batch:Y
4 Set the frequency of the backup.
Select Daily or another desired time scale. Click Next.
5 Select the time and the day, and select the username to run the
task under.
• Fill in the desired start time and date.
• Click Next.
•
In the window that is now displayed, select the Windows
user under which the task must run. This is usually the
administrator.
• Click Next.
• Click Finish.
6 Open the eBACKUP Properties.
Right-click the eBACKUP line in the window. In the pop-up
menu, select Properties.
7 Edit the command arguments.
Nortel Communication Server 1000
DECT Messenger Fundamentals
NN43120-120 01.06
17 October 2008
Copyright © 2003–2008 Nortel Networks
.