
User's Manual
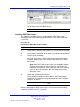
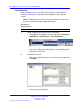

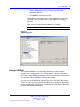
Table Of Contents
- New in this release
- Nortel DECT Messenger Administrator Guide
- Preface
- Nortel DECT Messenger overview
- eCONFIG
- Adding a DECT device to the Messenger system
- DECT Messenger Customer Engineer Manual
- Preface
- DECT Messenger overview
- DECT Messenger in a WAN or MAN network
- Licensing
- Detailed module descriptions
- What is required to run DECT Messenger
- DATABASES in DECT Messenger
- Installing and getting started
- Using eCONFIG
- Using eTM
- eDMSAPI Inbound
- eLOCATION
- Connecting National Instruments modules
- Understanding Security features
- Using eBackup
- Setting up e-mail integration (eSMTP_Server/eSMTP)
- Using eSMTP Server
- Using eSMTP
- Sending SMS messages
- V.24 - RS232 connections (eCAP, eESPA)
- Using Import/Export menu
- eLOG
- Checking diagnostics
94 DECT Messenger Customer Engineer Manual
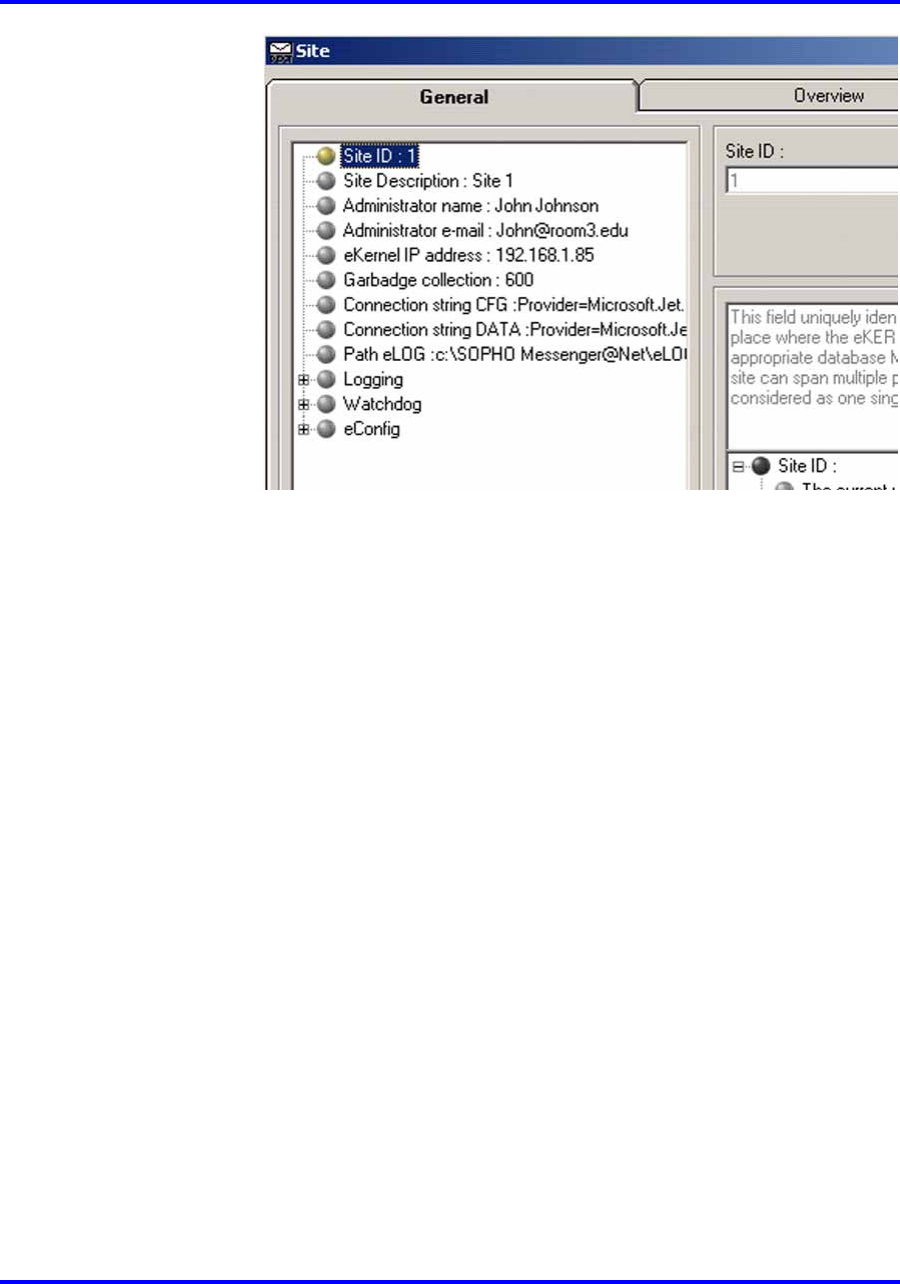
• Enter the Administrator name and Administrator e-mail.
• Enter the IP address of the PC where the eKERNEL resides
in the field: eKERNEL IP Address.
• Click OK.
7 Check the Configuration database path.
Still in the eCONFIG window, you must specify the database
locations (the default database path are usually correct).
• Set the path to the Messenger Configuration database to the
following directory: c:\SOPHO Messenger@net\Mdb\ (unless
you have installed to a directory other than the default). The
file name is Messenger_CFG.mdb.
• Check the path setting for the Configuration database;
normally you do not need to change this.
Note: The Configuration database type is always MS Access
and always points directly to a file (not using ODBC). The
default setting is shown in the following illustration:
Nortel Communication Server 1000
DECT Messenger Fundamentals
NN43120-120 01.06
17 October 2008
Copyright © 2003–2008 Nortel Networks
.