
Quick Reference Guide

8
Issue 2 April 1997
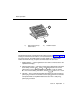
Console Layout
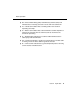
4. Handset Cradle — This is where you place the handset when it is not in
use. If you use a headset, the handset cradle can be removed from the
console.
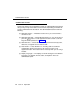
5. Lamp Test Switch — This is a switch under the front panel of the
Model 302B console that allows you to test the console lamps. The test
starts when you press the switch and stops when you release the switch.
On the Model 302C console, you must simultaneously press and hold the
and buttons to test the console lamps. The test
starts when you press the buttons and stops when you release the
buttons.
6. Display — This is a single-line, 40-character, alphanumeric display that
shows call progress and feature usage information.
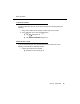
7. Ringer Volume — This controls the ringer volume for incoming calls.
Incoming emergency calls (Page 34 and Page 36) ring at a louder fixed
volume that you cannot control.
NOTE:
Always check your ringer volume to make sure it is set at an
audible level. If the console should experience a power outage, the
volume level is reset to the lowest setting.
8. Trunk Group Select Buttons — These 12 buttons are assigned with trunk
access codes that allow access to outside lines.
9. Feature Buttons — These 24 buttons are used to access features such
as Do Not Disturb and Automatic Wakeup.
10. Call Appearance Buttons — These six call appearance buttons are used
to select a call appearance and are labeled through . Pressing one
of them is similar to pressing the button, but you can specify which
appearance you want.
11. DXS Hundreds Group Select Buttons — These buttons on the DXS
selector console are assigned the first digit or the first two digits of each
group of 100 rooms. For example, if you have rooms numbered from
7000 to 7099, there will be a button labeled .
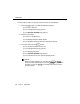
Pos Busy Volume Up
a
f
Start
7000