Title page Nortel Mobile Communication 3100 Series Portfolio Nortel Mobile Communication Client 3100 for Nokia User Guide
Revision history Revision history November 2007 Standard 01.03. This document is up-issued to contain cellular data usage information. October 2007 Standard 01.02. This document is up-issued to contain fixes for configuring Mobile Communication Gateway 3100 addresses and revised Outgoing Call Service DN requirements. September 2007 Standard 01.01. This document is issued to support the Nortel Mobile Communications 3100 Series Portfolio on Nortel Communication Server 1000 Release 5.0.
Revision history 4
Contents Contents Revision history . . . . . . . . . . . . . . . . . . . . . . . . . . . . . . . . . . . 3 Contents . . . . . . . . . . . . . . . . . . . . . . . . . . . . . . . . . . . . . . . . . 5 Introduction . . . . . . . . . . . . . . . . . . . . . . . . . . . . . . . . . . . . . . . 9 MCC 3100 features . . . . . . . . . . . . . . . . . . . . . . . . . . . . . . . . . 9 Before you begin . . . . . . . . . . . . . . . . . . . . . . . . . . . . . . . . . . 10 System and network requirements . . . . . .
Contents Navigating screens . . . . . . . . . . . . . . . . . . . . . . . . . . . . . . . . . 29 Accessing screens . . . . . . . . . . . . . . . . . . . . . . . . . . . . . . 29 Shortcut Keys . . . . . . . . . . . . . . . . . . . . . . . . . . . . . . . . . . 29 Accessing Help . . . . . . . . . . . . . . . . . . . . . . . . . . . . . . . . . . . . 30 Advanced functions . . . . . . . . . . . . . . . . . . . . . . . . . . . . . . . 33 Friends . . . . . . . . . . . . . . . . . . . . . . . . . . . . . . . . .
Contents Software installation . . . . . . . . . . . . . . . . . . . . . . . . . . . . . . 61 Installing the MCC 3100 for Nokia software . . . . . . . . . . . . . . 61 Moving the MCC 3100 icon to the menu screen . . . . . . . . . . 64 Upgrading the MCC 3100 for Nokia software . . . . . . . . . . . . . 65 Uninstalling the MCC 3100 for Nokia software . . . . . . . . . . . . 65 Acronyms . . . . . . . . . . . . . . . . . . . . . . . . . . . . . . . . . . . . . . .
Contents 8
Introduction Introduction This section contains the following topics: • “MCC 3100 features” on page 9 • “Before you begin” on page 10 • "System and network requirements" on page 11 • "About this guide" on page 14 MCC 3100 features The Nortel Mobile Communication Client 3100 (MCC 3100) for Nokia application allows you to achieve real-time communication with the Nortel Mobile Communication Gateway 3100 (MCG 3100) and Nortel Communication Server 1000 (CS 1000).
Introduction • Use the following call modes: — Direct Outbound: This is the basic mode. You can initiate calls directly from your Nokia device to other parties by dialing or selecting friends to call. This direct mode uses an Outgoing Call Service DN to access the MCG 3100 in the enterprise. The MCG 3100 then dials the number entered in the MCC 3100 using the enterprise dial plan.
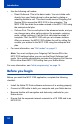
Introduction System and network requirements The MCC 3100 for Nokia has the following system requirements Important Notice: Users are advised to select / use headsets which are designed to reduce excessive sound pressure levels or acoustic shocks. Users should check that their headsets do meet their respective National or International Acoustic and Safety requirements. Table 1: System requirements Hardware and software Type Operating system Symbian v7.0 operating system.
Introduction Network specifications The following network specifications are required: • Cellular network subscription • Cellular Internet access (for example, GPRS, EDGE, CDMA 1xRTT, or EVDO) • WiFi Internet access (Optional) Cellular data plan use of MCC3100 for Nokia “Cellular data plan usage” on page 12 shows the approximate data usage for various MCC3100 functions.
Introduction Sample Calculation Using the following assumption for a MCC3100 user: — 5 logon or logout attempts per day. — 3 calls per hour (2 inbound, 1 outbound) within an 8 hour workday.
Introduction About this guide This guide is for users of the MCC 3100 for Nokia.
MCC 3100 configuration MCC 3100 configuration This section contains the following topics: • “Initial programming” on page 15 • "System settings" on page 18 • "Personal preferences" on page 20 • "Call settings" on page 22 Initial programming The first time you start the Mobile Communication Client 3100 (MCC 3100) after you install it on your Nokia, you must program the following parameters provided by your system administrator: • your account username and extension • your account password • the
MCC 3100 configuration Figure 1: System Settings Note: If the Main screen appears, then your basic settings are already programmed, and you can start using the application. 3. In the Username field, enter user name provided by your system administrator. 4. In the Password field, enter the password provided by your system administrator. 5. In the Primary MCG3100 Address field, enter the IP address or domain name and port of the Mobile Communication Gateway provided by your system administrator.
MCC 3100 configuration Figure 2: Preferences 9. In the Mobile Contact field, enter the cell telephone number for your Nokia device. Note: On some devices, the Mobile Contact field is automatically populated with the cell telephone number for your device. 10. From the menu, select Save. If you correctly enter the settings, you log on to the system and the Main screen appears. See “Overview of the main screen” on page 27. If you made an error, you are prompted to re-enter the settings.
MCC 3100 configuration System settings Use the System Settings screen to manage your connection to the network. As a minimum, you must enter your user name, password, Mobile Communication Gateway IP address, and Outgoing Call Service DN on this screen. See, “Initial programming” on page 15. Nortel recommends that the Outgoing Call Service DN includes the international access code (+) and your country code as part of the number to facilitate roaming. For example, +1 613 123 1111.
MCC 3100 configuration 3. Complete the fields on the System Settings screen using the information provided by your system administrator. Consult your system administrator if you need assistance. Table 3: System Settings screen fields Field Settings Username Enter your MCG 3100 user name. Password Enter your MCG 3100 password. Primary MCG3100 Address Enter the IP address or domain name and port of the primary MCG 3100. : For example, 47.11.210.11:8080 or mcg3100.nortel.
MCC 3100 configuration Table 3: System Settings screen fields Field Settings No. of Visible Entries in Friends Popup (1 50) Specify the number of friends that display in the Friends preview page of the MCC 3100. You can choose from a range of 1 to 50 items (default is 7). 4. From the menu, select Save. You are logged on and the Main screen appears. Personal preferences Use the Preferences screen to enter personal information, such as your name, contact, and call prefix settings.
MCC 3100 configuration Table 4: Preferences screen fields Field Mobile Contact Settings Enter your Nokia telephone number. Your phone number must be configured. This is your default contact location. You can select other contact locations when you place an Advanced Call. Mobile Contact Default Prefix Select the mobile telephone default call prefix.
MCC 3100 configuration Table 4: Preferences screen fields Field Corporate Prefix Settings Enter the digits required to make a call within the company. For example, if the telephone dialing plan requires corporate calls to use a specific trunk, program the digits required to access that trunk. The corporate prefix is also known as the trunk steering code Only the MCC 3100 uses the information you enter on the Preferences screen. No information is uploaded to any other application. 4.
MCC 3100 configuration Figure 4: Call Settings 3. Use the radio buttons to select a Call Screening Mode: — Call Screening Enabled-When you receive an incoming call, the MCC 3100 displays a dialog that allows you to either accept the call on your Nokia, redirect the call to another number, or decline the call. — Call Screening Disabled-When you receive an incoming call, the MCC 3100 allows you to only accept calls on your Nokia device.
MCC 3100 configuration 24
Basic functions Basic functions This section contains the following topics: • “Starting and exiting the MCC 3100 application” on page 25 • “Logging on and logging off” on page 26 • “Hiding the MCC 3100 application” on page 26 • “Overview of the main screen” on page 27 • “Navigating screens” on page 29 • “Accessing Help” on page 30 Starting and exiting the MCC 3100 application This section describes how to start the MCC 3100 application.
Basic functions 1. Go to the Main screen. 2. From the menu, select Quit. The Quit confirmation screen appears. 3. Select Yes to exit the application, or Cancel to return to the application. 4. Select Ok to confirm your selection. Note: Nortel recommends that you exit the MCC 3100 application before you shut off your device. Note: On some Nokia devices, you can exit the application by selecting Quit from any menu. Logging on and logging off To log on or log off the MCC 3100, perform the following steps: 1.
Basic functions The application does not appear, but remains running in the background. When you access the Nortel MCC 3100 again, you return to the last screen you used. Overview of the main screen After you program the MCC 3100 (see “Initial programming” on page 15), the Main screen appears whenever you start the MCC 3100. The Main screens menu provides access to the full functionality of the MCC 3100. See “Main screen” on page 27.
Basic functions • Logged out by Another Device (grey text): You have been logged off because you logged on with another device. • Logged out by Server (grey text): You are logged off because the MCG 3100 is unavailable. You automatically log on when the server becomes available.
Basic functions Navigating screens Use the five-way scroll key to scroll screens, select or navigate menus, and select settings. Use Selection keys to perform functions indicated by the text above the key (for example, to select from a menu). Use the keypad to enter numbers and characters. Use the Send key to initiate calls and the End key to terminate calls. Use the Menu key to open the main menu. Accessing screens The Main screen contains links from which you can access other screens.
Basic functions Note: Some devices may not offer the full range of shortcut keys. Table 5: Shortcut keys Key Action a-z While focus is on the Main screen or the Friends preview panel, press a key to search for friends with names that start with that letter. space Go to the Place Call screen to initiate a call. If focus is on the Friends preview panel when you press space, the highlighted friend’s contact location is preconfigured.
Basic functions Figure 7: Help screen 31
Basic functions 32
Advanced functions Advanced functions This section contains the following topics: • “Friends” on page 33 • “Searching the corporate directory” on page 39 • “Placing Calls” on page 41 • “Groups” on page 47 • “Logging Events” on page 54 • “Managing voice mail” on page 58 Friends Friends are people that you call frequently. Each friends has a name and at least one contact location (extension or telephone number). You can use the MCC 3100 to add, edit, and delete friends.
Advanced functions Figure 8: New friend screen 3. Complete the fields on the Edit Contact screen using the information in “Adding a friend” on page 34 as a guide. Table 6: Adding a friend Field Settings Display Name Enter a display name for your friend. This name appears on the Friends screen. Extension Enter the office extension number associated with your friend. Last Name Enter the last name for your friend. First Name Enter the first name for your friend.
Advanced functions Table 6: Adding a friend Field Settings Mobile contact Enter the mobile telephone number of your friend. When you call this friend, you choose this number from a list. Home contact Enter the home telephone number of your friend. When placing a call to this friend, you can choose this number from a list. Other1 contact Enter an additional telephone number of your friend. When you call this friend, you choose this number from a list.
Advanced functions Table 6: Adding a friend Field Settings Default Prefix Select the friend’s default prefix. • Use No Prefix • Local Prefix • Long Distance Prefix • International Prefix • Corporate Prefix When you initiate a basic call or group call, the system automatically inserts this prefix ahead of the call to contact number. Note: Provide at least one contact location: Extension, Office number, Mobile number, Home number, or Other number. 4.
Advanced functions 4. Make changes if needed, and then select Save from the menu. Your new friend is added to the MCC 3100 local address book. Note: After you add a friend from the logs screen, check that the contact information is complete. You may need to add a prefix or special character that was removed from the original record. To add a friend from the Search Results screen 1. From the Main screen, select Corp Dir link: or, from the Friends screen select Search from the menu.
Advanced functions To edit a friend 1. From the Main screen, select the Friends links. The Friends screen appears. 2. Highlight the friend you want to edit. 3. From the menu, select Edit Friend. The Edit Friend screen appears. See “Edit friend screen” on page 38. Figure 9: Edit friend screen 4. Edit the friend information as required. 5. After you edit a friend, select Save from the menu. The screen displays the friend’s updated information.
Advanced functions Deleting a friend You can delete a friend from the MCC 3100 local address book. To delete a friend from the MCC 3100 local address book 1. From the main screen, select the Friends link. The Friends screen appears. 2. Highlight the friend you want to edit. 3. From the menu, select Delete Friend. 4. Click Yes to confirm the deletion. The friend is deleted from the MCC 3100 local address book.
Advanced functions 2. Enter as much of the person’s name as you know. You must enter at least one character. 3. To search for friends that you saved on the MCC 3100, select Also search local friends. 4. From the menu, select Search Now. Your search results appear on the Search Results screen. If you search in both the local and corporate directories, your search results appear in two panels: local and corporate. See “Search results screen” on page 40. Figure 11: Search results screen 5.
Advanced functions Note: To locate a friend, you require a first name or a last name. You cannot locate friends that have only a display name. Placing Calls Your enterprise telephone system manages all calls that you place on the MCC 3100. You can quickly and easily call your co-workers either by selecting them from a friends list or by dialing their extension number. As well, one number is associated with all of your outbound calls, regardless of your actual location.
Advanced functions Figure 12: Direct outbound mode Direct Outbound mode requires an Outgoing Call Service DN configured in your MCC 3100 settings. For more information, see “System settings” on page 18. When the MCC 3100 is configured for Direct Outbound mode, you can switch from Direct Outbound mode to Call-me-First mode for advanced calls. See “Advanced call” on page 44. Call-me-First mode In Call-me-First mode, your calls are completed in two steps. First the enterprise telephony system calls you.
Advanced functions Calling a friend You can place a call to a friend directly from your Nokia device. Your friend receives the call at their default contact location. 1. Go to the Main, Logs, Friends, or Search Results screen. 2. Scroll to log entry or click a shortcut key to select a friend. 3. From the menu, select Call. Optionally press Space or Enter to place the call. Note: The first time you place a call in Direct Outbound mode, you may receive a number of prompts that you must respond to.
Advanced functions — Internal office extension numbers (for example, 4489). — External PSTN numbers (for example, 96131231111). 4. From the menu, select Call. Optionally press Space or Enter to place the call. You can also choose Call from Extension or Advanced Call from the menu. See “Calling from your extension” on page 43 or “Advanced call” on page 44. Advanced call You can use Advanced call to: • Use Call-me-First mode to use one device to start the call and another to hold the conversation.
Advanced functions Figure 14: Place call prefix 8. From the menu, select Call. The enterprise telephony system calls you at the contact location you specified. 9. Answer the call. 10. The enterprise telephony system calls your friend at the contact location you specified. 11. .After your friend answers, you connect and the conversation can commence. To use the telephone keypad during a call (for example to respond to voice mail prompts), switch to the telephone application on your Nokia device.
Advanced functions Receiving calls After you log on, you can receive audio calls from any MCC 3100 screen. If the MCC 3100 has call screening enabled, you can accept the call on the Nokia, redirect the call to another number, or decline the call. If the MCC 3100 has call screening disabled, the call can only be accepted from your Nokia device. If the MCC 3100 has Mobile Do-Not-Disturb enabled, the call is forwarded to voice mail.
Advanced functions Groups You can add and manage a group that contains multiple friends, and then initiate conference calls to the group. Adding a group 1. From the Main screen menu, select Group Mgmt. The Group Management screen appears. 2. From the menu, select New Group. The New Group screen appears. See “New group screen” on page 47. Figure 16: New group screen 3. Enter the name of the group in the Group Name box. 4. From the menu, select Save.
Advanced functions The Add to Group screen appears. See “Add to group screen” on page 48. Figure 17: Add to group screen 3. Select the group you wish to add the friend to. 4. From the menu, select Add Now. The friend is added to the group you selected. 5. Repeat steps 1 to 4 for all friends in the group. You can select one or more friends in one group and add them to another group. For more information, see “Managing friends in a group” on page 48.
Advanced functions Figure 18: Group management screen 2. From the Group List, select a group. 3. From the menu, select Group Details. The Group Details screen appears. See “Group details screen” on page 49. Figure 19: Group details screen 4. Select the friends you wish to manage. 5. From the menu, select one of the following options: — Call to initiate a group call to the friends. — Edit to view or edit the selected friend on the Edit Friend screen. Only one friend at a time can be edited.
Advanced functions — Add to Another Group to add the selected friends to another group. — Select All to select all friends in a group. — Clear All to remove all selected friends in a group. — Delete Selected Users to delete the selected friends from the group. — Save Selections to save the current friend selections. The next time you enter the Group Details screen, the same friends are selected. Managing a group You can manage groups by deleting groups and changing group names. 1.
Advanced functions Initiating a group call With a group call, you can select a nonmobile contact location for yourself. You can set up the call on your Nokia device and then engage in the conversation on another device, such as your desktop telephone. 1. From the Main screen, select the Groups link, or from the Main screen menu, select Group Mgmt. The Group Management screen appears. See “Group management screen” on page 49. 2. From the Group List, select a group. 3. From the menu, select Group Details.
Advanced functions 6. In the Using list, select your contact location for the group call, or accept the default. 7. In the Using Prefix list, select your call prefix for the group call, or accept the default. 8. From the menu, select Call. The Group-Call Session screen appears. 9. The enterprise telephony system calls you at the contact location you specified. 10. Accept the call, and then follow the prompts. As the group call initiator, you perform the following steps: a.
Advanced functions • press *6 to mute or unmute your own voice • press *7 to lock or unlock the conference • press *8 to hear a list of participants • press *9 to stop the help Joining a group call that is in progress You can join a group call that is in progress if you selected Join Later when you were initially invited to participate. Note: If you are the group call initiator, you cannot join 1. Go to the Logs screen. See “Logging Events” on page 54. 2.
Advanced functions Logging Events The MCC 3100 retains a record of your recent communication sessions. The following events are logged: • Incoming calls (answered, missed) • Outgoing calls (successful, unsuccessful, in progress) • System event notifications You can view an abbreviated list of log events on the Main screen. For a complete list and for details concerning individual events, you must access the Logs screen.
Advanced functions The Recent preview panel displays up to 10 friends that you recently communicated with. 2. Optionally, select an entry and select a menu command such as Call. Viewing entries on the Logs screen The Logs screen provides a history of your most recent incoming and outgoing calls, voice mail messages, and system event notifications. The Logs screen can contain a maximum of 50 entries. By default, the entries are organized by time and date, but you can reorganized them by name.
Advanced functions For call icon explanations, see "Call icons" on page 56. Figure 23: Call icons For group call icon explanations, see "Group call icons" on page 56. Figure 24: Group call icons For system notification icon explanations, see "System notification icons" on page 56. Figure 25: System notification icons 2. To view the details concerning an individual entry, select the entry, and select Log Details from the menu.
Advanced functions The Details screen appears. See “Logs details screen” on page 57. Figure 26: Logs details screen Sorting entries on the Logs screen You can sort items in the Logs screen by the name of the individual associated with the log or by the time and date. You can also re-sort the list to only display missed calls or voice mail notifications. 1. Go to the Logs screen. 2. From the menu, select Sort by Time (default) or Sort by Date. The entries are sorted according to your selection. 3.
Advanced functions 1. Go to the Logs screen. 2. From the menu, select Delete All. 3. Select Yes or Cancel in response to the prompt. If you selected Yes, all entries are deleted. Managing voice mail In addition to checking whether you have any messages, you can quickly and easily call the voice mail system to access your mailbox. Voice mail message waiting indication When you receive a new voice mail message, the voice mail indicator (VM) appears on the Main screen.
Advanced functions Note: You must use the Nokia telephone application to generate DTMF tones. Note: You can also call voice mail from the Recent preview panel by selecting the voice mail entry, and choose Call from the menu. The Recent preview panel can contain up to 10 voice mail and call entries.
Advanced functions 60
Software installation Software installation This section contains the following topics: • “Installing the MCC 3100 for Nokia software” on page 61 • “Moving the MCC 3100 icon to the menu screen” on page 64 • “Upgrading the MCC 3100 for Nokia software” on page 65 • “Uninstalling the MCC 3100 for Nokia software” on page 65 This section describes how to install, upgrade, and uninstall the Nortel Multimedia Communication Client 3100 (MCC 3100) for Nokia on a supported Nokia device.
Software installation — MCC3100-N.jad Optionally, to automatically start the MCC 3100 on your Nokia device, you need to install the following file: — MCC3100-N.sis If you install the MCC3100-N.sis, the MCC 3100 application will start automatically when you power on your Nokia device. The MCC 3100 application will also restart automatically if closed. 3. Launch the Nokia PC Suite on your PC by selecting Start > Programs > Nokia PC Suite > Nokia PC Suite. 4. Click File Manager.
Software installation Figure 27: Nokia phone browser installs An Uploading progress dialog box appears indicating a transfer of the files to your device. See “Uploading progress” on page 63. Figure 28: Uploading progress The remainder of the installation is performed from your device. 7. On your Nokia device, press the Menu key. The Menu screen appears. 8. Select Tools > App. mgr The Applications Manager appears. 9. Scroll to the MCC3100-N.jad file, then select Options > Install. 10.
Software installation 11. If you want the MCC 3100 application to start automatically, repeat steps 6 to 9 to install MCC3100-N.sis. 12. Optionally, move the MCC 3100 application icon to the menu screen of your Nokia device. For more information, see “Moving the MCC 3100 icon to the menu screen” on page 64. Moving the MCC 3100 icon to the menu screen Complete this procedure to make the MCC 3100 application icon available on the menu screen of the Nokia device. 1. On your Nokia device, press the Menu key.
Software installation Upgrading the MCC 3100 for Nokia software This section describes how to upgrade or reinstall the MCC 3100 for Nokia software. When you upgrade the software, your data is saved automatically. 1. Exit the MCC 3100. 2. If you installed the auto start application, perform the following steps: a. On your Nokia device, press the Menu key. The Menu screen appears. b. Select Tools > App. Mgr. The Application Manager screen appears. c. Scroll to MCC3100-N.sis and select Options > Remove.
Software installation You must remove the files and applications one at a time. 4. Highlight the MCC3100-N.sis file (if available), and select Options > Remove. 5. Select Yes to confirm file removal. 6. Highlight the MCC3100-N.jad file, and select Options > Remove. 7. Select Yes to confirm file removal. 8. Highlight the MCC 3100 starter application (if available) and select Options > Remove. 9. Select Yes to confirm application removal. 10. Highlight the MCC 3100 application and select Options > Remove.
Acronyms Acronyms Table 7 lists the acronyms used in this guide.
Acronyms Table 7: Acronyms Acronym Full Name USB Universal Serial Bus VM Voice Mail VPN Virtual Private Network WiFi Wireless Fidelity 68
Nortel Mobile Communication Series 3100 Portfolio Nortel Mobile Communication Client 3100 for Nokia User Guide Copyright © 2007 Nortel Networks. All Rights Reserved. LEGAL NOTICE While the information in this document is believed to be accurate and reliable, except as otherwise expressly agreed to in writing NORTEL PROVIDES THIS DOCUMENT "AS IS" WITHOUT WARRANTY OR CONDITION OF ANY KIND, EITHER EXPRESS OR IMPLIED.