Title page Nortel Mobile Communication 3100 Series Portfolio Nortel Mobile Communication Client 3100 for Windows Mobile User Guide
Revision history Revision history November 2007 Standard 01.04. This document is upissued to support the Nortel Mobile Communications 3100 Series Portfolio on Nortel Communication Server 1000 Release 5.0 and Multimedia Communication Server 5100 Release 4.0. This document includes a statement that only the HTC TyTN device supports Ocotber 2007 Standard 01.03. This document is upissued to support the Nortel Mobile Communications 3100 Series Portfolio on Nortel Communication Server 1000 Release 5.
Revision history 4
Contents Contents Introduction . . . . . . . . . . . . . . . . . . . . . . . . . . . . . . . . . . . . . . . 9 Supported features . . . . . . . . . . . . . . . . . . . . . . . . . . . . . . . . . 10 Requirements . . . . . . . . . . . . . . . . . . . . . . . . . . . . . . . . . . . . . 14 Supported platforms . . . . . . . . . . . . . . . . . . . . . . . . . . . . . . . . 14 Software installation . . . . . . . . . . . . . . . . . . . . . . . . . . . . . .
Contents Configuring a display name . . . . . . . . . . . . . . . . . . . . . . . . . . 38 Network roaming mode selection . . . . . . . . . . . . . . . . . . . . . . 39 Selecting a roaming mode . . . . . . . . . . . . . . . . . . . . . . . . 39 Screen lock . . . . . . . . . . . . . . . . . . . . . . . . . . . . . . . . . . . . . . . 40 Enabling the screen lock manually . . . . . . . . . . . . . . . . . . 40 Disabling the screen lock manually . . . . . . . . . . . . . . . . .
Contents Place an emergency call . . . . . . . . . . . . . . . . . . . . . . . . . 62 Outbound calls dialing plan . . . . . . . . . . . . . . . . . . . . . . . 63 Receiving a call . . . . . . . . . . . . . . . . . . . . . . . . . . . . . . . . 65 Simultaneous incoming calls . . . . . . . . . . . . . . . . . . . . . . 67 Call Waiting . . . . . . . . . . . . . . . . . . . . . . . . . . . . . . . . . . . 68 Redialing the last number dialed . . . . . . . . . . . . . . . . . . . 69 Ending a call . . . . . . . .
Contents Calling a contact on the Contact List . . . . . . . . . . . . . . . . 90 Virtual Private Network connection management . . . . . . . 93 Establishing a VPN connection . . . . . . . . . . . . . . . . . . . . 94 Disconnecting a VPN connection . . . . . . . . . . . . . . . . . . . 95 Manual setup. . . . . . . . . . . . . . . . . . . . . . . . . . . . . . . . . . . . . 97 Line settings . . . . . . . . . . . . . . . . . . . . . . . . . . . . . . . . . . . 97 Proxy settings . . . . . . . . . . . . . . .
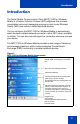
Introduction Introduction The Nortel Mobile Communication Client (MCC) 3100 for Windows Mobile is a Session Initiation Protocol (SIP) softphone that provides consolidated voice and messaging services on dual-mode (Wireless Fidelity [WiFi] and cellular) mobile handheld devices. You can configure the MCC 3100 for Windows Mobile to automatically select the best available network connection, either WiFi (when available) or cellular. You can also manually specify a connection whenever you use your device.
Introduction Supported features The MCC 3100 for Windows Mobile supports the following features: • cellular network standards—Global System for Mobile Communications (GSM) and Code Division Multiple Access (CDMA) cellular network standards For more information, see Appendix B “Configuring CDMA or GSM features on your phone” on page 111. • network roaming mode—manual or automatic roaming mode For more information about network roaming mode, see “Network roaming mode selection” on page 39.
Introduction • Message Waiting Indicator (MWI)—indicates voice mailbox messages For more information, see “Managing your voice mail” on page 51. • Missed Call Indicator (MCI)—enables you to quickly check the total number of missed WiFi or cellular calls For more information, see “Checking for missed calls” on page 53. • Integration with Windows Mobile Outlook—synchronizes your address book between a PC and the mobile device. For more information, see “Contact list (Address book)” on page 88.
Introduction • Call Transfer—executes blind WiFi call transfers. In Cellular mode, support for Call Transfer depends on your cellular operator subscription service.
Introduction Table 1: MCC 3100 for Windows Mobile features (Part 2 of 2) Call feature Cell network WiFi network Call Transfer (unsupervised) No Yes Call Hold Yes Yes Call Forwarding Yes—network setting Yes Conference call No Yes (MCS 5100 only) Last Number Redial Yes Yes The MCC 3100 for Windows Mobile supports the following technical features: • SIP-based registration with Digest authentication (RFC 3261) • in-band and out-of-band Dual Tone Multi Frequency (DTMF) tones The specialized
Introduction • Enhanced power management functionality, which extends battery life • Basic Bluetooth connectivity for cellular and WiFi calls; advanced support varies by headset and mobile device Requirements The MCC 3100 for Windows Mobile requires the following devices: • Mobile device handsets that support one of the following network connection modes: — WiFi network connectivity for WiFi mode — WiFi and CDMA network connectivity for WiFi/CDMA mode — WiFi and GSM network connectivity for WiFi/GSM m
Introduction Table 2: Supported platforms (Part 2 of 2) Dual mode device (OEM) Operating system Original Equipment Manufacturer (OEM) names are provided. Local carriers can sell the same devices under different names. IMPORTANT! You must use handsfree operation or a headset to make or receive WiFi calls on all supported mobile devices except HTC TnTN.
Introduction 16
Software installation Software installation This section describes how to install, upgrade, and uninstall the Nortel Mobile Communication Client (MCC) 3100 for Windows Mobile on a mobile device. Before you install the MCC 3100 for Windows Mobile software, ensure that you use a Universal Serial Bus (USB) cable to connect the mobile to the PC. Use Microsoft ActiveSync 4.1 or later to install, upgrade, and uninstall the MCC 3100 Windows Mobile software.
Software installation Figure 2: Choose Setup Language window 6. Choose the setup language, then click OK. The License Agreement window appears. See Figure 3 on page 18. Figure 3: License agreement window 7. If you agree with the terms of the License Agreement, select the appropriate button and click Next. The Welcome to the InstallShield Wizard for Nortel Mobile Communication Client window appears. 8. Click Next. 9. The Customer Information dialog box appears. See Figure 4 on page 19.
Software installation Figure 4: Customer information 10. Enter your User Name and Company Name. 11. Click Next. Choose a folder to install the files on your PC. See Figure 5 on page 20.
Software installation Figure 5: Choose Destination Location window 12. Click Next. The Ready to Install the Program window opens. See Figure 6 on page 20.
Software installation 13. Click Install. After the program installs, the InstallWizard Complete window appears. Figure 7: InstallWizard Complete window 14. Click Finish. The Pending Application Install window appears. See Figure 10 on page 22. Figure 8: Pending Application Install window The installation program scans the mobile device to determine if it has sufficient capacity to host the MCC 3100 for Windows Mobile.
Software installation Figure 9: Select Destination Media dialog 15. Perform one of the following: • To install the application on the mobile device, click Cancel. Free up space in the mobile device main memory, then go to step 16 to restart the installation process. • To install the application on the external flash card, select Storage Card as the destination media, then click OK. IMPORTANT! For recovery, call processing speed, and reliability, do not install the software on an expansion card.
Software installation Complete the remainder of the installation steps on your mobile device. 17. On the mobile device, tap Yes to install the software. 18. If the mobile device contains a storage card, select an installation location for the MCC 3100 for Windows Mobile. See Figure 11 on page 23. Figure 11: Installation location 19. Select the location where you want to install and run the MCC 3100 for Windows Mobile—Device or Storage Card. 20. Tap Install.
Software installation Managing the license key Before you can use the MCC 3100 for Windows Mobile, you must add your license key to the mobile device. Save a copy of your license key in case you delete the original license key. Contact your administrator if you do not have a License key. Installing the license key Obtain your license key from your system administrator then use the following steps to install the license key. 1. Copy the license key file (license.txt) to a folder on your computer. 2.
Software installation 8. After you install the license key, start the MCC 3100 for Windows Mobile and configure the application settings. IMPORTANT! When the MCC 3100 client application launches for the first time, it requires a connection to the Internet to validate the license information. Thus you must establish a connection to the Internet before the MCC 3100 client application launches.
Software installation To reinstall the license key, see “Installing the license key” on page 24. Upgrading the MCC 3100 for Windows Mobile software This procedure describes how to upgrade or reinstall the MCC 3100 for Windows Mobile software. IMPORTANT! In general, you can upgrade between versions but if you move from the Virtual Private Network (VPN) version to non-VPN and vice versa, you must uninstall the previous version of software. 1.
Software installation 8. Choose the setup language, then click OK. The License Agreement window appears. See Figure 13 on page 27. Figure 13: License agreement window 9. If you agree with the terms of the License Agreement, select the appropriate button and click Next. The Welcome to the InstallShield Wizard for Nortel Mobile Communication Client window appears. 10. Click Next. The InstallShield Wizard for Nortel Mobile Communication Client window to modify, repair, or remove the program appears.
Software installation Figure 14: Modify, repair, or remove the program window 11. Select Modify or Repair, then click Next. The Maintenance Complete window appears. See Figure 15 on page 28.
Software installation 12. Click Finish. The Application Already Installed window appears. See Figure 16 on page 29. Figure 16: Application Already Installed window 13. Click Yes to proceed with the reinstallation or upgrade. 14. Press OK to check your mobile device screen to see if additional steps are required to complete the installation. 15. Press Yes to start the software installation. 16.
Software installation 18. Tap Install. The application installs in the location you select. 19. Tap OK to remove the previous software version. 20. Perform one of the following steps: • To retain your configuration settings, tap No. • To remove your configuration settings, tap Yes. If you tap Yes, you must reenter new configuration settings before you can use MCC 3100 for Windows Mobile. 21. Tap OK to restart your mobile device.
Software installation Uninstalling the MCC 3100 for Windows Mobile software from your PC This procedure describes how to remove the MCC 3100 for Windows Mobile software from your PC. Before you uninstall the MCC 3100 for Windows Mobile software, ensure you install that Microsoft ActiveSync and connect the mobile device and the PC with a Universal Serial Bus (USB) cable. 1. On your PC, select Start > Settings > Control Panel > Add or Remove Programs. 2. Select Nortel Mobile Communication Client 3100. 3.
Software installation 32
Basic setup and use Basic setup and use This section describes how to configure, start, and use the Nortel Mobile Communication Client (MCC) 3100 for Windows Mobile basic features.
Basic setup and use Figure 18 MCC 3100 splash screen After the MCC 3100 for Windows Mobile starts, the Home screen replaces the splash screen. IMPORTANT! Startup time and ongoing performance of the MCC 3100 for Windows Mobile depends on available system resources. 4. Enter your configuration settings. For further information about how to enter configuration settings, see “How to enter your configuration settings” on page 35.
Basic setup and use How to enter your configuration settings Before you use the MCC 3100 for Windows Mobile application, add your personalized configuration settings to the mobile device. See “Automated setup” on page 35 to program your settings. Automated setup Your system administrator manages your user profile with the Mobile Client Administration Tool. An automated e-mail generates when your system administrator creates and updates your user profile with the Mobile Client Administration Tool.
Basic setup and use 3. Tap the Nortel MCC3100 icon. The MCC 3100 for Windows Mobile starts and the Home screen appears. 4. Select Tools > Settings on the Home screen. The MCC 3100 for Windows Mobile configuration screen appears. 5. Tap the Advanced tab. 6. Tap Download Config. Power management enhancements for Voice over WLAN You can tailor the MCC 3100 for Windows Mobile to optimize power consumption yet remain available to make and receive calls and messages.
Basic setup and use Configuring your mobile device to turn off automatically When your mobile device operates on battery power, configure your mobile device to turn off after a period of inactivity to conserve battery power. 1. On your mobile device, select Start > Settings. 2. In the Settings screen, tap the System tab. 3. Tap the Power icon. The Power screen appears. 4. Tap the Advanced tab. 5. Select the On battery power: Turn off device if not used for check box. 6.
Basic setup and use Timer to 3 minutes. For more information about the MCC 3100 for Windows Mobile firewall settings, see “Manual setup” on page 97. To avoid being disturbed by incoming calls while your mobile device is switched off, turn the ringer off. For more information, see “Setting the call alert mode and phone volume” on page 41. Using your mobile device when you enable WiFi Standby To conserve power on your mobile device, turn it off (press the Power button or allow the activity timer to expire).
Basic setup and use 1. Tap Tools > Settings. 2. Tap the Line 1 tab. 3. In the Display Name field, enter a name, which displays to others when you are in a WiFi communication session (if supported). Your SIP address appears if you do not configure a display name. 4. Tap Apply to accept your changes or Undo to start again. 5. Tap OK to save the configuration.
Basic setup and use The button lamp indicates your network status. If the WiFi signal strength is too low, you cannot register to the Call Server. See Table 3 on page 40. Table 3: Network status Button lamp Status Green You are logged on to the network. Yellow The network is available but you are not logged on. Red The network is unavailable. Orange Low WiFi signal strength. Log on prevented.
Basic setup and use For more information, see Appendix A “Manual setup” on page 97. Enabling the screen lock automatically Use the following procedure to use the automatic screen lock. 1. Select Tools > Settings. The MCC 3100 for Windows Mobile Configuration screen appears. 2. Tap the Advance tab. 3. Select On Calls for the Lock Screen field. 4. Click Apply. 5. Tap OK. The screen lock turns on automatically whenever you engage in an incoming or an outgoing call.
Basic setup and use You can use the MCC 3100 for Windows Mobile in WiFi mode with a headset or as a handsfree device. IMPORTANT! Users are advised to select/use headsets which are designed to reduce excessive sound pressure levels or acoustical shocks. Users should check that their headsets do meet their respective National or International Acoustical and Safety requirements. While the MCC 3100 for Windows Mobile is inactive, you can adjust all settings.
Basic setup and use Your device can offer enhanced handset speaker performance when in SIP mode. For further information, see Nortel Mobile Communication Client 3100 for Windows Mobile Release Notes (NN42030-400). Screen access Select the appropriate icon on the Windows Mobile Today screen (Figure 21) or in the MCC 3100 for Windows Mobile navigation bar (Figure 20).
Basic setup and use Figure 22 on page 44 shows the touch screens in portrait and landscape modes. Figure 22: Touchscreens Portrait mode Landscape mode Square touchscreen in portrait mode If your device supports a square touchscreen, (Figure 23 on page 45) the MCC 3100 for Windows Mobile always displays in portrait mode.
Basic setup and use Figure 23: Square touch screen Basic dialpad You can temporarily exit the MCC 3100 for Windows Mobile in order to use the native Windows Mobile dialer. For example, you can use this dialpad to place an emergency call on the cellular network. IMPORTANT! You can also use the MCC 3100 for Windows Mobile dialpad to place an emergency call. The number must be recognized as an emergency number, for example 911. The system automatically switches to the native Windows Mobile dialer.
Basic setup and use Select Tools > Basic Dialpad. The MCC 3100 for Windows Mobile application stops and the view switches to the native Windows Mobile dialer. See Figure 24 on page 46. Figure 24: Windows Mobile dialer You can use the native dialer to place calls on the cellular network. Returning to the MCC 3100 for Windows Mobile If the native dialer is currently open on the mobile device, close it, then use the following procedure to return to the MCC 3100 for Windows Mobile. 1.
Basic setup and use Exiting the MCC 3100 for Windows Mobile You can leave the application running while the mobile device is on. You must, however, exit the application before you perform the following software maintenance tasks: • “Upgrading the MCC 3100 for Windows Mobile software” on page 26. • “Uninstalling the MCC 3100 for Windows Mobile software from your mobile device” on page 30. To exit the MCC 3100 for Windows Mobile application, select Tools > Exit.
Basic setup and use 48
MCC 3100 for Windows Mobile functionality MCC 3100 for Windows Mobile functionality This chapter describes the Nortel Mobile Communication Client 3100 for Windows Mobile (MCC 3100 for Windows Mobile) functionality and includes the following topics: • “Home screen functions” on page 49 • “Adding a display name (WiFi SIP only)” on page 50 • “Managing your voice mail” on page 51 • “Call dialpad screen functions” on page 56 • “Audio Sessions screen functions” on page 72 • “SMS view screen functions”
MCC 3100 for Windows Mobile functionality Figure 25: Home screen The Home screen supports the following functions: • “Adding a display name (WiFi SIP only)” on page 50 • “Managing your voice mail” on page 51 • “Listening to messages” on page 52 • “Checking for missed calls” on page 53 • “Enabling Do Not Disturb” on page 53 • “Enabling Call Forward (WiFi only)” on page 54 • “Logging on a network manually” on page 55 • “Logging off a network” on page 55 Adding a display name (WiFi SIP only)
MCC 3100 for Windows Mobile functionality phone. If you do not enter a display name, your user name (SIP address) appears. You can program your display name in the configuration settings. See “Configuring a display name” on page 38. 1. On the navigation bar, tap the Home icon. The Home screen appears. 2. Tap Display. 3. Use the MCC 3100 for Windows Mobile soft keyboard to enter your display name.
MCC 3100 for Windows Mobile functionality Table 4 shows voice mail message waiting indicators. Table 4: Voice mail message waiting indicators Event Indicator Voice mail message waiting WiFi mailbox displays Yes to indicate that you have messages waiting Cellular mailbox displays the number of messages waiting. The voice mail icon appears in the status bar.
MCC 3100 for Windows Mobile functionality Using the Call Dialpad screen to listen to messages 1. Tap WiFi or Cell to select a dialout network connection (manual roaming mode only). 2. Perform one of the following: • Tap Mailbox • Press and hold the 1 key Checking for missed calls Use the Home screen to check the total number of missed WiFi and cellular calls. Go to the Call Log screen to obtain additional information and to return calls. 1. On the navigation bar, tap the Home icon.
MCC 3100 for Windows Mobile functionality Enabling Call Forward (WiFi only) When you enable Call Forward (CFW), all incoming WiFi calls forward to the number your administrator specifies in the configuration settings. 1. On the navigation bar, tap the Home icon. The Home screen appears. 2. Tap the check box beside the CFW icon to enable Call Forward. You can tap the CFW check box to switch between CFW enabled and disabled. For information about configuring CFW, see Appendix A “Manual setup” on page 97.
MCC 3100 for Windows Mobile functionality On the MCC 3100 for Windows Mobile for WiFi does not impact the Call Forward No Answer on CS 1000. Logging on a network manually You can manually log on (register) when you manually configure the MCC 3100 for Windows Mobile to operate in manual network roaming mode. For more information, see “Selecting a roaming mode” on page 39. You must log on to a network before you can place a call or send a message. 1. On the navigation bar, tap the Home icon.
MCC 3100 for Windows Mobile functionality 3. Select Logout. When the flag button turns yellow, the MCC 3100 for Windows Mobile is logged out of the network. For information about your network status, see Table 5 on page 57. Call dialpad screen functions Use the Call Dialpad screen to place outgoing calls, mute the microphone, redial the last number dialed, set up a conference, place calls on hold, and initiate a call transfer. Figure 26 on page 50 shows the Call dialpad screen.
MCC 3100 for Windows Mobile functionality Table 5 shows the call dialpad screen function keys. Table 5: Call dialpad screen function keys Function key Description Soft keys Use the soft keys to select options that appear on the dialpad display. Back key Press the Back key to delete mistakes. Network keys Use the network keys to select either a WiFi or a Cellular network connection. Talk key Use the Talk key to initiate a call and perform other functions, such as redial last number dialed.
MCC 3100 for Windows Mobile functionality • “Muting the microphone” on page 69 • “Switching between the earpiece and speaker phone” on page 70 • “Placing a call on hold” on page 70 • “Transferring a call (WiFi only)” on page 71 • “Setting up a conference call (WiFi only)” on page 71 Selecting a network while in manual roaming mode Use the following procedure to specify which network, either WiFi or Cellular, that you want to use as your dialout network.
MCC 3100 for Windows Mobile functionality The dialpad display indicates your current network connection status. See Table 6. Table 6: Network connection status Button lamp Status WiFi-M Indicates a manual connection to the wireless network. See Figure 27 on page 59. If you select WiFi mode, outbound calls use WiFi; however, you can receive incoming calls from Cellular or WiFi networks. Cellular-M Indicates a manual connection to the cellular network. See Figure 28 on page 59.
MCC 3100 for Windows Mobile functionality Monitoring a network while in automatic roaming mode Use this procedure to determine which network, either WiFi or Cellular is your current dialout network. Use this network to place all of your outgoing calls. Before you can monitor the network connections, you must configure the MCC 3100 for Windows Mobile to operate in automatic roaming mode. For more information, see “Selecting a roaming mode” on page 39. 1. On the navigation bar, tap the Call Dialpad icon.
MCC 3100 for Windows Mobile functionality Table 7 describes the network connection status which appears on your dialpad display. Table 7: Network connection status Button lamp Status WiFi-A Indicates an automatic connection to the wireless network. See Figure on page 60. Cellular-A Indicates an automatic connection to the cellular network when WiFi becomes unavailable. See Figure on page 60. You are switched back to the WiFi network when it becomes available.
MCC 3100 for Windows Mobile functionality You can use this screen to call a telephone number or a user name. 3. To make a call, use the MCC 3100 for Windows Mobile integrated keyboard, the device hardware keyboard, or the Windows Mobile soft keyboard. If you enter an incorrect number or username, swipe the dialpad display with your finger or tap the backspace key to delete it. 4. Press the Send key or tap Talk. The MCC 3100 for Windows Mobile dials the number or user name.
MCC 3100 for Windows Mobile functionality Outbound calls dialing plan The Dialing Plan inserts prefixes that you would otherwise dial when you place long distance and out-of-network calls. The dialing plan is programmed in MCC 3100 for Windows Mobile configuration settings. You have access to your desktop dialing plan when you use the MCC 3100 for Windows Mobile for WiFi calls. For more information about dialing plans, contact your administrator.
MCC 3100 for Windows Mobile functionality 3. Tap Call. The system inserts the PBX prefix and calls the number. For example, 9 1234567. You can use the PBX Prefix in conjunction with the Optional Prefix. When the Prefix Options screen appears, select the PBX Prefix check box, and select an Optional Prefix from the list. The system inserts the PBX Prefix followed by the Optional Prefix and calls number. For example, 9 6131234567. Invoking the Optional Prefix from the dialpad 1.
MCC 3100 for Windows Mobile functionality From the Call log or SMS view, you are presented with the following options when you receive a call or message on one network and return it from another network: • If you receive a call or an SMS message on the cellular network and reply to it from the WiFi network, the Prefix Options screen appears. You can select a PBX Prefix or an Optional Prefix.
MCC 3100 for Windows Mobile functionality When you receive an incoming call, the MCC 3100 for Windows Mobile Incoming Call dialog window appears.The dialog window presents the following caller ID information: • For Cell calls: — The caller ID (name) and type (work, mobile, or home)—display if the incoming number matches a record on the Contact List. — Multiple Contacts displays if the number matches more than on record. — Unknown Contact displays if the number does not match any records.
MCC 3100 for Windows Mobile functionality accounts. Cell calls forward immediately and WiFi calls forward after a short delay. During the delay, you can press the Send key or tap Talk to accept calls. Simultaneous incoming calls The following limitations apply to this feature: • Global System for Mobile Communications (GSM) devices can support multiple simultaneous incoming WiFi calls or one cellular call and multiple WiFi calls.
MCC 3100 for Windows Mobile functionality Figure 35: Simultaneous incoming call Second incoming call First incoming call In Figure 35, the dialog includes panels for two new incoming calls. You can reject both calls, accept one call and reject the other, or accept both calls. Be aware that if you accept both calls, the first call that you answer is placed on hold when you accept the other call. The dialog continues to display until you accept or reject all of your incoming calls.
MCC 3100 for Windows Mobile functionality Redialing the last number dialed The MCC 3100 for Windows Mobile dials the last number, which was used to place an outgoing call. While no other calls are connected, perform one of the following: • Tap Talk. • Tap the pound (#) key. • Press the mobile device Send key. Calling appears in the display area. See Figure 36. Figure 36: Call Status – Calling Ending a call You can terminate a WiFi or Cellular call using the MCC 3100 for Windows Mobile.
MCC 3100 for Windows Mobile functionality Switching between the earpiece and speaker phone In Cellular mode, you can switch between the earpiece and the speaker phone. Press and hold the Send key on your mobile device for a few seconds. Placing a call on hold The number of calls you place on hold depends on whether you have a CDMA or a GSM mobile device. • For a CDMA mobile device, you can place one cell call or multiple WiFi calls on hold.
MCC 3100 for Windows Mobile functionality conference. For more information, see “Setting up a conference call (WiFi only)” on page 71. Transferring a call (WiFi only) You can complete blind (unattended) call transfers of WiFi calls. 1. While a WiFi call is connected, tap the Xfer button. The call is placed on hold. Call on hold and XFER-ON appears in the dialpad display.Dial the other number. 2. Tap the Xfer button.
MCC 3100 for Windows Mobile functionality – Tap and hold the call session that you previously put on hold. The menu appears. – Select Go to Audio Panel from the menu. 3. After the second party answers, inform them that you are adding them to a conference, then tap the Conf button.The conference starts with three participants—you and the two parties you added. Conference appears in the dialpad display. See Figure 38.
MCC 3100 for Windows Mobile functionality Figure 39: Audio sessions screen The Call dialpad screen supports the following functions: • “Audio session indicators” on page 74 • “Managing active audio sessions” on page 75 73
MCC 3100 for Windows Mobile functionality Audio session indicators Table 8 shows the Audio sessions screen indicators.
MCC 3100 for Windows Mobile functionality Table 8: Audio sessions indicators (Part 2 of 2) Indicator Network type Icon Description WiFi A—wireless mode, automatic roaming WiFi M—wireless mode, manual roaming Cellular A—cellular mode, automatic roaming Cellular M—cellular mode, automatic roaming No Service—no available network Call state Caller ID Call State—changes mid-call Caller number or name Managing active audio sessions You can manage a list of active audio sessions.
MCC 3100 for Windows Mobile functionality 1. While one or more sessions are active (for example, In call or On hold), on the navigation bar, tap the Call Dialpad icon. The Audio Sessions screen replaces the Call Dialpad screen. The screen can display a single In Call session and multiple On Hold and Terminated sessions if sufficient network resources are available. 2. From the line selector box, select a line. 3. Tap and hold a call session to display the call management menu.
MCC 3100 for Windows Mobile functionality Figure 40: SMS view screen Inbox Command bar Bold text indicates the message is unread Sender name or username Highlight to view message details Message text SMS View screen supports the following functions: • Read a message. • Compose a new message. • Reply to a message. • Delete messages. • Call a user. Read a message Your mobile device uses the following methods to alert you to new messages: • The device beeps.
MCC 3100 for Windows Mobile functionality Figure 41: New text message window Click View to read the message immediately, or click Close to read the message at a later time. New messages are listed in the Inbox of the SMS View screen. Highlight a message to view the sender number and the message text at the bottom of the application panel. See Figure 40 on page 77. Compose an SMS view screen new message Use the following procedure to compose a new message. 1. On the navigator bar, tap the SMS View icon.
MCC 3100 for Windows Mobile functionality Figure 42: Compose screen 3. If necessary, select the appropriate option to change networks: • Cell for SMS messaging. • WiFi for Instant Messaging (MCS 5100 only). You can switch networks only if the MCC 3100 for Windows Mobile is set to operate in manual roaming mode. For more information, see “Network roaming mode selection” on page 39. 4. Enter a mobile phone number or SIP username in the To: field. 5. Type your message in the SMS box.
MCC 3100 for Windows Mobile functionality Reply to a message You can reply to a message that appears in your inbox. 1. On the navigation bar, tap the SMS View icon. The SMS View screen appears. 2. Select the Inbox folder. 3. Tap and hold a message, then select Reply from the menu or highlight a message and select Reply from the command bar. The Compose screen appears. 4. Type your message in the SMS box. 5. Press the Send key. The Sent folder stores a copy of the message.
MCC 3100 for Windows Mobile functionality 1. On the navigation bar, tap the SMS View icon. The SMS View screen appears. 2. Select one of the following folders: • Inbox • Sent 3. Tap and hold a message. 4. Select Call. If you place the call from the WiFi network but the message originated in the cellular network, the Prefix Options screen appears, where you may select a PBX Prefix and Optional Prefix (if configured).
MCC 3100 for Windows Mobile functionality Figure 44: Call Log screen Call status Caller ID Call start Media type Call duration The Call Log screen supports the following functions: • “Call Log indicators” on page 83 • “Accessing the Call Log” on page 84 • “Filtering calls” on page 85 • “Sorting calls” on page 86 • “Calling from the Call Log” on page 86 • “Sending a message from the Call Log” on page 86 • “Clearing the Call Log” on page 87 • “Setting the size of the Call Log” on page 88 8
MCC 3100 for Windows Mobile functionality Call Log indicators Table 9 shows the Call Log indicators.
MCC 3100 for Windows Mobile functionality Table 9: Call Log indicators (Part 2 of 2) Indicator Icon Description Caller ID Caller number or name Call Start Date and time that the call started Session duration Duration of call Accessing the Call Log You can access the Call Log to view a history of received, dialed, and missed calls. 1. On the navigation tool bar, tap the Call Log icon. The Call Log screen appears.
MCC 3100 for Windows Mobile functionality 2. Use the slider bar at the right side of the screen to scroll through the list. The Missed Calls indicator reduces by one whenever you review, return, or delete a missed call from the Call Log screen. Filtering calls Filter options control which calls display in the Call Log. The following filter options are available: • All Calls (default) • Incoming Calls • Missed Calls • Outgoing Calls To filter calls, select a filter option from the Filter list.
MCC 3100 for Windows Mobile functionality Sorting calls Use the sort options to control the order in which the Call Log lists the calls. The following sort options are available: • Caller ID (default) • Call Start • Duration By default, the list is sorted in descending order (A to Z). You can reverse the list to sort in ascending order (Z to A). 1. To sort calls, select a filter type from the Sort list. 2. Tap the Sort order button to change the order.
MCC 3100 for Windows Mobile functionality 1. On the navigation bar, tap the Call log icon. The Call Log screen appears. 2. Tap and hold a Call Log entry, and then select Send Text Message. The SMS View screen appears. 3. On the command bar, select Compose. The Reply to SMS screen appears. 4.
MCC 3100 for Windows Mobile functionality whenever you review or return a missed call from the Call Log screen. Setting the size of the Call Log You can change the maximum size of the Call Log, which is 100 lines by default. Use the following procedure to change the size of the Call Log. 1. Select Tools > Settings. The MCC 3100 for Windows Mobile Configuration screen appears. 2. Tap the Advance tab. 3. Use the Windows Mobile soft keyboard to enter the Call Log Size (lines). 4.
MCC 3100 for Windows Mobile functionality Adding a contact to the Contact List Use the following procedure to add a contact to the Contact List. 1. On the navigation bar or on the Windows Mobile Today screen, tap the Contact List icon.The Contacts List screen appears. 2. Select New Contact. The Edit Contact screen appears. Figure 47: Edit Contact screen 3. Enter the contact personal information, including the name and telephone number.
MCC 3100 for Windows Mobile functionality • Work telephone: The contact business number on the PSTN or SIP username on the WiFi network. Typically, the SIP username is an extension number. All other numbers are optional. The contact name appears on the MCC 3100 for Windows Mobile display when you receive a cellular call from a number that matches Home tel, Mobile tel, or Work tel programmed in the Contact list. 4. Tap OK.
MCC 3100 for Windows Mobile functionality Figure 48: Contacts List screen 4. Scroll through the list and tap one of the following options: • Dial Mobile with Nortel MCC3100 • Dial Home with Nortel MCC3100 • Dial Work with Nortel MCC3100 See Figure 49 on page 92.
MCC 3100 for Windows Mobile functionality Figure 49: Menu list The Call Dialpad screen appears and the MCC 3100 for Windows Mobile dials the number. The status of the call appears in the dialpad display.
Virtual Private Network connection management Virtual Private Network connection management A Virtual Private Network (VPN) connection allows you to communicate through the public internet but maintain privacy through the use of a tunneling protocol and security procedures. You can be required to establish a VPN connection to your enterprise before you can use the MCC 3100 for Windows Mobile to access enterprise network resources. The MCC 3100 for Windows Mobile supports multiple VPN profiles.
Virtual Private Network connection management Establishing a VPN connection You can set up an automatic VPN connection from the MCC 3100 for Windows Mobile. 1. Select Tools > VPN. 2. Select the Enable VPN check box on the VPN Control Panel. 3. To use manual roaming mode to log on to the WiFi network, tap WiFi Network.To use automatic roaming mode to log on to the WiFi network, move within range of a WiFi access point. 4. Tap Yes in the VPN Connection dialog window. The VPN Control Panel appears. 5.
Virtual Private Network connection management Disconnecting a VPN connection Use the following procedure to disconnect the active VPN connection. 1. Select Tools > VPN. The VPN Control Panel appears. 2. Tap Disconnect. The active VPN connection disconnects. The VPN connection icon on the VPN Control Panel changes from locked to unlocked.
Virtual Private Network connection management 96
Manual setup Appendix A: Manual setup Enter your settings directly in the Nortel Mobile Communication Client (MCC) 3100 for Windows Mobile interface. Before you begin, complete the following procedures: • “Installing the MCC 3100 for Windows Mobile software” on page 17 • “Installing the license key” on page 24 The system administrator enters the manual configuration settings. If you enter incorrect values, the MCC 3100 for Windows Mobile can disconnect from the call control server.
Manual setup Your updated configuration settings are automatically downloaded and you can begin to use the MCC 3100 for Windows Mobile. 5. Configure the settings listed in Table 10 on page 98. Table 10: Line 1 configuration fields (Part 1 of 2) Address The SIP username of the line, which can be a name such as John or an extension number such as 2701. For example, enter 2701, not 2701@domain.com.
Manual setup Table 10: Line 1 configuration fields (Part 2 of 2) Call Forward Reminder If you enable WiFi call forwarding, the mobile device briefly rings whenever a call forwards to the number you specify. Call Forward To The phone number, SIP URI, or voice mailbox to which WiFi calls forward. To ensure that you have entered a valid telephone number or SIP URI, perform the following test: 1 Enable the Call Forwarding feature.
Manual setup 3. Configure the settings listed in Table 11 on page 100. Table 11: Proxy configuration fields Domain The SIP domain at which the MCC 3100 for Windows Mobile registers. MCC 3100 for Windows Mobile adds an @ followed by the domain name to SIP usernames that you enter. Primary ECS Server The IP address of the primary Enterprise Communication Server. Use one of the following formats: IP address, DNS A record, or DNS SRV record. Examples: IP address—192.168.1.10 DNS A record—sip.firsthand.
Manual setup 3. Configure the settings listed in Table 12 on page 101. Table 12: Firewall configuration fields Pinhole Timer (seconds) If you select STUN as the Discovery Method, set the Pinhole Timer to a value between 10 seconds and 3 minutes to keep the firewall port open. If you select None as the Discovery Method and you clear Enable WiFi Standby in the Advanced settings, set the Pinhole Timer to a value between 30 seconds and 3 minutes.
Manual setup 3. Configure the settings listed in Table 13 on page 102. Table 13: Audio configuration fields (Part 1 of 2) Packetization Rate (ms) Select the packetization rate for the voice portion of RTP packets. Configure a value in 10 millisecond increments, from 10 to 40 milliseconds. The default is 20 milliseconds for all codecs. Echo Suppression Echo suppression reduces the possibility that you hear your own voice while you engage in a WiFi call.
Manual setup Table 13: Audio configuration fields (Part 2 of 2) VAD/CNG If you select Voice Activity Detection/Comfort Noise Generation (VAD/CNG), voice-based RTP packets do not send during periods of silence, potentially saving bandwidth for WiFi calls. This option enables by default. Only VAD is supported with G.729. In-Band DTMF If you select In-Band DTMF, DTMF tones generate with in-band signalling.
Manual setup Table 14: Advance configuration fields (Part 2 of 5) Proxy heartbeat (sec) The interval, in seconds, that the MCC 3100 for Windows Mobile tests the connection to the primary proxy server by sending OPTIONS request messages. The MCC 3100 for Windows Mobile continues to send these messages even while the primary proxy is unavailable. The default and minimum configurable value is 5 seconds. SBR Prefix Enter the prefix for source-based routing (SBR) defined on the Nortel PBX.
Manual setup Table 14: Advance configuration fields (Part 3 of 5) Lock Screen Select “All Calls” to enable the automatic screen lock; select “Never” to disable it (default). If you enable this feature, you deactivate all keys, buttons and menus whenever you engage in a call (incoming or outgoing). A manual screen lock is also available for GSM devices. See “Phone security settings” on page 108. The screen only disables the MCC 3100 for Windows Mobile application, not the device itself.
Manual setup Table 14: Advance configuration fields (Part 4 of 5) Alpha To digit (0-9) If the device includes a hardware keyboard, but the keyboard lacks a numeric dialpad, configure alpha to digit mapping to use the keyboard alphanumeric keys to dial telephone numbers. For example, if 0 is located on the same key as A, enter A as the first character of the map. Enter the character corresponding to 1 up to 9. After you program the map, select the Active check box.
Manual setup Table 14: Advance configuration fields (Part 5 of 5) Enable WiFi Standby If you select this check box, the mobile device enters standby mode whenever it is switches off (for example, you press the Power button or the activity timer expires). In standby mode, the device backlight, touch and audio are off, and the range of the WiFi radio reduces, but the system remains active and the MCC 3100 for Windows Mobile can continue to receive calls and messages.
Manual setup 3. Configure the settings listed in Table 15 on page 108. Table 15: Dialing Plan configuration fields PBX Prefix If you place a call on the WiFi network, select the PBX Prefix in order to route the call to a PBX. For example, if you dial 3257023 and then select a PBX Prefix 9, the ultimate number is 9 325 7023. The PBX removes the 9 and before the call forwards to a destination outside the WiFi network (PSTN).
Manual setup • Enter the Personal Identification Number (PIN) (4 to 8 numeric digits) in the Enter PIN field. Use the PIN to lock the Subscriber Identification Module (SIM) in the mobile device and to prevent unauthorized access to the GSM cellular network. Your service provider gives you a default PIN, which you can change. If you forget your PIN, you must contact your service provider to obtain a PIN unlock key (PUK). • Select the Lock button to lock or unlock your device.
Manual setup 110
Configuring CDMA or GSM features on your phone Appendix B:Configuring CDMA or GSM features on your phone The following procedure provides what is typically available on Code Division Multiple Access (CDMA) and Global System for Mobile Communications (GSM) networks. Settings are specific to your device. See your device documentation to confirm the services your device supports.
Configuring CDMA or GSM features on your phone Table 16 shows the CDMA phone service configuration fields. Table 16: CDMA phone service configuration fields (Part 1 of 2) Field name Description Location Setting If you select On (the default), your current position is detected, which enables the delivery of CDMA network services. If you select Off, your position is hidden, which prevents the delivery of all CDMA network services with the exception of emergency services. For example, 911.
Configuring CDMA or GSM features on your phone Table 16: CDMA phone service configuration fields (Part 2 of 2) Field name Description Talk after x rings If you select Automatic Pickup, select the number of times the mobile device rings before it answers incoming calls. The default is three rings; the range is from one to six rings. Table 17 shows the GSM phone service configuration fields.
Configuring CDMA or GSM features on your phone Table 17: GSM phone service configuration fields (Part 2 of 3) Field name Description Caller ID Select whether your caller ID is presented to one of the following options: Call Forwarding • everyone that you call on the cellular network • no one that you call on the cellular network Use the settings on this screen to configure the call forwarding options for incoming cellular calls. • Forward all incoming cellular phone calls.
Configuring CDMA or GSM features on your phone Table 17: GSM phone service configuration fields (Part 3 of 3) Field name Description Voice Mail and Text Messages • Enter the Voice Mail server host name or IP address. • Enter the phone number of the SMS text message service center (required by SIM card). Fixed Dialing The Fixed Dial Number (FDN) mode, if supported by your Subscriber Identity Module (SIM) card, allows restriction of outgoing calls to a limited set of phone numbers. 3. Select OK.
Configuring CDMA or GSM features on your phone 116
VPN connections Appendix C:VPN connections Your system administrator provides the VPN connection details. You can add up to 8 VPN profiles, each of which defines a unique VPN connection. You can also edit and delete VPN profiles. Adding a VPN profile Use the following procedure to add a VPN profile. 1. Tap Tools > VPN. The VPN Control Panel appears. 2. Tap Create Profile. The New Profile dialog appears. 3. Enter the new VPN profile name. 4. Tap OK. 5.
VPN connections Table 18: Gateway fields (Part 2 of 2) Field name Description Enable Perfect Forward Secrecy (PFS) Select this check box to enable Perfect Forward Secrecy (PFS). You must use the same PFS setting on both ends of the connection. 6.
VPN connections Table 19: Authentication fields (Part 2 of 2) Field name Description If you select PSK (regular or extended) as the VPN authentication method, the following fields display: • Group Authentication ID • Group Authentication Password • Extended Authentication ID Type • Extended Authentication ID • Extended Authentication Password Group Authentication ID Enter the ID for group authentication. Group Authentication Password Enter the password for group authentication.
VPN connections For more information, see Table 20. Table 20: IKE Proposal fields Field name Description Use Default IKE Proposal Select the check box to use the default IKE proposal, or clear the check box to configure a customized IKE proposal. If the check box is cleared, you can modify the following fields: Automatic rekey • IKE Group • IKE Cipher • IKE Hash • IKE PRF • IKE Lifetime Select the check box to perform an automatic rekey when the IKE lifetime expires. 8.
VPN connections For more information, see Table 21. Table 21: IPSec Proposal fields Field name Description Use Default IPSec Proposal Select the check box to use the default IKE proposal, or clear it to configure a customized IKE proposal. If it is cleared, you can modify the following fields: Automatic rekey • IPSec Group • IPSec Cipher • IPSec Hash • IPSec Lifetime Select the check box to perform an automatic rekey when the IPSec lifetime expires. 9. Tap Save Profile.
VPN connections Deleting a VPN profile Use the following procedure to delete a VPN profile. 1. Tap Tools > VPN. The VPN Control Panel appears. 2. Select a profile from the Profiles list. 3. Tap Delete Profile. 4. Tap Yes to confirm the deletion.
Call sessions for mobile devices Appendix D:Call sessions for mobile devices The Mobile Communication Client (MCC) 3100 for Windows Mobile supports a different number of call sessions, depending on whether it is a Code Division Multiple Access (CDMA) or a Global System for Mobile Communications (GSM) mobile device. Table 22 on page 123 shows the maximum number of call sessions supported on a CDMA mobile device.
Call sessions for mobile devices 124
Acronyms Acronyms Table 24 lists the acronyms used in this guide.
Acronyms Table 24: Acronyms Acronym Full Name RTP Real-Time Transport Protocol SIM Subscriber Identity Module SIP Session Initiation Protocol SMS Short Message Service STUN Simple Traversal of Universal Dialing Plan UDP Uniform Dialing Plan URI Universal Resource Identifier URL Universal Resource Locator VAD Voice Activity Detection VPN Virtual Private Network WLAN Wireless Local Area Network WiFi Wireless Fidelity 126
Index Index A C Access Point (AP) 125 Call alert mode 41 Accessing the call log 84 Call Forward 12 Acoustic Echo Suppression (AES) 13, 125 Call Forward all calls 125 acronyms, 125 Call Forward, enabling 54 Adding a display name 50 Call Hold 11 Adding a VPN profile 117 Call log 64 Calling 86 Clearing 87 sending a message 86 setting the size 88 Address book 88 Audio Panel 76 Audio session indicator Call on hold 74 Call State 75 call terminated 74 Caller number or name 75 Cellular A 75 Cellular
Index E CDMA Alert 112 Automatic pickup 112 Location Setting 112 Preferred Serving System 112 Talk after x rings 113 TTY Mode 112 Enable screen lock 40 CDMA cellular service 111 Enable screen lock automatically 41 Editing a VPN profile 121 Enable Perfect Forward Secrecy 118 Gateway 118 VPN 118 Checking your voicmail 51 End key 57 Code Division Multiple Access (CDMA) 10, 125 Ending a call 69 Code Division Multiple Access cellular service 111 Codec 13 Comfort Noise Generation (CNG) 13, 125 Communic
Index Fully Qualified Domain Name (FQDN) 13, 125 HTC Apache 14 HTC TyTN 14 G HTC Universal 14 G.7.11 Mu-Law 13 I G.711 A-Law 13 IKE Proposal Autotmatic rekey 120 Use Default IKE Proposal 120 G.
Index Missed Call Indicator (MCI) 11 R Missed calls 53 Real-Time Transport Protocol 126 Mobile Communication Client (MCC) 125 Real-Time Transport Protocol (RTP) 13 Monitoring networks in automatic mode 60 Receiving calls 65 Redialing the last number redialed 69 Multimedia Communication Server (MCS) 125 Requirements 14 Muting the microphone 69 S N Navigation bar 43 Network connection status 59 Network keys 57 Network status 40 Screen access 43 Screen functions 56 Screen lock 10, 40 Screen View m
Index system requirements, 14 T Talk key 57 Terminate Session 76 W Wide Area Network (WAN) 126 Windows Mobile native dialer 45 Wireless Fidelity (WiFi) 126 Today screen 43 Touchscreen 43 Transferring a call 71 U Uniform Dialing Plan (UDP) 126 Universal Resource Identifier (URI) 126 Universal Resource Locator (URL) 126 Universal Serial Bus (USB) 17 Use Default IKE Proposal IKE Proposal 120 Use Default IPSec Proposal IPSec Proposal 121 User setup 33 V Virtual Private Network (VPN) 11, 126 Voice Activity
Index 132
Nortel Mobile Communication 3100 Series Portfolio Nortel Mobile Communication Client for Windows Mobile User Guide Copyright © 2007 Nortel Networks. All Rights Reserved. LEGAL NOTICE While the information in this document is believed to be accurate and reliable, except as otherwise expressly agreed to in writing NORTEL PROVIDES THIS DOCUMENT "AS IS" WITHOUT WARRANTY OR CONDITION OF ANY KIND, EITHER EXPRESS OR IMPLIED.