
Configuration Guide
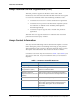

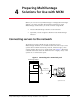

Table Of Contents
- Avaya MultiVantage Configuration Manager Installation and Configuration
- Table of Contents
- Preface
- 1 Resources and Notices
- 2 Overview
- 3 System Requirements
- 4 Preparing MultiVantage Solutions for Use with MCM
- 5 Installing MCM
- 6 Configuring MCM
- Glossary and Abbreviations
- Index
Avaya MultiVantage™ Configuration Manager Installation and Configuration 19
4VITEVMRK1YPXM:ERXEKI
7SPYXMSRWJSV9WI[MXL1'1
Before you can use Avaya MultiVantage™ Configuration Manager
(MCM), you must complete the following activities for each
MultiVantage solution that you want to access using MCM:
• Connect MultiVantage solutions to the network
• (Optional) Create a login for MCM on each MultiVantage
solution.
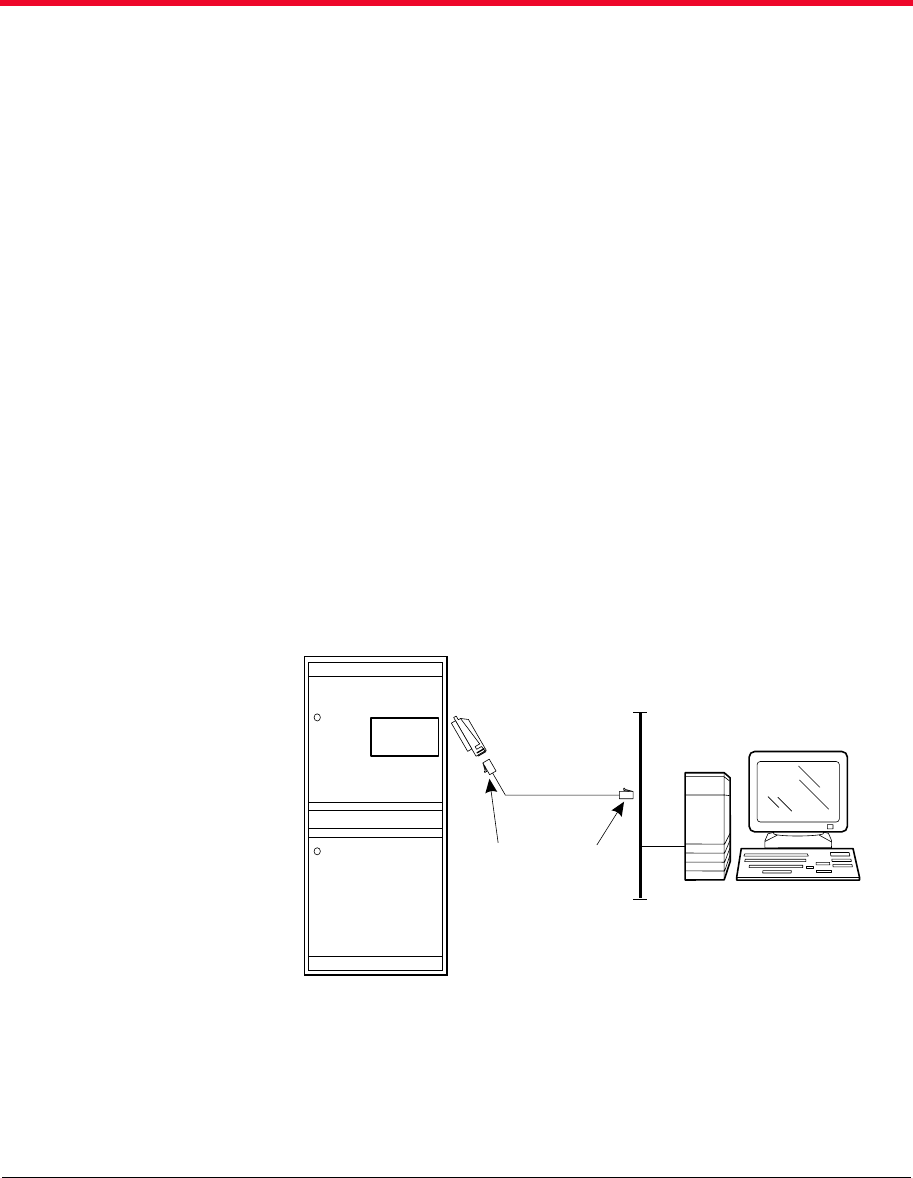
'SRRIGXMRKWIVZIVWXSXLIRIX[SVO
To function properly, MCM must be connected to your
MultiVantage solutions via a TCP/IP connection. New Avaya voice
systems have TCP/IP connectivity built-in, whereas legacy voice
systems require the use of a C-LAN circuit pack. Figure 1 illustrates
a TCP/IP connection from the MCM server to a legacy Avaya voice
system via a C-LAN circuit pack.
Figure 1. Connecting via C-LAN circuit pack
cydrdta LJK 103100
MultiVantage Solution
C-LAN
259A
adapter
RJ-45 RJ-45
LAN
MCM server
Category 5