
User guide


4-6 Configuring BCMS Vu from the Server
Configuring and Managing the
BCMS Vu
Software
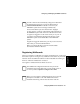
5. In the “Mode of Connection:” group box, choose the “TCP/IP” or the
“Data Module” radio button. If you choose the “TCP/IP” option, the
“Host Name/IP Address:” and “Port:” boxes are enabled and the
“Phone Number:” and “Serial Port:” are disabled. If you choose the
“Data Module option,” the “Phone Number:” and “Serial Port:” boxes
are enabled and the “Host Name/IP Address:” and “Port:” boxes are
disabled.
6. If you choose the “TCP/IP” option, follow Steps “a” and “b,” and go to
Step 8.
a. Complete the “Host Name/IP address:” box. Type the Host Name or
the IP address of the DEFINITY ONE system to which connection is
desired.
b. Complete the “Port:” box. The “port” is the port on the switch to
which TCP/IP sockets will bind to initiate communications to the
switch. For the DEFINITY ONE system, port “22” must be used.
7. If you choose the “Data Module” option, follow Steps “a” and “b.”
a. Use the drop-down list for the “Serial Port:” box to select the serial
port that you are using to connect to the data module, if the data
module option is chosen. The serial ports that are available in the
drop-down list will match the ports available on your PC. If you do
not know which serial (COM) port to choose, look at the back of your
PC for the port (1 through 8) to which the data module is connected.
b. In the “Phone Number:” box type the hunt group extension for
Netcon channels that must be dialed for the data module to connect
to the DEFINITY system.
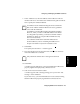
8. Select Next.
In the window that appears you will see a diagram showing the path to
the DEFINITY system you are trying to connect to. Select Test
Connection to confirm that the connection has been properly set up.
Note
If you are configuring for the first time, then the “TCP/IP”
radio button is selected by default. Otherwise the option that
was used the previous time is selected.