SIP Software for Avaya 1100 Series IP Deskphones-Administration with Avaya Aura® Application Server 5300 SIP 4.2 18-604103, Standard 01.
© 2012 Avaya Inc. Copyright All Rights Reserved. Except where expressly stated otherwise, no use should be made of materials on this site, the Documentation, Software, or Hardware provided by Avaya.
Contents Chapter 1: New in this release........................................................................................... 9 Features.................................................................................................................................................... 9 MLPP_PRECEDENCE_DEFAULT................................................................................................... 9 MLPP_NETWORK_DOMAIN enhancement................................................................
Phone bug logging/recovery commands................................................................................................... 117 IP Deskphone configuration commands summary................................................................................... 118 Create the Dialing Plan file on the provisioning server............................................................................. 119 DRegex...................................................................................................
SIP Domain DNS Lookup feature............................................................................................................. 230 How DNS lookup works.................................................................................................................... 230 Server Profiles........................................................................................................................................... 231 Chapter 12: IP Deskphone restrictions................................
Characteristics of the licensing framework................................................................................................ 303 License file download................................................................................................................................ 303 [LICENSING] section................................................................................................................................ 305 License information for the IP Deskphone.......................
Test key..................................................................................................................................................... 358 Reset Factory Settings support................................................................................................................. 359 Logging System........................................................................................................................................ 361 Problem Determination Tool (PDT)...............
SIP Software for Avaya 1100 Series IP Deskphones-Administration with Avaya Aura ® Application Server 5300 November 2012
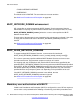
Chapter 1: New in this release SIP Software for Avaya 1100 Series IP Deskphones- Administration , NN43170-600 supports SIP Software Release 4.3. This document contains administration information for the Avaya 1120E IP Deskphone, Avaya 1140E IP Deskphone, and Avaya 1165E IP Deskphone. Features SIP Software Release 4.
New in this release • FLASH-OVERRIDE-OVERRIDE • EMERGENCY The default value is ROUTINE. The text values are not case-sensitive. See Multi-Level Precedence and Preemption on page 223. MLPP_NETWORK_DOMAIN enhancement SIP 4.2 provides an enhancement to the MLPP_Network_Domain parameter. Now the Administrator can specify any MLPP Network Domain Name (for example: DSN, UC, CUC). MLPP_NETWORK_DOMAIN [] where the value specifies the MLPP Network Domain Name.
Features higher than Routine. The user is able to change the default precedence level using the Precedence menu on the IP Deskphone: Options > Select Precedence. The menu is available either when dialing or transferring a call. This feature is also available when dialing from the Address Book, using Speed Dial, or using Redial. There is no limit to the number of password retries. The ENABLE_SERVICE_PACKAGE parameter must be configured as YES and MLPP must be configured for the user.
New in this release The administrator can configure OCSP parameters in the [DEVICE_CONFIG] section of the Provisioning file 11xxeSIP.cfg. 2. Device Settings menu of the IP Deskphone OCSP parameters can be modified in the Device Settings menu of the IP Deskphone.
Features Ignore redirect SIP Release 4.2 provides the ability to configure the system to ignore redirect messages sent by routers. The following parameter is introduced in the Device Configuration file: IPV6_REDIRECT_IGNORE [Yes | No] The default value is NO. The parameter cannot be changed on the IP Deskphone user interface. See Server and network configuration commands on page 46. Disable echo replies SIP 4.
New in this release Audio tuning parameters SIP 4.3 introduces the following audio tuning parameter for the Device Configuration file, specific to the 1165E IP Deskphone: AUDIO_PROFILE where is one of the following values: • DEFAULT — TIA audio tuning parameters are applied • S004 — S004 standard (Australia and New Zealand) audio tuning parameters are applied The values are not case-sensitive.
Revision history • AUTOLOGIN_ID_KEY parameters • roaming profiles and network address book • reset codecs to default • modifying the SIP provisioning file April 2011 Standard 03.01. This document is up-issued to support SIP Software Release 4.1. January 2011 Standard 02.03. This document is published to support SIP Software Release 4.0. January 2011 Standard 02.02. This document is up-issued to support SIP Software Release 4.0. October 2010 Standard 02.01.
New in this release 16 SIP Software for Avaya 1100 Series IP Deskphones-Administration with Avaya Aura ® Application Server 5300 November 2012 Comments? infodev@avaya.
Chapter 2: Customer service Visit the Avaya Web site to access the complete range of services and support that Avaya provides. Go to http://www.avaya.com/support or go to one of the pages listed in the following sections.
Customer service Getting technical support from the Avaya Web site The easiest and most effective way to get technical support for Avaya products is from the Avaya Technical Support Web site at http://support.avaya.com. 18 SIP Software for Avaya 1100 Series IP Deskphones-Administration with Avaya Aura ® Application Server 5300 November 2012 Comments? infodev@avaya.
Chapter 3: Introduction to this guide Subject SIP Software for Avaya 1100 Series IP Deskphones — Administration, NN43170-600 describes how to install, configure, and provision the Avaya 1120E IP Deskphone, Avaya 1140E IP Deskphone, and Avaya 1165E IP Deskphone for use on a SIP network. These IP Deskphones are collectively known as Avaya 1100 Series IP Deskphones. In this document, the Avaya 1100 Series IP Deskphones are referred to as IP Deskphones.
Introduction to this guide 20 DCP Device Certificate Profile DET Distinguished Encoding Rules DHCP Dynamic Host Configuration Protocol DN Distinguished Name DND Do Not Disturb feature DNS Domain Name System DOD Department of Defense DRegex Digit Regular Expression DSCP Differentiated Services Code Point DSN Defense Switched Network EAP Extensible Authentication Protocol ECR Error Collection and Recovery EJBCA Enterprise Java Bean Certificate Authority ERE Extended Regular Expres
Acronyms MADN Multiple Appearance Directory Number MD5 Message Digest v5 MLLP Multi-Level Precedence and Pre-emption MS Avaya Media Server NAT Network Address Translator NetConfig Configuration screens available after an IP Deskphone resets NDU Network Diagnostic Utility OAM Operation, Administration (and) Maintenance PDT Problem Determination Tool PEAP Protected Extensible Authentication Protocol PEC Product Engineering Code PKCS#12 Public Key Cryptographic Standard #12 POE Power
Introduction to this guide SKS Special Key Sequence SMTP Simple Mail Transfer Protocol SOAP Simple Object Access Protocol SRTCP Secure Real-time Transport Control Protocol SRTP Secure Real-time Transport Protocol STUN Simple Traversal of UDP through NAT devices TCP Transport Control Protocol TFTP Trivial File Transport Protocol TLS Transport Level Security TPS Terminal Proxy Server TTL Time-to-live UDP User Datagram Protocol UFTP UNIStim File Transfer Protocol UI User Interface
Chapter 4: Overview Introduction This chapter describes the hardware and software features of the Avaya 1100 Series IP Deskphones and provides a brief overview of Session Initiation Protocol (SIP). In this document, Avaya 1100 Series IP Deskphones will be referred to as IP Deskphones. Avaya 1100 Series IP Deskphones with SIP Software The Avaya 1100 Series IP Deskphones connect to an IP network using an Ethernet connection.
Overview Figure 1: Avaya 1165E IP Deskphone with SIP Software SIP overview Session Initiation Protocol (SIP) is a signaling protocol used for establishing multimedia sessions in an Internet Protocol (IP) network. SIP is a text-based protocol similar to Hyper Text Transfer Protocol (HTTP) and Simple Mail Transfer Protocol (SMTP). With the introduction of SIP to IP Deskphones, telephony integrates easily with other Internet services. SIP allows the convergence of voice and multimedia.
Related documentation Related documentation The Avaya 1100 Series IP Deskphones with SIP Software User Guides explains how to do the following: • use the context-sensitive soft keys and Navigation key cluster • enter text • use the address book • access and use the call inbox and call outbox • configure and use instant messaging • receive, identify, answer, redirect, decline, or ignore an incoming call • operate hold, three-way calling, call transfer, and call park • use other features such as speed dial,
Overview Installation overview To install the Avaya 1100 Series IP Deskphones with SIP Software, three basic steps are required. 1. Configure the provisioning server and, optionally, the DHCP server. The function of the provisioning server is to provide configuration options to every IP Deskphone throughout the network. The DHCP server can be configured to provide basic network-configuration data or a more comprehensive set of network-configuration data for the IP Deskphone with SIP Software. 2.
Installation overview Figure 2: Installation of IP Deskphones with SIP Software, page 1 of 2 SIP Software for Avaya 1100 Series IP Deskphones-Administration with Avaya Aura ® Application Server 5300 November 2012 27
Overview Figure 3: Installation of IP Deskphones with SIP Software, page 2 of 2 28 SIP Software for Avaya 1100 Series IP Deskphones-Administration with Avaya Aura ® Application Server 5300 November 2012 Comments? infodev@avaya.
Chapter 5: Before installation Introduction This chapter features a checklist of tasks you must complete before you install SIP Software on the Avaya 1100 Series IP Deskphones. Preinstallation Complete the following checklist. Preinstallation checklist 1. Read and become familiar with your IP Deskphone User Guide. 2. Ensure there is one IP Deskphone boxed package for each IP Deskphone being installed. 3.
Before installation Table 2: External power supply parts list (order separately) CPC code PEC code Product description NTYS17xxE6 IP Deskphone Global Power Supply (2000 series, 1100 series, 1200 series) (RoHS) N0089603 NTYS14AAE6 Standard IEC Cable - North America (RoHS) A0781922 NTTK15AA Standard IEC Cable – Australia / NZ (Note: RoHS not required) N0114986 NTTK16ABE6 Standard IEC Cable – Europe N0109787 NTTK17ABE6 Standard IEC Cable – Switzerland N0109881 NTTK18ABE6 Standard IEC Cable
Chapter 6: Configure the provisioning server Important: If you have UNIStim software on your IP Deskphone, the software must be converted from UNIStim to SIP before you proceed with the following instructions. See the chapter Upgrade and convert the IP Deskphone software on page 131 for instructions on how to convert the software on an IP Deskphone from UNIStim to SIP.
Configure the provisioning server IP Deskphone, a new file transfer session starts for each file to be downloaded. The provisioning file (for example, 1165eSIP.cfg) can contain commands that prompt for confirmation before a file is downloaded. Download the SIP Software to the provisioning server To download the SIP Software, perform the following procedure. Downloading SIP Software for the IP Deskphone 1. Go to http://www.avaya.com/support. 2.
Create the SIP provisioning file on the provisioning server [LANGUAGE] DOWNLOAD_MODE AUTO DELETE_FILES YES VERSION 000024 FILENAME French_d24lang FILENAME Portuguese_d24.lang FILENAME Czech_d24.lang FILENAME Russian_d24.lang Language files section [IMAGES] DOWNLOAD_MODE FORCED VERSION 000003 FILENAME mountains.png FILENAME sunrise.png Images section [TONES] DOWNLOAD_MODE AUTO DELETE_FILES YES VERSION 000003 FILENAME ring.
Configure the provisioning server [USER_CONFIG] DOWNLOAD_MODE FORCED VERSION 000001 IP Deskphone-specific configuration files Table 3: Provisioning file supported sections [DEVICE_CONFIG] Device configuration file [FW] Firmware image [DIALING_PLAN] Dialing plan [LANGUAGE] Downloadable language files (more than one can be specified in each section) [IMAGES] Downloadable images [TONES] Downloadable tones (.
Create the SIP provisioning file on the provisioning server A section is a mandatory field. Parsing of download rules for each file type starts with finding this key word. Currently, the following sections are supported by the IP Deskphone with SIP Software: • [DEVICE_CONFIG]—this section is used to configure various parameters in the IP Deskphone. • [FW] —image files originate from Avaya only and are authenticated during software download.
Configure the provisioning server kHz, 16 bit mono). The WAV files can be created and downloaded to the IP Deskphone. These files are not authenticated by the IP Deskphone. • [LICENSING]—this section is used for downloading license files. • [SEC_POLICY]—this section is use for for downloading a file, which contains rules that define the security policy for the IP Deskphone.
Create the SIP provisioning file on the provisioning server Note: The version number of the firmware [FW] can be longer, up to 19 characters, and must follow this format: SIP1120e03.02.16.00 SIP1140e03.02.16.00 SIP1165e03.02.16.00 SIP12x003.02.16.00 Caution: The version number is stored permanently on the IP Deskphone until a higher version number is downloaded. However, if the Forced option is in the 1xxxeSIP.
Configure the provisioning server - NO – disables the prompt • PROTOCOL [TFTP | FTP | HTTP] [ HTTPS] defines the protocol used to download the file. The IP Deskphone with SIP Software supports TFTP, FTP, HTTP, and HTTPS protocols for file download. This command is optional. If it is not present, the default protocol TFTP is used. Important: When using the TFTP protocol to transfer the software image, the average round trip time must be < 75 ms.
Create the SIP provisioning file on the provisioning server - NO – after the user login name is entered, the password screen appears. • AUTOLOGIN_AUTHID_KEYxx [* | userid@domain] is used for auto login when the AUTOLOGIN_ENABLE method is configured to USE_AUTOLOGIN_ID. If this parameter is blank and AUTOLOGIN_ENABLE is configured to USE_AUTOLOGIN_ID (or 2) in the device configuration file, then the IP Deskphone uses the value associated with AUTOLOGIN_PASSWD_KEY01.
Configure the provisioning server Create the device configuration file on the provisioning server After the IP Deskphone downloads the provisioning file, the IP Deskphone reads the [DEVICE_CONFIG] section and is directed to download the device configuration file. The device configuration file is a clear text file and the naming convention is defined by the administrator. See the FILENAME keyword in the [DEVICE_CONFIG] section of the SIP provisioning file.
Create the device configuration file on the provisioning server configuration file, removing the IP Deskphone-specific configuration file does not clear the setting. The following table provides a summary of the commands that can be used in the device configuration file. A description and the exact syntax of each command is given in Device configuration commands on page 45.
Configure the provisioning server Configuration command type Feature configuration commands 42 Configuration commands SRTP_CIPHER_1 SRTP_CIPHER_2 PCPORT_ENABLE DHCP_NUMBER_OF_RETRIES DHCP_INITIAL_TIMEOUT HTTP_RETRY_NUMBER MLPP_ALIAS_NETWORK_DO MAINS MLPP_PRECEDENCE_DOMAI N MLPP_PRECEDENCE_ENABL E MLPP_PRECEDENCE_DEFAU LT CACHED_IP_ENABLED LLDP_ENABLE FAIL_BACK_TO_PRIMARY DHCP_UNTAG_ENABLED VMAIL VMAIL_DELAY IP_OFFICE_ENABLE IPOFFICE_MSG_CODE IPOFFICE_CONF_CODE IPOFFICE_REDIAL_CODE LLDP_WAITING_TIME AU
Create the device configuration file on the provisioning server Configuration command type Configuration commands TOVM_VOICEMAIL_PARAM MAX_RING_TIME ENABLE_UPDATE E911_TERMINATE_ENABLE E911_USERNAME E911_PASSWORD KEEP_ALIVE_TYPE CONN_KEEP_ALIVE AUTOLOGIN_ID_KEYxx AUTOLOGIN_PASSWD_KEYxx HOLD_TYPE ENABLE_3WAY_CALL MADN_DIALOG DEFAULT_CFWD_NOTIFY FORCE_CFWD_NOTIFY DISPLAY_CALL_SNDR_IM_KE Y RTP_MIN_PORT RTP_MAX_PORT SCA_HOLD_BEHAVIOR SCA_APPEARANCES SCA_BROADWORKS SCA_LINE_SEIZE_EXPIRES EXP_MODULE_ENABLE PRO
Configure the provisioning server Configuration command type Configuration commands CUST_CERT_ACCEPT CERT_ADMIN_UI_ENABLE USER_FILE_ENABLE DEFAULT_ADDRESSBOOK_FI LE SEC_POLICY_ACCEPT SECURITY_LOG_UI_ENABLE KEY_SIZE KEY_ALGORITHM TLS_CIPHER SIGN_SIP_CONFIG_FILES FP_PRESENTED FP_ENTERED SUBJ_ALT_NAME_CHECK_ENA B LE CERT_EXPIRE SECURITY_POLICY_PARAM_C HANGE AUTO_PRV_ACCEPT AUDIO_PROFILE CONFERENCE_URI1 CONFERENCE_URI2 CONFERENCE_URI3 CONFERENCE_URI4 CONFERENCE_URI5 DEFAULT_SPEEDDIALLIST_FI LE DEFAULT_CUST
Create the device configuration file on the provisioning server Configuration command type Configuration commands HASHED_ADMIN_PASSWORD OCSP_ENABLE OCSP_SERVER OCSP_CHECK_TIMEPERIOD Audio Codecs G729_ENABLE_ANNEXB G723_ENABLE_ANNEXA DEF_AUDIO_QUALITY AUDIO_CODEC1 AUDIO_CODEC2 AUDIO_CODEC3 AUDIO_CODEC4 AUDIO_CODEC5 AUDIO_CODEC6 Deskphone bugs logging/ recovery commands RECOVERY_LEVEL LOG_LEVEL AUDIO_CODEC7 AUDIO_CODEC8 AUDIO_CODEC9 AUDIO_CODEC10 AUDIO_CODEC11 AUDIO_CODEC12 AUDIO_CODEC13 AUDIO_CODEC14
Configure the provisioning server Server and network configuration commands FAIL_BACK_TO_PRIMARY [YES | This parameter allows you to enable/disable the Fail NO] Back to Primary feature. - YES – enables the fail back. - NO – disables the fail back (default). SIP_DOMAIN[x] [domain_name] This parameter preconfigures the proxy domain name for all servers. The same configuration can be done through the domain configuration menu on the IP Deskphone. - x – the number of the SIP domain number from 1 to 5.
Server and network configuration commands DNS_DOMAIN [domain] This parameter is the DNS domain of the IP Deskphone. DEF_USERS[x] [user_name] This parameter allows you to enter the default user name for all domains. When the device configuration file is downloaded, the default user name is used when logging in. - x – the domain number from 1 to 5. - user_name – the default user name. UPDATE_USERS [YES | NO] This parameter affects the default user names stored in the IP Deskphone.
Configure the provisioning server The default value is YES if not specified in the device configuration file. If SIP_PING is changed in the Device configuration file, the IP Deskphone must be rebooted for the change to take effect. - YES – enables pinging - NO – disables pinging REG_REFRESH_INTERVAL [seconds] This parameter allows the administrator to change the default re-registration time of the IP Deskphone. The default is 86400 seconds (or 24 hours).
Server and network configuration commands addresses must be configured through manual or static configuration. - YES – enables IPv6 stateless autoconfiguration (default). - NO – disables IPv6 stateless autoconfiguration. IPV6_REDIRECT_IGNORE [YES | This parameter configures the system to ignore redirect NO] messages sent by routers. The default value is NO. - YES – the system ignores all redirect messages. - NO – the system processes all redirect messages. This is the default.
Configure the provisioning server - BE-2MLines (default) - BE-Cap Neg - SecureOnly SRTP_CIPHER_1 This parameter configures the preferred order for SRTP [AES_CM_128_HMAC_SHA1_80 cipher offers. The default value is AES_CM_128_HMAC_SHA1_80. | AES_CM_128_HMAC_SHA1_32] - AES_CM_128_HMAC_SHA1_80 (default value) - AES_CM_128_HMAC_SHA1_32 - None This parameter configures the preferred order for SRTP SRTP_CIPHER_2 [AES_CM_128_HMAC_SHA1_80 cipher offers. The default value is | AES_CM_128_HMAC_SHA1_32.
Server and network configuration commands When this parameter is changed, the system resets. SFTP_WRITE_PATTERNS [x] This parameter enables file extensions to write from the IP Deskphone. The default values are .cfg and .dat. The write pattern for this entry should be strictly followed. A valid example is as follows: SFTP_WRITE_PATTERNS ..cfg,.txt,.wr1,.wr2 Important: Ensure there are no spaces between the extensions. When this parameter is changed, the system resets.
Configure the provisioning server - minimum value – 4 characters - maximum value –20 characters EAPPWD [x] The administrator is prompted to enter a password when EAP-PEAP and EAP-MD5 are selected. - minimum value – 4 characters - maximum value –12 characters CA [IP address] This parameter is the IP address of the Certificates Server. CA_DOMAIN [phone name] This parameter is the IP Deskphone phone name.
Server and network configuration commands or if the IP Deskphone should interrupt regular work and wait for a DHCP response. The default is NO. - YES — the last IP address information is used if the DHCP server is not reached. - NO — Must receive a response from the DHCP server to assign the IP Deskphone an IP address (default). If DHCP=YES on the IP Deskphone, then the cached IP parameter can also be modified through the IP Deskphone's UI in the Network > Diagnostics menu.
Configure the provisioning server timeout interval and keeps the timeout value of 64 seconds. - minimum value is 4 seconds - maximum value is 10 seconds If the value defined in the System Configuration file is incorrect, the default value is used.
Feature configuration commands Feature configuration commands TOVM_SOFTKEY_ENABLE [YES | NO] This feature enables the transfer to voice mail feature and displays a soft key on the IP Deskphone. When a user has an incoming call they can transfer the call directly to their voice mail. This is supported on the AS5200 and AS5300 servers. - YES – enables the toVM soft key on the IP Deskphone. - NO – disables the toVM soft key on the IP Deskphone.
Configure the provisioning server RTP_MAX_PORT [x] The maximum RTP port value is an integer between 1024 and 65535, exclusive of the restricted SIP ports between 5059 and 5080. The default value is 50100. Note: The RTP port configuration parameters must satisfy the constraints that (RTP_MAX_PORT RTP_MIN_PORT) is greater than or equal to 10 and less than 1000. Note: If there is a provisioning error, RTP_MIN_PORT is reset to the default value of 50000 and RTP_MAX_PORT is reset to the default value of 50100.
Feature configuration commands calls to ring before ignoring them. The default value is 120. ENABLE_UPDATE [YES | NO] - YES – enables UPDATE message support and adds “UPDATE” to ALLOW header. This is the default option. - NO – disables UPDATE message support. Note: ENABLE_UPDATE is provisioned after user logoff. PROMPT_ON_LOCATION_OTHER [YES | NO] - YES – prompt the user to select new location if location “other” was previously selected.
Configure the provisioning server - YES – IP Office-specific features are active. - NO – IP Office-specific features are not active. IPOFFICE_CONF_CODE [opt_string] This parameter allows the administrator to configure the Conf soft key. If the parameter is configured, the IP Deskphone user is able to call the IP Office option "Conference". — opt_string = code of the Conference option Example: IPOFFICE_CONF_CODE *3 Note: The option is available if IP_OFFICE_ENABLE is YES.
Feature configuration commands Note: The option is available if IP_OFFICE_ENABLE is YES. The code of the option is specified in the IP Office Administration Guide AUTOLOGIN_ENABLE [YES | NO | USE_AUTOLOGIN_ID] or [1 | 0 | 2] This parameter controls whether the IP Deskphone attempts to automatically log on to the proxy server. - YES – turns on the auto login feature. - NO – turns off the auto login feature.
Configure the provisioning server Note: When using this setting, the user is prevented from logging off the IP Deskphone. Note: If Autologin ID is enabled in the IP Deskphonespecific configuration file, it is recommended that AUTOLOGIN_ENABLE be configured as either Yes/No or 1/0 in the device configuration file. This recommendation facilitates migrating an IP Deskphone that uses the IP Deskphone-specific configuration file to not using the IP Deskphonespecific configuration file.
Feature configuration commands same time. By default the automatic update feature is disabled (see AUTO_UPDATE_TIME_RANGE). - x – the time after midnight that the automatic update occurs. AUTO_UPDATE_TIME_RANGE [x] This parameter is the range in hours, from the AUTO_UPDATE_TIME where an IP Deskphone checks for updates from the server. The default range is 1 hour. - x – the range in hours when the IP Deskphone checks for updates from the server. The range can be from 1 to 6 hours.
Configure the provisioning server verify that early media is being received. See RFC3262 for details. Note: ENABLE_PRACK must be configured as NO when connected to the MCS 5100 Release 3.5 system. Note: ENABLE_PRACK is provisioned after user logoff. - YES – enables PRACK. - NO – disables PRACK and is the default value. PROXY_CHECKING [YES | NO] This parameter enables and disables extra security checking when incoming requests are sent to the IP Deskphone.
Feature configuration commands • PCMU • G729 • G722 • G723 - text description – a text description of the codec. For more information about audio codec configuration, see Audio codecs on page 261 DEF_AUDIO_QUALITY [Low | Medium | High] This parameter is used to configure the default audio quality used for each new call. Audio quality can be changed when the call is active. If this command is not present in the configuration file, the IP Deskphone uses High quality as its default value.
Configure the provisioning server FORCE_BANNER is configured as YES, the banner from the configuration file is reloaded each time the IP Deskphone powers up, even if the user changes the banner manually. The default value is NO. - YES – causes the banner configured by the administrator to override any banner configured by the user. - NO – allows the user to configure the banner (default). DST_ENABLED [YES | NO] This parameter enables and disables the Daylight Savings Time (DST) mechanism.
Feature configuration commands Location FORCE_TIME_ZONE [YES | NO] Time zone offset (seconds) (GMT-05:00) Eastern time (US and Canada) -18000 (GMT-04:00) Atlantic time (US and Canada) -14400 (GMT-03:00) Brasilia, Buenos Aires -10800 (GMT+00:00) Greenwich, Dublin, Lisbon, London 0 (GMT+01:00) Amsterdam, Berlin, Rome, Stockholm, Madrid, Paris 3600 (GMT+02:00) Athens, Istanbul, Cairo, Helsinki, Jerusalem 7200 (GMT+03:00) Moscow, St.
Configure the provisioning server - ENCRYPTED – Instant Messages are sent encrypted - TEXT – Instant Messages are sent as text. - SIMPLE – Instant Messages are sent using SIP for Instant Messaging and Presence Leveraging Extensions (SIMPLE) protocol. - DISABLED – Instant Messaging is turned off and no Instant Messages can be sent or received. IM_NOTIFY [YES | NO] This parameter is used to turn on or off the Blue LED indicator upon receipt of an Instant Message. The default value is YES.
Feature configuration commands line keys. A value of 1 allows a single user at a time. A value of 0 is treated the same as a value of 1 because you cannot restrict the IP Deskphone to 0 logins. The number of concurrent logins can never exceed 24, regardless of the value configured on MAX_LOGINS. The default is 24. - x – the maximum number of user accounts that can be logged in at the same time.
Configure the provisioning server - YES - send the PUBLISH request - NO - do not send the request DEF_LANG [language] This parameter configures the default language. Select one of the supported languages from the language list downloaded. Note that the corresponding language file must be downloaded and stored in the IP Deskphone through the [LANGUAGE] section in Provisioning. If the language file is not stored in the IP Deskphone, the default language English is used.
Feature configuration commands - RFC2543 – standard protocol of the Internet Engineering Task Force (IETF). - RFC3261 – standard protocol of the IETF. ENABLE_3WAY_CALL [YES | NO] This parameter enables or disables local telephonebased three-way calling for three-party conferences. - YES – enables local (telephone-based) three-way calling for three-party conferences. YES is the default. - NO – disables local (telephone-based) three-way calling.
Configure the provisioning server cannot contact the server, the IP Deskphone tries every 15 minutes up to a maximum of 6 attempts, and then hourly attempts are made. If SNTP_ENABLE is configured as NO, the IP Deskphone tries to retrieve the time and date from the SIP proxy server. However, not all SIP proxy servers support this method of retrieving the time and date. - YES – enables NTP. - NO – disables NTP.
Feature configuration commands created, unless the FORCE_CFWD_NOTIFY flag is also used. The default setting is NO. - YES – a brief ring splash plays when a call is forwarded. - NO – the ring splash does not play. FORCE_CFWD_NOTIFY [YES | NO ] This parameter allows the administrator to force the behavior of the DEFAULT_CFWD_NOTIFY value on all users who login to the IP Deskphone. The default setting is NO. - YES – the DEFAULT_CFWD_NOTIFY configuration value is forced into effect for the user.
Configure the provisioning server CONFERENCE_URI [x] This parameter contains the conference Uniform Resource Identifier (URI); for example CONFERENCE_URI conference@bvw.com. This is the address of the conference server when the user attempts to make a conference call. The default is conference@avaya.com. If a service package is used, then this is provided by the service package.
Feature configuration commands user is not able to log out of the IP Deskphone. The default value is NO. - YES – enables the user to logout without a password. - NO – does not allow the user to logout without a password (default). REMOTE_CHECK_FOR_UPDATE [YES This parameter provides the functionality to | NO] remotely force the IP Deskphone to check for new firmware and configuration files. The proxy sends a NOTIFY with Event header set to “check-sync”.
Configure the provisioning server the same emergency username, otherwise, the emergency call fails. E911_PROXY [proxy_name] This parameter is a default emergency proxy.
Feature configuration commands The supported values are OS or CRLF (or any string). The default value is OS. — type_string - the keep-alive mode value CONN_KEEP_ALIVE [conn_keep] This parameter configures the time in seconds to use for the keep-alive. The values are from 5 to 1800 seconds. The default value is 120 seconds.
Configure the provisioning server user to display the provisioned banner text as part of the login process. The banner text file is a separate file downloaded by provisioning. The banner text file is specified much like the current dialing plan is specified (file name listed in 1xxxeSIP.cfg, under section [LOGIN_BANNER], and is downloaded when enabled or disabled. To be accepted, the file must contain at least one byte and must be no bigger than 2048 bytes.
Feature configuration commands allows the user to define a password for the screensaver. The default value is NO. - YES – enables the ability to configure and use a less secure user-defined password for the IP Deskphone screensaver in password protected mode. - NO – disables the ability to configure and use a less secure user-defined password for the IP Deskphone screensaver in password protected mode (default).
Configure the provisioning server be configured to Y for the NO_PASS mode to be configured on the new profiles. SCRNSVR_DELAY [[minutes] This parameter determines how long an IP Deskphone remains at the idle screen before the screensaver is evoked. This parameterconfigures the delay, in minutes, for the display screensaver of newly created profiles. Changes to this value through the Prefs context-sensitive soft key overwrites the value provided through provisioning.
Feature configuration commands BG_IMAGE_ENABLE must be configured as YES in order to select a background image. - YES – configures the background image for the display of newly created profiles. - NO – does not configure the background image for the display of newly created profiles. Note: Image files for the IP Deskphone must include the PNG format. SPEEDLIST_KEY_INDEX [x] This parameter specifies the programmable key used for displaying the Speed Dial List.
Configure the provisioning server x – the maximum number of possible active calls MAX_BLFCALLS [x] This parameter defines the maximum number of available Busy Lamp Field (BLF) calls on the IP Deskphone. The values are 1 to 10. The default value is 10. x – the maximum number of available Busy Lamp Field (BLF) calls The MAX_BLFCALLS parameter value cannot be greater than the MAX_APPEARANCE parameter value.
Feature configuration commands FM_LANGS_ENABLE This parameter allows the user to perform actions on Languages files using the file manager. The default value is YES. - YES – allows the user to perform actions on Language files using the file manager (default). -. - NO – does not allow the user to delete or copy Language files on the IP Deskphone or USB drive using the file manager FM_SOUNDS_ENABLE [YES | NO] This parameter allows the user to act on WAV files using the file manager.
Configure the provisioning server - YES – to act on JPG and PNG files using the file manager. - NO – does not allow the user to delete of copy JPG and PNG files on the IP Deskphone or USB drive through the file manager. FM_CONFIG_ENABLE [YES | NO] This parameter allows the user to act on CFG files using the file manager. The default value is NO. - YES – to act on CFG files using the file manager.
Feature configuration commands Note: If the default value is acceptable, the USB_MOUSE configuration command is not required to be in the Device Configuration file. If change is required, the USB_MOUSE configuration command must be placed in the Device Configuration file with the new value. USB_KEYBOARD [YES | NO[ This parameter enables or disables the USB keyboard. The default value is NO. - YES – enables the USB keyboard - NO – disables the USB keyboard (default).
Configure the provisioning server - YES – enables the USB flash drive - NO – disables the USB flash drive (default). Note: If the default value is acceptable, the USB_MEMORY_STICK configuration command is not required to be in the Device Configuration file. If change is required, the USB_MEMORY_STICK configuration command must be placed in the Device Configuration file with the new value. ATA_REGION [reg_string] This parameter specifies the region for an ATA USB-device.
Feature configuration commands SESSION_TIMER_ENABLE [YES | NO] This parameter indicates if the session timer service is enabled or disabled. The default value is YES. - YES – the Session Timer Service for the IP Deskphone is enabled, and the behavior of the IP Deskphone complies with RFC4028. - NO – the Session Timer Service is disabled. SESSION_TIMER_DEFAULT_SE [seconds] This parameter indicates the default session expiration in seconds.
Configure the provisioning server - YES – the Port Mirroring prompt in the Advanced Diag Tools dialog is enabled and can be modified. - NO – the Port Mirroring prompt in the Advanced Diag Tools dialog is disabled (dimmed) and cannot be modified. MEMCHECK_PERIOD [seconds] This parameter determines the time period in seconds when the Memory monitor wakes up (after re-start or the last memory check attempt). The values are 1800 (0.5 hrs) to 86400 (24 hrs). The default value is 86400 (24 hrs).
Feature configuration commands For more information, see Roaming profiles on page 182. USER_FILE_PATH / This parameter defines the location of the configuration file for each user which contains the path to custom keys file. DEFAULT_ADDRESSBOOK_FILE [filename] This parameter is the default filename used when downloading the provisioning files. Default names are overwritten by names specified in the user.cfg file. For more information, see Roaming profiles on page 182.
Configure the provisioning server - YES – Call Forwarding Reminder service subscribes to its own dialog event. - NO – Call Forwarding Reminder service subscribes to network-redirection-reminder event package. MLPP_NETWORK_DOMAIN [xx] This parameter is the network domain of the user to be added to the INVITE message of outgoing calls. It can specify any MLPP Network Domain Name. The default value is DSN.
Feature configuration commands CALL_WAITING_TONE [0|1] This parameter configures the call waiting tone. The default value is 0. - 0 – single buzz tone (default). - 1 – two-beep periodic tone. DISABLE_SPKRPHN [YES | NO] This parameter disables the speakerphone for all non-911 calls. This is intended for DoD. The default value is NO. - YES– disables the speakerphone. - NO – enables the speakerphone .
Configure the provisioning server LOGINALPHA_ENABLE [YES | NO] This parameter allows the system administrator to configure the initial login and logout of the IP Deskphone to be in either alphanumeric mode or numeric mode. The default is NO. - YES – initial login and logout is alphanumeric. - NO – initial login and logout is numeric (default). FIPS_MODE [YES | NO] FIPS mode is used in a Federal environment.
Feature configuration commands - YES – enables the Remote Check for Updates feature. - NO – the IP Deskphone does not act on the NOTIFY message from the proxy. SECURE _INCALL_DIGITS [YES | NO] This parameter shows the typed digits as asterisks when the user makes a call into the voice mail. When this feature is enabled, the most recentlypressed key is displayed but is overwritten by an asterisk (*) when the next key is pressed. The user has the option to Hide or Unhide the digits typed.
Configure the provisioning server E911_PROXY is not defined, then the value of SIP_DOMAIN1 is used as the emergency proxy. E911_PASSWORD [password] This parameter is the password for the emergency username that is used for making an emergency call that does not require login. The proxy must be configured with the same password; otherwise the emergency call fails.
Feature configuration commands are 0, 15, 30, 60, 120, 300, 600. The default value is 30. - x – 0, 15, 30, 60, 120, 300, and 600 For example, MENU_AUTO_BACKOUT 15. Note: There are some application screens that do not time out. Some menus, such as the administration menus, require the user to press the Back or Quit key to exit the screen. AUTOCLEAR_NEWCALL_MSG [YES | This parameter configures the missed calls NO] notification mode.
Configure the provisioning server - YES – enables the customizable banner login banner. - NO – disables the customizable banner login banner (default). SECURE_UI_ENABLE [YES| NO] This parameter disables access to the Phone Information details screen, and the contextsensitive soft key that invokes it. The values are YES and NO. The default value is NO. - YES – disables access to the Phone Information details screen and the context-sensitive soft key that invokes it.
Feature configuration commands screensaver without a password. The default value is NO. - YES – enables the UI for configuring and using the screensaver without a password. - NO – disables the UI for configuring and using the screensaver without a password (default). SCRNSVR_TEXT [text] This parameter configures the text displayed on the screensaver of newly created profiles when the screensaver/lock is active.
Configure the provisioning server or no background image is used for the screensaver. BG_IMAGE_ENABLE [YES| NO] This parameter configures the background image file for the display in newly created profiles, and can completely disable the background image feature and disable the corresponding user interface. If the specified file does not exist in the images folder of the IP Deskphone, no background image is used for the display. The default value is YES.
Feature configuration commands device configuration through provisioning. If the SPEEDLIST_KEY_INDEX flag is configured to a valid programmable key that can be used for the feature, for example, >1 and less than or equal to available number of programmable keys, the IP Deskphone verifies if it has previously loaded a "Speed Dial List" file (a file containing the contents of the speed dial list). This file is similar to the dialing plan file.
Configure the provisioning server BLF_ENABLE [YES | NO | SCS | SIPX] This parameter enables or disables the Busy Lamp Field (BLF) feature support. If configured as Y, the flag BLF_RESOURCE_LIST_URI is not ignored and the BLF feature is used. The values are Y, N, SCS, and SIPX. The default is N.
Feature configuration commands configured as YES, the user can delete or copy WAV files with the file manager interface (this applies to WAV files on the IP Deskphone and a USB drive). The default value is YES. - YES – allows the user to delete or copy WAV files on the IP Deskphone or USB drive through the file manager (default). - NO – does not allow the user to delete of copy WAV files on the IP Deskphone or USB drive through the file manager.
Configure the provisioning server - YES – can act on CFG files using the file manager (default). - NO – does not allow the user to delete of copy CFG files on the IP Deskphone or USB drive through the file manager (default). ENABLE_USB_PORT [YES | NO] This parameter enables or disables the USB port. If configured as NO, all USB devices are disabled and all other USB commands are ignored. The default value is NO. - YES – enables the USB port - NO – disables the USB port (default).
Feature configuration commands required to be in the device configuration file. If change is required, the USB_KEYBOARD configuration command must be placed in the device configuration file with the new value. USB_HEADSET [YES | NO[ This parameter enables or disables the USB headset. The default value is NO. - YES – enables the USB headset - NO – disables the USB headset (default).
Configure the provisioning server - EU2 - AusNZ The default value is NA. HOTLINE_ENABLE [YES | NO] This parameter indicates if Hotline Service is enabled or disabled. The default value is NO. - YES – enables Hotline Service - NO – disables Hotline Service (default). Note: If a service package is enabled then this value is overridden by the value in the service package.
Feature configuration commands - 0 – indicates that the refresher is omitted - 1– indicates that the refresher is configured to UAC - 2– indicates that the refresher is configured to UAS SET_RESP_REFRESHER [x] This parameter indicates what refresher value is configured in the 200 OK response. The values are 0, 1, and 2. The default value is 2.
Configure the provisioning server DOS_PACKET_RATE is < 1, other values are ignored and packets are not dropped. LOGSIP_ENABLE [YES | NO] This parameter enables or disable SIP-logging. The default value is NO. - YES – the SIP-logging Manager is active and starts to log SIP incoming and outgoing packages into the log file in FFS. - NO – the SIP-logging Manager is not active and cannot log SIP incoming and outgoing packages into the log file in FFS.
Feature configuration commands Note: The label appears if the TECH_SUPPORT_ADDRESS parameter is defined. TECH_SUPPORT_ADDRESS [addr_string] This parameter configures the URI of the Technical.Support service. If the IP Deskphone licensing verification fails, then special dialog appears where the IP Deskphone user can press the Support soft key to call to the Technical Support service (see the preceding command TECH_SUPPORT_LABEL). The default value is notset@invalid.invalid.
Configure the provisioning server an outbound call. This is intended for DoD. The default value is NO. - YES– user is not presented with an incoming call . - NO – user is presented with an incoming call (default). FAST_EARLY_MEDIA_ENABLE [YES| This parameter allows the administrator to activate NO] and deactivate the Fast Early Media option (according to RFC 3264). The default value is NO.
Feature configuration commands - YES - the Answer-Mode is allowed. The IP Deskphone adds the "answermode" tag to the Support header in the REGISTER request. - NO - the Answer-Mode is not supported (default). ANSWER_MODE_MAXALLOWADDR This parameter specifies the maximum number of [max_addr] addresses that can be white-listed for Answer-Mode support. The allowed values are from 0 to 200. The default value is 100.
Configure the provisioning server QoS and ToS commands AVAYA_AUTOMATIC_QoS [YES | NO] This parameter provides a better treatment for signaling and media packets after you deploy the IP Deskphones with the Avaya switches. All the devices use private Differentiated Services Code Point (DSCP) values to give better treatment to the traffic coming from peer Avaya devices. - YES –– the IP Deskphone uses private DSCP values, unless overridden.
QoS and ToS commands DSCP_DATA [x] This parameter uses a value entered in decimal format between -1 and 63 representing the DSCP value in the provisioning packets. If the value is -1, the DSCP value is retrieved from the Service Package. The default value is 40. - x ––a value from -1 to 63 indicating the DSCP value. 802.1P_DATA [x] This parameter uses a value entered in decimal format between -1 and 7 representing the 802.1P value in the provisioning packets. If the value is -1, the 802.
Configure the provisioning server priority level voice call. If the value is -1, the DSCP value is retrieved from the Service Package. The default value is 45. - x –– a value from -1 to 63 indicating the DSCP value. DSCP_OAM [x] This parameter uses a value entered in decimal format between -1 and 63 representing the DSCP value in the provisioning packets for OA&M precedence and priority level voice call. If the value is -1, the DSCP value is retrieved from the Service Package. The default value is 18.
Tone configuration commands For example, 440,480; 2000,4000 (440 and 480 Hz with 2 seconds on, 4 seconds off) BUSY_TONE [frequency1 This parameter selects the tone advising the caller that the | frequency2 | on_time | telephone number is busy. You can select the country-specific off_time] tone. The default tone is the North American tone. - frequency1 – the frequency of tone 1. - frequency2 – the frequency of tone 2. - on_time – the duration of the tone when it is on. A -1 indicates a continuous tone.
Configure the provisioning server NAT configuration commands NAT_SIGNALLING [NONE | SIP_PING | STUN] This parameter indicates the type of protocol used for NAT traversal in the signaling port. The IP Deskphone with SIP Software supports two methods of NAT traversal of the signaling path: SIP_PING and STUN. - NONE – if the value is not configured as None, this parameter overrides the value of the parameter SIP_PING in the device configuration file. - SIP_PING – an Avaya proprietary NAT traversal protocol.
VQMon configuration commands STUN_SERVER_IP1[ip_address] NAT traversal using STUN protocol requires a STUN server in the public internet. Two STUN server IPs can be provisioned. - ip_address – is the IP address of STUN server 1. STUN_SERVER IP2[ip_address] NAT traversal using STUN protocol requires a STUN server in the public internet. Two STUN servers IPs can be provisioned. - ip_address – is the IP address of STUN server 2.
Configure the provisioning server LISTENING_R_ENABLE [YES | NO] This parameter enables or disables the alerts based on the Listening R Minor and Major Thresholds. The default value is vocoder-dependent, using a scale from 1 (lowest quality) to 100 (highest quality). Currently, default values are used based on VOCODER on a per-call basis as summarized below. - YES – enables the sending of the alert report based on the Listening R Value.
VQMon configuration commands PACKET_LOSS_WARN [xx] This parameter is the threshold to send a report on Packet Loss greater than [xx]. The default is 256 (1%). Using 0 resets the threshold to default. - xx – is an INTEGER value scaled by 256 that is used as threshold. The range is 1 to 25600. PACKET_LOSS_EXCE [xx] This parameter is the threshold to send a report on Packet Loss greater than [xx]. The default is 1280 (5%). Using 0 resets the threshold to default.
Configure the provisioning server DELAY_EXCE [xx] This parameter is the threshold to report unacceptable Excessive Delay greater than [xx]. The default is 175 ms. Using 0 resets the threshold to default. - xx – is an INTEGER value used as a threshold measured in 1/1000 of a second. SESSION_RPT_EN [YES | NO] This parameter enables or disables periodic VQMon session reports. The default is disabled.
Phone bug logging/recovery commands OCSP_ENABLE [YES | NO] This parameter indicates whether the IP Deskphone uses an OCSP server for validating certificates or not. The default value is NO. - YES – The IP Deskphone uses an OCSP server for validating certificates. - NO – The IP Deskphone does not use an OCSP server for validating certificates. OCSP_SERVER [IPv4 | Ipv6 | URL] This parameter specifies the IP address or URL of the OCSP server used for validating certificates.
Configure the provisioning server x - level of bugs from 0 to 255. The default value is 2. - 0 - logging is blocked - 1 - log only Critical bugs - 2 - log Critical / Major bugs - 3 - log Critical / Major / Minor bugs - >= 4 – log all information and bugs IP Deskphone configuration commands summary AUTOLOGIN_ID_KEY[xx] [userID@domain name] This parameter is located within the IP Deskphonespecific configuration file. This is the ID the IP Deskphone uses to register.
Create the Dialing Plan file on the provisioning server Deskphone. For CS 1000, it is necessary to configure an authentication name when configuring IP Deskphone features. - YES – prompt the user to enter an authentication name. - NO – authentication name is not configured. AUTOLOGIN_AUTHID_KEY [xx] This parameter specifies the authentication name to be used for a specific key.
Configure the provisioning server identified, the IP Deskphone with SIP Software sends the invite without the need to press the send key. This behavior closely matches the traditional PBX operation. The IP Deskphone with SIP Software design places no restriction in the format of the SIP URI. The dialing plan is a scheme to match the user experience with traditional PBX operation. It does not restrict the type of URI that the user can use.
Create the Dialing Plan file on the provisioning server Dialing function description Dialing plan If the IP Deskphone encounters a [DIALING_PLAN] section while parsing the 11xxeSIP.cfg configuration file, the IP Deskphone downloads the specified dialing plan configuration file. As most phone users are used to dialing digits to indicate the address of the destination, there is a need to specify the rule by which digits are transformed into a URI.
Configure the provisioning server $4="com" $5="Avaya.com" $t=10000 (default timer is 10 seconds) $a=Avaya.com The second section of dialing plan contains the digit map. The digit map section has three subsections that are divided by a separator of two ampersands (&&). Figure 8: Sample dialing plan digit map section The first part of a dialing plan contains a pattern defined with DRegex, which is used for matching the dialed number. The patterns are separated by the pipe (|) sign.
Downloadable WAV files Figure 9: DRegex rules Downloadable WAV files If the IP Deskphone encounters a [TONES] section while parsing the 11xxeSIP.cfg file, the IP Deskphone downloads the specified tones configuration file.
Configure the provisioning server It is possible to customize the ring tones on the IP Deskphone with SIP Software. Up to five special ring tones can be downloaded from the provisioning server and stored on the IP Deskphone. The end user can select which ring tone they would like to implement. In order to download these special files, the files must reside on the provisioning server and be specified in the SIP provisioning file.
Chapter 7: Configure the DHCP Server The DHCP server requires special configuration in Full DHCP mode. The IP Deskphone with SIP Software obtains Device Settings parameters from specially-configured DHCP servers.
Configure the DHCP Server The unique DHCP configuration is required to allow the DHCP server to respond with a unique Option 66 parameter to the IP Deskphone with SIP Software. Note: The DHCP standard defines Option 66 as the bootp server address in a string. The meaning of the bootp server address is extended in Avaya IP Deskphone with SIP Software to include the provisioning server address.
DHCP VLAN Auto Discovery Parameter requested by the IP Deskphone Description DHCP server option DNS domain Implementation varies according to DHCP server. 15 Lease time Implementation varies according to DHCP server. 51 Renewal time Implementation varies according to DHCP server. 58 Rebinding interval Implementation varies according to DHCP server. 59 Provisioning server Used for delivering the 66 provisioning server IP address.
Configure the DHCP Server as part of each DHCPOFFER and DHCPACK message for the IP Deskphone to accept these messages as valid; 43, 128, 131, 144, 157, 188, 191, 205, 219, 223, 232, 247, 251. After multiple VLAN IDs are returned from the DHCP server, the IP Deskphone tries to connect to each of the VLANs, following the order in which VLAN IDs are specified in the DHCP option. The format of the field for DHCP VLAN Auto Discovery is: Type, length, and data, described in the following sections.
Chapter 8: Install the IP Deskphone Complete instructions to install the IP Deskphone, including detailed figures and applicable warnings, are given in the IP Deskphones User Guides. The steps for installing the IP Deskphone are summarized in the following procedure. Installing the IP Deskphone 1. Remove the stand cover. Pull upward on the center catch and remove the stand cover. The cable routing tracks are now accessible. 2. Connect the AC power adapter (optional).
Install the IP Deskphone tilt lever and continue to push the IP Deskphone towards the base until an audible click is heard. Ensure the IP Deskphone is securely locked in position. The following figure shows the connections on the IP Deskphone. Figure 10: IP Deskphone connections 130 SIP Software for Avaya 1100 Series IP Deskphones-Administration with Avaya Aura ® Application Server 5300 November 2012 Comments? infodev@avaya.
Chapter 9: Upgrade and convert the IP Deskphone software This chapter describes how to upgrade an IP Deskphone with UNIStim software to SIP Software. n order to upgrade an IP Deskphone with UNIStim software, first determine if you have the minimum UNIStim software release on the IP Deskphone (0625C39). If your IP Deskphone is installed with the minimum version of UNIStim software, proceed to the section Convert UNIStim software to SIP Software on the IP Deskphone on page 137.
Upgrade and convert the IP Deskphone software Modify the SIP provisioning file Use the following procedure to modify the SIP provisioning file, which exists on the provisioning server. Modifying the SIP provisioning file 1. Under the firmware [FW] section of the SIP Provisioning file, increase the VERSION number (for example SIP1165e03.02.16.00). 2. Under the firmware [FW] section of the SIP Provisioning file, modify the FILENAME of the new file you want to upload to the IP Deskphone.
Upgrade to the minimum UNIStim Software Identify the current version of UNIStim software Checking the UNIStim software version on a new IP Deskphone 1. After assembling the IP Deskphone and turning it on, the display on the IP Deskphone goes through the following sequence: • Avaya splash screen appears • Avaya sonic sound plays • Avaya banner appears Following the Avaya banner, the software version appears in the display (F/W version). 2. Note the UNIStim software version number and write it down.
Upgrade and convert the IP Deskphone software to scroll through the menu items. Press the Select key to select the highlighted menu item. Table 8: Using the Navigation key cluster to navigate in the Local Tools menu Key Action Down Moves highlight down Up Moves highlight up Right Selected current menu item Left Closes menu Select key (center of cluster) Selects current menu item To close this menu, use the Quit key. 2. Select 2.
Upgrade to the minimum UNIStim Software 1. UFTP download initiated by the server if the server supports this method of upgrading UNIStim software. Refer to the appropriate documentation for your Call Server for instructions on using this method. 2. TFTP download on bootup. If necessary, use the following procedure to configure the TFTP server. Configuring the TFTP server 1.
Upgrade and convert the IP Deskphone software This can be the provisioning server as defined in the chapter Configure the provisioning server on page 31. 5. Select the Apply&Reset context-sensitive soft key to save the configurations and reset the IP Deskphone. The IP Deskphone downloads the software file. The display shows [FW] reading… If the download is successful, the display shows [FW] writing… and the blue LED flashes.
Convert UNIStim software to SIP Software on the IP Deskphone The IP Deskphone downloads the software file. The display shows [FW] reading… If the download is successful, the display shows [FW] writing… and the blue LED flashes. After the software image is downloaded to the IP Deskphone, the display shows [FW] finished... the blue LED stops flashing, and the IP Deskphone resets. If the upgrade is unsuccessful, see IP Deskphone diagnostics on page 341.
Upgrade and convert the IP Deskphone software 4. Press the red arrow at the end of the TheInSite Knowledge Base box to obtain the Search Results. 5. From the Search Results, select the appropriate version of the SIP Software for the IP Deskphone; for example, Avaya 1165E IP Deskphone Release SIP1165e03.02.16.00.bin. 6. Place the selected software on the provisioning server. Perform the following procedure to convert the UNIStim software to SIP Software on the IP Deskphone.
Convert SIP Software to UNIStim Software Convert SIP Software to UNIStim Software The IP Deskphone can be ordered with UNIStim software installed or with SIP software installed. If you have an IP Deskphone with UNIStim software, and you convert the software from UNIStim to SIP, the UNIStim software is overwritten. To convert an IP Deskphone from SIP software to UNIStim software, a software reload is required. Reloading UNIStim software 1.
Upgrade and convert the IP Deskphone software where xxx is the UNIStim version number appropriate for the hardware release of your IP Deskphone, for example, 0625C23, and yyy.bin is the filename containing the version number, for example, 0625C23.bin. 4. Power the IP Deskphone off and on. The IP Deskphone reboots and contacts the provisioning server upon bootup and downloads the new UNIStim software.
Chapter 10: Provisioning the IP Deskphones The IP Deskphones support the following provisioning modes: • Manual provisioning • Automatic provisioning Manual provisioning The manual provisioning of IP Deskphone parameters overrides the configuration of parameters by any other provisioning source. Technicians can use manual provisioning to override system wide parameters for troubleshooting purposes or to provide special needs configurations for a small group of users.
Provisioning the IP Deskphones Configuration You can store common provisioning parameters in a managed central server, such as a DHCP, TFTP, or HTTP server. You can configure the IP Deskphone to automatically or manually obtain the provisioning parameters from the various provisioning sources. For automatic provisioning, the IP Deskphone receives the parameters from the provisioning server. You can switch between automatic provisioning to manual provisioning on the Auto Provisioning page.
Configuring parameters manually for the IP Deskphone Configuring parameters manually for the IP Deskphone Procedure 1. Press Auto on the Configuration page to switch to the Auto Provisioning page. 2. Perform one of the following actions: • Press the AllMan soft key to change all parameters to be manually provisioned.
Provisioning the IP Deskphones 3. To exit and save, press the Config key to return to the Device Settings page, then press Apply. Auto Provisioning parameters Use the keys in the following table to provision the parameters for the IP Deskphones. Table 12: Keys and descriptions Key Description [] Check box, select or clear: Auto-checked, Manual-unchecked. Dial pad Enter number of index to jump to option Up Move up a group index Down Move down a group index Right Go to next item.
Manual provisioning parameters Voice Control pBits [] Voice Media pBits [] DSCP [] Avaya Auto QoS [] Enable PC Port [] PC Port Speed [] Data VLAN [] Data Priority bits [] PC-Port Untag all [] Cached IP [] Ignore GARP [] Provisioning [] PVQMon IP [] NAT Traversal [] STUN S1 IP [] STUN S2 IP [] Media Security [] SIP UDP Port [] SIP TCP Port [] SIP TLS Port [] Connection Timers [] Keep-Alive [] Register Retry [] Register Max Retry [] Login Notify [] Enable Bluetooth (1120E/1140/1165E only) [ ] SSH-SFTP [] Ena
Provisioning the IP Deskphones Key Description Enter Highlight on list item: open list In list: select highlighted item and close list Highlight on editable item: start edit mode Highlight on checkbox item: toggle checkbox state Apply Save changes and reboot IP Deskphone. Auto Go to Auto provision page. Config Return to manual configuration page. AllMan / AllAut Context-sensitive. Set all items to manual (clear checkboxes) or auto (check all boxes).
Manual provisioning parameters option and applies only to that option. If both the prompt and the option have dependencies, they are cumulative between the prompt and the option and is used to show multiple dependencies. The parameters list in order of appearance. Config option Enable 802.1x (EAP) Options or input Description MD5 MD5 encryption. PEAP PEAP encryption. TLS TLS encryption. ID 1 4 to 8 characters EAP ID. ID 2 4 to 8 characters EAP ID. Password 4 to 12 characters EAP password.
Provisioning the IP Deskphones Config option Options or input Description Note: Maximum of 2 DNS IP addresses can be configured. DNS IP2 IP address DNS server 2 IPv4 and IPv6 IP address. SIP Server IP IP address SIP proxy server IPv4 and IPv6 IP address. Note: Maximum of 2 SIP proxy IP addresses per domain can be configured. CA Server IP address Certificate Server IP address. Domain Name 4 to 12 characters IP Deskphone domain name. Hostname 4 to 12 characters IP Deskphone host name.
Manual provisioning parameters Config option Options or input Description • DHCP—VLAN ID from DHCP Auto VLAN • LLDP VLAN Name—VLAN ID from LLDP VLAN Name TLV • LLDP MED—VLAN ID from Network Policy Discovery TLV. Manual VLAN ID entered 1 to 4094. checked Filter frames without Voice VLAN tag. Unchecked Process all frames. Auto Use value from received LLDP Network Policy TLV, SIP, or default value of 1. 0 to 7 Force signalling related priority bits to chosen value.
Provisioning the IP Deskphones Config option Enable Data 802.1Q Data VLAN Data Priority bits PC-Port Untag all Cached IP Ignore GARP Provisioning Options or input Description Force Half Forced half duplex. Checked 802.1Q header and features used. Unchecked 802.1Q not used. No VLAN Data VLAN not used. Enter VLAN ID VLAN ID entered 1 to 4094. Auto Use value from the info block or default of 7. 0 to 7 Force all priority bits to chosen value. Checked Removes the 802.
Manual provisioning parameters Config option Options or input Description • HTTP • HTTPS PVQMon IP Device ID ID used by provisioning server to authenticate the IP Deskphone. Enter the User ID as the Device ID. TFTP does not require Device ID. Password Password used by provisioning server to authenticate the IP Deskphone. Maximum number of characters is 99. IP address PVQM server IPv4 or IPv6 IP address. Note: Maximum of 1 PVQM server can be configured.
Provisioning the IP Deskphones Config option Options or input Description • AES_128_SHA1_80 • AES_128_SHA1 32 SIP UDP Port Integer Value from 1024 to 65535. SIP TCP Port Integer Value from 1024 to 65535. SIP TLS Port Integer Value from 1024 to 65535. Connection Timers OS keep-alive Keep-Alive Integer Value from 5 to 1800. Register Retry Integer Value from 30 to 1800. Register Max Retry Integer Value from 600 to 1800.
Chapter 11: Features This chapter describes the features that are supported on the Avaya 1100 Series IP Deskphones with SIP Software. Voice Quality Monitoring Feature overview Proactive Voice Quality Monitoring (PVQMon or VQMon) allows the IP Deskphone with SIP Software to report voice quality statistics to a server in the network.
Features Server set-up The IP Deskphone with SIP Software works with Telchemy server software. The name of the software is SQmediator and is available through Telchemy (http://www.telchemy.com). The minimum version required is release 1.0. How VQMon works The IP Deskphone with SIP Software gathers statistics about the current call when VQMon is enabled. Statistics are also gathered regarding the quality metrics of the current call.
Voice Quality Monitoring Metric Description MIU Media Information Unit. MIU is a concept from VQMon. An MIU can be any size down to a 10 millisecond (8 sample) block. An MIU means a frame in the i200x implementation. MOS Mean Opinion Score. A subjective measurement of the voice quality of a voice call. MOS_CQ The VQMon conversational quality MOS score calculated for a call channel. MOS_LQ The VQMon listening quality MOS score calculated for a call channel.
Features Multiuser The Multiuser feature allows multiple SIP user accounts to be in use on the IP Deskphone at the same time. Multiple users, each with their own account, can share a single IP Deskphone allowing each user to receive calls without logging off other users. One user can have multiple user accounts (for example, a work account and a personal account) active at the same time on the same IP Deskphone.
Multiuser Configuration Depending on server policy, the Multiuser feature can require you to configure the PROMPT_AUTHNAME_ENABLE value to YES in the device configuration file. This enables a prompt that requires you to enter an Authentication ID that is different from the Login ID. For example, CS 1000 requires an Authentication ID to find a corresponding TN and a Login ID to find a key; enabling PROMPT_AUTHNAME_ENABLE creates a prompt for the authentication ID.
Features is registered as the secondary account (not the primary account), then the IP Deskphone uses the configurations of the primary account. The IP Deskphone keeps up to 24 sets of configurations (one set for each user). If you exceed the limit of 24 sets of configurations, the IP Deskphone automatically deletes the least recently-used set, and a new account is registered. Additional logons The Login command in the System menu allows you to register additional accounts.
Multiuser the IP Deskphone is switched off, the IP Deskphone automatically logs all users back on when you restart the IP Deskphone. • AUTOLOGIN_ENABLE USE_AUTOLOGIN_ID: You do not enter user credentials; the system administrator pre-configures the IP Deskophone using an IP Deskphone-specific file. The following example shows a SIP provisioning file: [USER_CONFIG] DOWNLOAD_MODE FORCED VERSION 000001 PROMPT NO IP Deskphone-specific configuration file AUTOLOGIN_ID_KEY01 8010@avaya.
Features If you restart the IP Deskphone after you logged off the primary account, the logon screen appears on the IP Deskphone. Logging on a new primary account leads to automatic logon of the secondary accounts. The list of programmed feature keys is part of the IP Deskphone profile. Logging off one primary account and logging on a different account can change the set of feature keys.
Multiuser Line keys Each registered user is associated to a separate line key. Each line key displays the name of the registered account and some basic state information for the account. The primary account is associated to the first bottom-right line key of the IP Deskphone. If you are using a secondary account, the order of the next available line key is from bottom to top and right to left on the IP Deskphone, followed by the keys on the Expansion Module from bottom to top and right to left.
Features • Missed incoming calls and new voice mail messages for the account are indicated with an icon. The icon supplements the NN missed calls message on the idle screen and the red LED which cannot provide per-account information. • The MADN, do-not-disturb, and call forwarding features also affect the appropriate line key icon of the account. Making a call You can place a call using any of the registered user accounts.
Multiuser The active call is affected by operations such as transfer or call parking. One exception is the New Call action which uses the primary account by default, but can be overridden by pressing another line key to initiate a call. You can use your account to transfer or park an active call that is received on that account. The exception is the New Call action because it uses the primary account by default. You can override the New Call action by pressing another line key to initiate a call.
Features Instant messages You can only receive or send instant messages from the primary account. Incoming messages for secondary accounts are rejected, are not displayed on the screen, and are not added to the instant message logs. Menu features The menus displayed on the IP Deskphone are customized to match the service package of the active account that is accessing the menu. Menus are accessed from the Idle screen when the primary account is active.
Multiuser modifications do not take effect until you register the secondary account as the primary account. Voice Mail settings Voice Mail Settings is located in theUser Settings menu. You can program different voice mail addresses and IDs for each account. To access the voice mail of a secondary account, press the line key of the secondary account to obtain a dial prompt, and then press the VMail Contextsensitive soft key.
Features Important: The Speed Dial keys always use the primary account to determine the presence state of the target. The Instant Message keys always use the primary account, because IM support is disabled for secondary accounts. Inbox, outbox, and instant message log Each profile has a single inbox, a single outbox and a single instant message log.
Multiuser Accessing the Address Books, by pressing the Directory hard key from the Idle screen, displays the address book of the primary account. If the primary account does not have a network address book, the local address book is accessed. Accessing the Address Book in Selection mode always accesses the address book of the current account. For example, after obtaining a dial prompt by pressing Line Key 2, you can press the Directory key to access the address book of the account associated to Line Key 2.
Features The following scenarios apply to DND. • If you select a single account that is in DND mode, the IP Deskphone displays a prompt that asks if you want to deactivate the DND mode. • If you select a single account that has Call Forwarding active, an error message appears to indicate that DND cannot be activated. • If you select the option all, and at least one account is not in DND mode, DND mode is activated for all accounts. If an account is in Call Forward mode, Call Forward is disabled.
Multiuser After you press a single account Call Forward programmed key: • If the account is already forwarding calls to the programmed target, call forwarding is deactivated. • If the account is not forwarding calls to the programmed target, the account is set to forward calls to the given target, disabling DND if necessary, and overriding any other call forward target that is active for the account.
Features After you press the all accounts Presence programmed key: • If all accounts are already set to the programmed presence state, all accounts are set to the Connected presence state. • If all accounts are not already set to the programmed presence state, all accounts are set to the programmed presence state. As like the Call Forwarding keys, if you do not perform any Presence operation, you can use the single and all keys as toggles. However, the presence states are not entirely under your control.
Multiuser Account selection There are a number of scenarios where you are prompted to select an account (for example, logoff, per-account settings, programming keys). The scenarios fall into the following two categories: • Prompts where you must select exactly one account. If only one account is logged on, the prompt does not appear. The IP Deskphone selects the single account automatically, and immediately displays the next screen.
Features on one TN and register from the IP Deskphone to each configured key. This applies to systems using Meridian Communications Adapter (MCA) – Multiple Appearance DN (MADN). Each registration must have the same Login ID and Authentication ID. The first registration maps to the lowest numbered DN key. Subsequent registrations are assigned DN keys in ascending order of the key numbers.
Multiple Appearance Directory Number • Telephones with a Privacy Override Allowed (POA) Class of Service can bridge into an established call on an SCA MADN. However, you cannot bridge into a call until the call establishes. • Any user with the MADN SCA feature can put a call on hold. Any other user in the group can pick up the held call by accessing the line key with SCA provisioned. • The state of the user’s group is reflected in the line key icon. Three states are available; idle, active, and held.
Features The MADN SCA feature for CS 1000 requires you to configure PROMPT_AUTHNAME_ENABLE to YES in the device configuration file. This prompts the end user to enter an Authentication ID that is different from the Login ID.
Images for the Avaya 1100 Series IP Deskphones Vertical services Vertical services are CS 2000 and CS 2100 features that can be activated or deactivated by dialing a defined code, for example, Privacy. Even though no more than one active session can be established for the MADN SCA group, members of the group can still enter certain vertical services. Currently, the available vertical service is Privacy.
Features Slideshow Screensaver images that have been uploaded to the IP Deskphone can be displayed in a slideshow format. It is possible to display all of the screensaver images that have been uploaded into the IP Deskphone in a slideshow format, whereby an image displays momentarily and then the next image displays. Different groups can of images can display independently. In order for this feature to work, the files must be named with the following syntax: ss [x] [image_name].
Speed Dial List Animated screensaver for the Avaya 1165E IP Deskphone Several images can be loaded and quickly displayed, one after the other on the Avaya 1165E IP Deskphone. The Avaya 1165E IP Deskphone provides the ability to display several images (for example 100 images) in quick succession giving the impression of a moving image on the display screen. A background can be loaded and displayed behind the animated screensaver.
Features The contents of the Speed Dial List can vary (context-sensitive) based on the current call state of the IP Deskphone and the type of Speed Dial List entry configured. Only entries in the Speed Dial List can be context-sensitive; not all speed dial keys or individual features keys are contextsensitive.
Speed Dial List Figure 21: Main feature key programming screen showing Speed Dial List provisioned on key 6 A feature key provisioned for use as a Speed Dial List has a similar appearance to all other programmed feature keys on the idle screen (or in-call screen). The label used for that key is provided through provisioning.
Features The following table describes the function of the context-sensitive soft keys for the Speed Dial List screen. Table 17: Context-sensitive soft keys for the Speed Dial List screen Context-sensitive soft key Action Dial Invokes the selected speed dial. Exit The screen is dismissed without invoking a Speed Dial List entry.
Speed Dial List If the auto retrieve behavior is enabled on a Speed Dial key (programmed keys) or Speed Dial List entry that is invoked, and a call is placed on hold to invoke the current key or entry, the IP Deskphone attempts to remove the call on hold after the key or entry call is complete. The following is a description of how the auto retrieve function operates. 1. A is talking to B when A invokes the Speed Dial List and selects an entry. 2.
Features Roaming profiles Roaming profiles enable the user to obtain the same settings when they are logged on to multiple IP Deskphones for features such as Address Book, Programmable keys, and Speed Dial List. The updatable data is split into 3 text files for these features. • address book • custom keys • speed dial list The user configuration file is used to specify the specific names of the feature files to be downloaded.
Roaming profiles Address book file The Address book file represents each contact [contact] and each group [group] (name only). A contact provides attributes to specify nickname, SIP address, group and whether it is a friend. An example of the syntax follows: [version] id=12345 [contact] nickname=lpg address=lpg@macadamian.com group=macadamian buddy=1 [group] name=macadamian Custom keys file The Custom keys file enables programmable keys to be provisioned for the IP Deskphone.
Features • banner • screensvrText • screensvrImage • backgroundImage • hotlineURL If a parameter has no value, its previous value is restored. For parameters which are allowed blank values, if the parameter is blank then the value is cleared. The custom keys file supports sections which contain user preferences. This file has the same format as the prefs.txt file which is stored on the flash of the IP Deskphone.
Roaming profiles Section name Key Value example Description index 3 Key number; sequential, starting with the IP Deskphone, then the Expansion Module(s) label CallForward Text to be displayed for the key target *4 Information number to be sent to IP Office type feature Key type [prefs] Contains the main profile preferences.
Features Section name Key Value example globalIgnore 0 Designates whether the Ignore key terminate all forks of a call. Value = 0 or 1 hotlineURL 2600@mycountry .gov Target url for a hotline call. language English User interface language.
Roaming profiles Section name Key Value example Description screensvrText My Company Text to show on screensaver screen (may be blank) searchMethod 0 Search mode for searchable menus Values: 0 = UKNOWN_SEARCH 1 = INDEX_SEARCH 2= FIRST_CHARCTER_SEARC H 3 = NAME_SEARCH [reasons] This section contains the list of reject reasons str-1 Out of office str-2 Busy str-0 Hello!! str-1 Hi! The key consists of prefix “str“and the sequence number 0, 1… The value can be any string.
Features The following attributes are type-specific attributes: • target – for cfwd, spdial, im keys. The SIP address to target when the key is pressed. This is a mandatory attribute for spdial and im. Omitting this attribute from a cfwd key creates a "disable call forward" key. • user – for cfwd, dnd, presence keys. The SIP address of the logged-in user whose state should be modified. Omitting this attribute creates "apply to all users" key. • subject – for spdial. Optional.
Customizable banner for login subject=my second call subject mode=MidCall Roaming profile limitations Roaming profiles have the following limitations: • Changes made on the IP Deskphone cannot be uploaded to the Call Server. • The user cannot edit the downloaded Speed Dial List. • Profiles are downloaded for the primary user only. • If a file is downloaded that places a custom key on a key that is already in use as a user’s login Line key, the Line key takes precedence.
Features as "enable", the IP Deskphone displays the banner text on the screen when the user logs on. The banner text is only displayed in the language that is provisioned (changing the IP Deskphone configured language does not change the banner text language). The banner appears only for the primary user of the IP Deskphone. In a multiuser configuration, a secondary user logon does not cause the banner to appear, even if the login banner is configured as enabled.
Customizable banner for login Table 21: Outside actions on content Key or action Result Inbox No action. Outbox No action. Directory (Address book) No action. Goodbye No action. Expand (IM Box) No action. Copy No action. Services Press once, no action. Press twice invokes the Network menu. Quit No action. Headset Brings up the dial prompt (in case the user wants to place an emergency call). Hold No action. Dialpad No action.
Features The banner text file is a separate file downloaded by provisioning. The banner text file is specified much like the current dialing plan is specified (file name listed in 11xxeSIP.cfg, under section [LOGIN_BANNER]), and is downloaded when enabled or disabled. To be accepted, the file must contain at least one byte and must be no larger than 2048 bytes. The encoding of the file must be UTF-8, or compatible with UTF-8, to ensure that all the characters are displayed properly.
Busy Lamp Field Figure 25: Call states and corresponding Presence icons Resource List URI The SIP-specific event notification mechanism allows the subscriber to request to be notified of changes in the state of a particular resource. Users often subscribe to multiple resources; without an aggregating mechanism, the user would have to generate a SUBSCRIBE request for each resource they monitor. A resource list is identified by a URI, and it represents a list of zero or more URIs (SIP endpoints).
Features MAX_APPEARANCE. If initial value of the MAX_BLFCALLS parameter is greater than the value of MAX_APPEARANCE, the value of the MAX_BLFCALLS parameter is forcibly reduced. BLF Call Pickup is only supported for IP Office. Therefore, IP_OFFICE_ENABLE must equal YES for Call Pickup to work. Universal Serial Bus device support The Avaya 1100 Series IP Deskphones provides a USB port located on the back of the IP Deskphone to support Universal Serial Bus (USB) devices.
Universal Serial Bus device support Separate information is provided, in the USB menu, to indicate the USB device types that are locked. Only USB devices that are unlocked function correctly. Locked USB devices do not work. Device configuration commands To configure the USB port behavior using the provisioning server, the following device configuration commands are available: Note: The parameters affect the configurations of all the IP Deskphones.
Features The following is an example of the USB Devices information screen when the USB port is disabled. Figure 26: USB Devices information screen — USB Port disabled If the USB Port is enabled, the USB Devices screen displays information on all USB devices attached, even if the device is locked. USB enumeration is independent of the device driver status. An unsupported device can still be enumerated if it is attached to the IP Deskphone.
Universal Serial Bus device support Figure 27: Sample USB Devices information menu USB lock Although the USB port allows the IP Deskphone to extend peripheral support without hardware changes, the customer is required to lock the USB port in compliance with the corporate security policy. The lock can be applied on the USB port to disable all USB devices, or it can be applied on individual types of USB devices.
Features Figure 28: USB Locks screen The following table describes the options that are listed on the USB Locks screen. Table 23: USB Locks screen options USB Locks options USB Locks Override Description • Enables or disables the USB lock configurations from the device configuration file. • If USB Locks Override is not checked, the remaining items on the list appear dimmed and the configurations from the device configuration file are used.
Universal Serial Bus device support USB Locks options Lock USB Mouse (only if Enable USB Port is checked) Description • The checkbox is used to lock or unlock the USB Mouse • Reboot is not required for change to take effect. Lock USB Keyboard (only if Enable USB Port is checked) • The checkbox is used to lock or unlock the USB Keyboard. • Reboot is not required for change to take effect. Disable USB Headset (only if Enable USB Port is checked) • The checkbox is used to lock or unlock the USB Headset.
Features Context-sensitive soft key Action • USB Locks override changed from checked to unchecked • Enable USB Port changed from checked to unchecked • Lock USB Headset changed from checked to unchecked. See Figure 29: Warning screen on page 200. Back Discards the changes, dismisses the USB Locks menu and returns you to the previous screen. Figure 29: Warning screen USB flash drive SIP Software supports a standard USB flash drive for the IP Deskphone.
Hotline service Avaya recommends the use of the following headsets: • GN Netcom GN9350e • Plantronics CS-50 Hotline service The Hotline service allows you to provision a SIP Avaya 1100 Series IP Deskphone as a Hotline Phone. From a Hotline Phone, you automatically make a call only to a designated number. A Hotline Phone is a dedicated IP Deskphone that has only one target. You cannot make a call to any other destinations; even emergency calls, such as E911 are not permitted.
Features • MLPP • E911 call The display of each feature that is restricted on the Hotline Phone is blocked. Provisioning Hotline Service configuration is obtained from the Hotline Service Enable parameter from the service package or the device configuration file. The service package takes precedence over the device configuration file. Service Package You can turn Hotline Service, on or off, through the Service Package or the device configuration file.
Session Timer Service Session Timer Service The Session Timer for the Session Initiation Protocol (SIP) feature (RFC4028) allows the Avaya 1100 Series IP Deskphone to support a keep-alive mechanism for SIP sessions. SIP sessions are periodically refreshed by UPDATE requests (or re-INVITES for the IP Deskphones that do not support UPDATE). The UPDATE requests are sent during an active call to allow endpoints or proxies to determine the status of a SIP session.
Features Provisioning The IP Deskphone uses the configuration parameters for the Session Timer Service to indicate if the Session Timer Service is available, and to configure the duration of the session timer. The following table describes the five configuration parameters in the device configuration file for Session Timer Service.
Emergency Services Parameter name Description Default value value 2 indicates that the refresher is configured to UAC. Emergency Services Important: Avaya strongly recommends testing the emergency services feature with the entire communications system, including the IP Deskphones during and after the installation of the communications systems. Avaya strongly recommends making arrangements with the Public Safety Answering Point (PSAP) provider to test actual emergency calls.
Features Location information If the IP Deskphone turns on or off, the IP Deskphone restarts in the usual way and receives the location information through LLDP-MED or DHCP protocols (from the Layer 2 switch or DHCP server , which must be available and properly configured). On certain Call Servers that support service packages , a list of locations is sent to the IP Deskphone and the end user is able to select the location during the login process.
Emergency Services Table 27: E911 Configuration in the IP Deskphone Config file E911_USERNAME The emergency user name used for making an emergency call that does not require a logon. You must configure the proxy with the same emergency user name, otherwise, the emergency call fails. E911_PROXY Default emergency proxy.
Features Configuration requirements for making an emergency call when there are no users logged on 1. Configuring the SIP Proxy. • The IP Deskphone must have an emergency user in order to make an emergency call without a user logon. • The IP Deskphone must have the necessary configurations values for automatic REGISTER of the emergency user (if you choose this implementation method). • You must add the emergency user to the proxy. 2. Adding the emergency user to the IP Deskphone configuration file.
NAT firewall traversal • The proxy must be able to transmit mixed MIME-types (for successful transferring of the location information). 5. Configuring the proxy with emergency user name and password. • You must have configuration access to the proxy to arrange for an emergency user (if this manner of implementation is chosen). • The emergency user and password at the proxy side must be identical to the emergency user and password that every IP Deskphone is configured with.
Features If a device is behind a NAT, transport addresses obtained are not publicly routable, and therefore, not useful in a number of multimedia applications. The limited lifetime of the NAT port mapping can also cause the SIP signaling to fail. If a port mapping is idle, it can be released by the NAT and reassigned to other applications. The STUN protocol lets an IP Deskphone discover the presence and type of NATs between the Avaya 1100 Series IP Deskphone and the public Internet.
Three-port switch and VLAN functionality Three-port switch and VLAN functionality System overview The Full VLAN support feature can create telephone Voice-VLAN and PC Data-VLAN on the three-port switch of the IP Deskphone manually and automatically (see Figure 30: Voice-VLAN and Data VLAN on page 212). If both Data and Voice VLANs are enabled on a three-port switch, only the frames with Data and Voice VLAN tagged go to networks.
Features Figure 30: Voice-VLAN and Data VLAN Table 28: Port functions on the three-port switch when VLAN is enabled Ports 212 Voice VLAN enabled Data VLAN enabled Both Voice and Data VLAN enabled Network Port (Port 0) N/A N/A N/A IP Deskpho ne Port (SMP) Receiving the frames with Voice VLAN tagged only. Sending the frames with Voice VLAN tagged. N/A Receiving the frames with Voice VLAN tagged only. Sending the frames with Voice VLAN tagged.
802.1x (EAP) Port-based network access control Ports Voice VLAN enabled Data VLAN enabled Both Voice and Data VLAN enabled Replacing the incoming frame tagged with VLAN other than DataVLAN and forwarding it to network port. Sending all kinds of frames. other than Data-VLAN and forwarding it to network port. Sending all kinds of frames. VLAN configuration can be done either manually or through DHCP. See Provisioning IP Deskphone parameters on page 142 for more detail on configuring VLANs. 802.
Features • When EAP-TLS is selected, the administrator is prompted to enter ID1. • When Disabled mode is selected, the existing IDs and Passwords are erased. Authorization If 802.1x is configured and the IP Deskphone is physically connected to the network, the IP Deskphone (supplicant) initiates 802.1x authentication by contacting the Layer 2/3 switch (authenticator). The IP Deskphone also initiates 802.
802.1ab Link Layer Discovery Protocol 802.1ab Link Layer Discovery Protocol (LLDP) provides the following functionality: • Periodic transmission of advertisements containing device information, device capabilities, and media specific configuration information to neighbors attached to the same network. • Reception of LLDP advertisements from its neighbors. • Implementation of behavioral requirements specified by Link Layer Discovery Protocol Media Endpoint Discovery (LLDP-MED).
Features 19. Inventory Software Revision 20. Inventory Manufacturer Name 21. Inventory Model Name Receive direction The IP Deskphone expects to receive the following TLVs: 1. Chassis ID 2. Port ID 3. Time To Live 4. End of LLDPPDU 5. System Capabilities 6. VLAN Name 7. MAC/PHY Configuration Status 8. LLDP-MED Capabilities 9. Network Policy 10.
802.1ab Link Layer Discovery Protocol TLV Fields If you disable the PC Ethernet port, the advertised enabled capabilities configured to Telephone only. Port VLAN ID PVID = 0 The IP Deskphone does not support port-based VLAN operation. Port And Protocol PPVID = 0 VLAN ID Port and Protocol VLAN is not supported and not enabled. VLAN Name Protocol Identity VLAN name field is configured to “data” and “voice”. 1. STP: Protocol identity = the first 8 bytes of an STP PDU starting with the Ethertype field.
Features TLV Fields Bit 3 = 0 – PSE pair selection can not be controlled PSE power pair = 1 Power Class = 3 for 1120E/1140E/1165E IP Deskphones Link Aggregation Aggregation status = 0; the link is not capable of being aggregated, and currently is not in aggregation. Aggregated Port ID = 0 Maximum frame size The MAC/PHY supports an extension of the basic MAC frame format for Tagged MAC frames. The maximum frame size is configured to 1522.
AS 5300 UC Client Softphone interworking TLV Model Name Fields Contains a string, which specifies the IP Deskphone model, for example, “IP Deskphone xxx”, where, xxx is one of the following values: 1120E, 1140E, 1165E. AS 5300 UC Client Softphone interworking The interworking feature allows the user to access the functionality of the SIP 1100 Series IP Deskphone using a softphone client on their PC. On an incoming call, both the IP Deskphone and the Avaya Aura ® AS 5300 UC Client Softphone ring.
Features Answer-Mode Settings screen The Answer-Mode Settings screen is used to pre-grant authorization to request an automatic answer to potential callers or groups of callers.
AS 5300 UC Client Softphone interworking The following screen appears. Figure 32: Allow-Mode Settings screen Allow Addresses screen The Allow Addresses screen is used to pre-grant authorization to request an automatic answer to a list of user-entered domains and SIP addresses. If the user selects the Allow Addresses option in the Answer-Mode Settings screen, the user is presented with an interface for entering a list of strings.
Features The user can add as many entries as the device configuration allows. If the Add soft key is disabled, then the user has reached the maximum number or entries. The user can also edit and delete entries. To access the Allow Addresses screen, on the Preference menu, choose Feature Options, Answer-Mode Settings, and Allow Addresses. If there are no domains in the list, the following screen appears.
Multi-Level Precedence and Preemption A "ring splash", or short ring tone, indicates to the user that the call was automatically answered. The subject is "Auto-Answered", and the microphone is muted (the user can deactivate the mute status by pressing the Mute key on the IP Deskphone). The following image is an example of a notification indicating an auto-answered call.
Features Aura® Application Server 5300 server. For information on configuring the MLPP service, see Avaya Aura ® Application Server 5300 Using the Provisioning Client (NN42040-112). To enable MLPP, DOD_ENABLE must be configured as YES in the device configuration file. Precedence Precedence enables an IP Deskphone user to specify the precedence level of each call that is placed.
Multi-Level Precedence and Preemption Domains There are three official MLPP domain names (MLPP_NETWORK_DOMAIN): DSN, DRSN and ETS. Each has a pre-defined list of priorities. Domain name DSN Priorities • Routine • Priority • Immediate • Flash • Flash-Override DRSN • Routine • Priority • Immediate • Flash • Flash-Override • Flash-Override-Override • Emergency ETS • Emergency • Emergency The default domain is DSN.
Features Warning: Emergency 911 calls can be preempted when there are no available call appearances and there is an incoming above-Routine precedence call. Order of call preemption: The following is the order of call preemption: 1. The lowest precedence call 2. If there are multiple calls on the same precedence level, then the following order is used a. Any outgoing call that is unanswered b. the oldest incoming call that is unanswered c.
Multi-Level Precedence and Preemption As well, when this feature is enabled: • the Answer soft key is not displayed for an incoming call • the user cannot answer a call by pressing the Handsfree key or line key, except for calls from the Emergency 911 operator • the user cannot go handsfree by pressing the Handsfree key . To answer any call except from Emergency 911, the user must go off-hook. MLPP tones Unique tones are played when MLPP is enabled.
Features Feature Interaction with MLPP Conference call (Ad-hoc conference) Available. The precedence level of the conference is the highest precedence level of all the joined calls. Call Waiting Disabled Not available when MLPP is enabled. Dialing plan Available with MLPP, with support for World Wide Numbering available through the Call Server. Do Not Disturb Incoming call with a Routine precedence level is rejected when Do Not Disturb is enabled on the IP Deskphone.
Multi-Level Precedence and Preemption Parameter Description Default DOD_ENABLE [YES | NO] Identifies whether it is DoD ARTS network. NO MLPP_NETWORK_DOMAIN [] The network domain of the user to be added to the INVITE message of outgoing calls. DSN MLPP_ALIAS_NETWORK_DOMAI specifies additional MLPP NS entries.
Features Parameter Description CALL_ORIGIN_BUSY [YES |NO] Default User is not interrupted (presented with NO an incoming call) when entering address of outbound call. YES– user is not presented with an incoming call NO – user is presented with an incoming call. SIP Domain DNS Lookup feature The DNS Lookup feature enables the IP Deskphone to discover IP addresses for a specified SIP domain using DNS. There are two ways the DNS Lookup feature can provide SIP domain IP addresses to the IP Deskphone: 1.
Server Profiles where: • sip = the desired service • tcp = the transport protocol • example.com = the configured domain name • 5060 = the port to be used • sipserver.example.com = the SIP proxy to be used (hostname is replaced by the IP address using A/AAAA records) The DNS Lookup feature then tries to find the IP address of the SIP domain in A/AAAA records on the DNS Server. Only the IP address is returned; therefore, default ports are used — 5060 for UDP/TCP and 5061 for TLS.
Features SIP_DOMAIN3 SERVER_PORT3_1 MAX_ADHOC_PORTS1 SIP_DOMAIN4 SERVER_TCP_PORT3_1 CONFERENCE_URI2 SIP_DOMAIN5 SERVER_TLS_PORT3_1 ADHOC_ENABLED2 SERVER_IP1_1 SERVER_PORT3_2 MAX_ADHOC_PORTS2 SERVER_IP1_2 SERVER_TCP_PORT3_2 CONFERENCE_URI3 SERVER_IP2_1 SERVER_TLS_PORT3_2 ADHOC_ENABLED3 SERVER_IP2_2 SERVER_PORT4_1 MAX_ADHOC_PORTS3 SERVER_IP3_1 SERVER_TCP_PORT4_1 CONFERENCE_URI4 SERVER_IP3_2 SERVER_TLS_PORT4_1 ADHOC_ENABLED4 SERVER_IP4_1 SERVER_PORT4_2 MAX_ADHOC_PORTS4 SERVER_IP4
Server Profiles 1. If the x_SERVER_PROFILE command is specified and contains the x Server Profile , the Server Profile file is downloaded to the IP Deskphone during the standard upgrade mechanism after downloading the System Configuration file. If the Server Profile file is specified but cannot be downloaded, the IP Deskphone uses the old Server Profile file, if it exists in the Flash File System (FFS).
Features MLPP_PRECEDENCE_DO MAIN SET_REQ_REFRESHER LLDP_ENABLE SNTP_ENABLE SET_RESP_REFRESHER EAP IPV6_ENABLE DOD_ENABLE EAPID1 IPV6_STATELESS SLOW_START_200OK EAPID2 SIP_TCP_PORT MAX_APPEARANCE EAPPWD SIP_TLS_PORT USE_PUBLISH_FOR_PRE SENCE Managing Server Profile files To download a new Server Profile file, the Server Profile parameters must first be configured in the System Configuration file and provisioned in the Device Configuration file.
Chapter 12: IP Deskphone restrictions Service package restrictions A limited number of Call Servers support the service package. The service package is a means of providing configuration settings to the IP Deskphone. Individual features and feature restrictions are sent to the IP Deskphone as a part of the service package every time a particular user logs on to the IP Deskphone.
IP Deskphone restrictions 236 SIP Software for Avaya 1100 Series IP Deskphones-Administration with Avaya Aura ® Application Server 5300 November 2012 Comments? infodev@avaya.
Chapter 13: Security This section specifies the behavior of the following security features: • SIP over TLS • Connection persistence • SRTP • SFTP • SSH SIP over TLS To avoid security problems such as message integrity attacks, SIP over TLS uses Transport Layer Security (TLS) to provide secure communication between the Avaya 1100 Series IP Deskphone and the SIP proxy. Transport Layer Security (TLS) protects SIP signaling traffic.
Security are tried periodically based on random, but increasing time periods, in order to give the server adequate time to recover. SSH and secure file transfer The Secure Shell Handler (SSH) is a widely-used protocol for providing secure logon access to run commands remotely. To establish a connection, you must access the SSH-capable client, and know the user name and password that is configured on the IP Deskphone through the use of the provisioning system.
TCP/TLS operation overview Parameter Password Description Default value The password None that must be entered when connecting to the IP Deskphone through SSH, SFTP. Boundaries Non-null string Maximum: 49 characters UI Properties for Device Settings SSH and SFTP parameters are as follows: • The User ID field is empty and the Password field displays "****" when both SSH and SFTP are disabled and applied. • The user can enable SSH or SFTP.
Security How the IP Deskphone uses TLS Transport Level Security (TLS) is a protocol for establishing a secure connection between two end-points. After a connection is established using TCP, TLS negotiates the cryptographic parameters used to secure the traffic that is sent over that connection. TLS, Public Key Cryptography, and X.509 certificates provide either mutual or server authentication.
IP Deskphone security configuration Certificate requirements For the IP Deskphone to validate that the server certificate provided by the TLS-enabled proxy matches the connected address, the certificate must contain the IP Addresses of the IP Deskphone. The server certificate has a Subject Alternative Name field, which contains the IPv4 and IPv6 IP addresses that correspond with the proxy. For example: subjectAltName=IP:192.168.100.
Security Parameter Purpose Default Allowed SERVER_TLS_PORT1_ 1 SERVER_TLS_PORT1_ 2 SERVER_TLS_PORT2_ 1 SERVER_TLS_PORT2_ 2 SERVER_TLS_PORT3_ 1 SERVER_TLS_PORT3_ 2 SERVER_TLS_PORT4_ 1 SERVER_TLS_PORT4_ 2 SERVER_TLS_PORT5_ 1 SERVER_TLS_PORT5_ 2 SIP_UDP_PORT SIP_TCP_PORT SIP_TLS_PORT Configures the UDP: 5060 local SIP TCP: 5060 listening ports.
IP Deskphone security configuration Parameter Purpose Default Allowed SRTP_CIPHER_1 SRTP_CIPHER_2 Allows configuration of the preferred order for SRTP cipher offers. AES_CM_128 _HMAC_SHA 1_80, AES_CM_128 _HMAC_SHA 1_32 AES_CM_128_HMAC_SH A1_32 AES_CM_128_HM AC_SHA1_80 None LOGIN_NOTIFY Configures whether or not the login banner appears after a successful logon.
Security Parameter Purpose Default Allowed After a change is detected in this parameter, the system resets. 244 SSHID Configuration of the SSH and SFTP user ID. None See Note 3. SSHPWD Configuration of the SSH and SFTP password. None See Note 3. HASHED_ADMIN_PASS W ORD Indicates NO whether the Admin Password is hashed or not. YES NO ENALBE_LOCAL_ADMI N_ UI Configures the YES availability of the local administration UI on the IP Deskphone. YES NO HASH_ALGORITHM Hash algorithm.
IP Deskphone security configuration Parameter Purpose Default Allowed MAC address on the IP Deskphone information screen, and the FE IP Address and Port on the audio quality details screen. ADMIN_PASSWORD_E XPI RY The date that the Empty configured ADMIN_PWD is no longer valid, and a new password must be downloaded from the provisioning server. Timestamp Note: Note 1: The SFTP file read and write pattern entries must be strictly followed.
Security Note: Note 3: If logon failures occur for SSH and SFTP applications, the system logs the following event: 1040[Minor][TUE JAN 02 20:12:14 2007][4189][i:/fw/build/../sshapp/ sshServer .c:616] - SSH Authentication Failed. Manually configure the IP Deskphone for UDP and TCP After you enable the administration user interface, you can manually change network settings on the IP Deskphone. You can manually configure the IP Deskphone through the Server Settings menu.
Using the TLS to connect to the SIP proxy Parameter name Description Default value Boundaries Disabled: 0 (must be non-zero for a TLSonly option) SIP TCP Port The listening port on 5060 the IP Deskphone for incoming TCP requests. Min: 1024 Max: 65535 Disabled: 0 (must be non-zero for a TLSonly option) SIP TLS Port The listening port on 0 the IP Deskphone for incoming TLS requests.
Security Figure 36: Security icon enabled Note: Connecting to the server requires that the IP Deskphone uses, at a minimum, TLS_RSA_WITH_AES_128_CBC_SHA, and as an objective, TLS_RSA_WITH_AES_256_CBC_SHA. Because this is a server-specific configuration, the IP Deskphone must be prepared to handle both. There is no difference in screen indication, regardless of the type of cipher used.
Registration behavior based on configuration settings Unsupported configurations cannot be saved. If the configurations are unsupported, the IP Deskphone displays an error message. The following is an example of an error message for unsupported configurations: Unsupported: UDP + TLS Unsupported: No protocols enabled.
Security Configura tion Description Expected result Possible results IP Deskphon e: TLS only Server: UDP + TCP + TLS The IP Deskphone only has TLS configured for sending requests to the server. The IP Deskphone must have a device certificate installed if the server is configured for mutual authentication. The IP Deskphone registers using SIP over TLS.
Managing connection persistence Configura tion None: unsupport ed Description Unsupported Expected result Unsupported Possible results Unsupported Note: The server must be configured with the appropriate protocols enabled for the success condition to be realized. Failure results are possible if the server configuration is changed to disallow protocols.
Security The following figure demonstrates how critical it is that the server can communicate directly with the IP Deskphone through the use of the established TCP connection because it has no way of getting through the firewall in order to contact port 5060 on the IP Deskphone.
SRTP Parameter name Register Max Retry Description Default value After a failure to reconnect 1800 with the proxy, the IP Deskphone increases the amount of time that it waits for the next registration retry attempt.
Security Parameter AES_CM_128_HMAC_ SHA1_80 AES_CM_128_HMAC_SHA1_32 SRTP lifetime 2^48 packets 2^48 packets SRTCP lifetime 2^31 packets 2^31 packets Cipher AES Counter Mode AES Counter Mode Encryption 128 bits key 128 bits MAC HMAC-SHA1 HMAC-SHA1 SRTP auth. tag 80 bits 32 bits SRTCP auth. tag 80 bits 80 bits SRTP auth. key len. 160 bits 160 bits SRTCP auth. key len.
Last successful or unsuccessful logon Available SRTP configurations are provided in the following table. Table 36: Configuration effects on media security display Configuration Result Media Security Icon Display (during active call) Default: UDP + TCP, no SRTP SIP is unsecured; media is unsecured. No UDP + TCP. Best-Effort SRTP SIP is unsecured; media is No encrypted, but due to transmission of crypto parameters in clear text, the media cannot be considered secure.
Security The display of a logon success and failure notification is local only to the IP Deskphone being used, and displays the last time that a user successfully logged on to the IP Deskphone or failed to log on to the IP Deskphone. The figures shown below provide examples of the IP Deskphone display screen based on the configuration of the IP Deskphone and whether Login Notify is enabled or not.
Last successful or unsuccessful logon Figure 40: Basic login notification The following notification appears on the display screen when the user successfully logs on when Login Notify with Time is enabled. Figure 41: Basic login and time notification The following notification appears on the display screen to notify the user of the last unsuccessful log on attempt made.
Security Figure 42: Login failure notification The following notification appears on the display screen to notify the user of the date and time of the last unsuccessful log on attempt made. Figure 43: Login failure with time notification The following notification appears on the display screen to notify the user of the last successful and unsuccessful log on attempts made.
Enhanced administrative password security Figure 44: Login and login failure notification The following notification appears on the display screen to notify the user of the date and time of the last successful and unsuccessful log on attempts made. Figure 45: Login and login failure with time notification Enhanced administrative password security The provisioning server can provide additional security associated with the administrative password.
Security stored on the IP Deskphone is not accepted. After this time, the administrative password must be changed in the administrative server. Password expiry can only be enforced if the date and time are retrieved by the IP Deskphone through SIP, SOAP, or SNTP. Important: IP Deskphone licensing information is located in the Keycode Retrieval System (KRS) User Guide. You must register for access to KRS.
Chapter 14: Audio codecs The optional audio codecs feature allows you to select the audio compression or decompression algorithm (codec) used on the IP Deskphone. You provision codecs using the Device Configuration file, and then the user can select from the provisioned codecs using the Audio menu on the IP Deskphone. This feature supports wideband audio performance, where wideband is defined as the frequency range between 150 and 6800 Hz.
Audio codecs Table 38: Static payload types and other parameters for the supported codecs for the IP Deskphone Codec Payload type SDP encoding name Clock rate (HZ) Bit rate (kbps) ptime (milisec) Channels G.711 a-law 8 PCMA 8000 20 1 G.711 u-law 0 PCMU 8000 20 1 G.711 a-law 8 PCMA 8000 30 1 G.711 u-law 0 PCMU 8000 30 1 G.729A + 40ms ptime 18 G729 8000 20 1 G.729B 18 G.722 9 G.723.1 4 G.723.1A 4 8000 8 20 1 G722 8000 48 20 1 G723 8000 5.3 6.
Codec preference through Device Configuration The list of codecs specified in the Device Configuration file determines the list of codecs that are available for selection on the IP Deskphone. Two fields in the device configuration file, G729_ENABLE_ANNEXB and G723_ENABLE_ANNEXA are used to enable or disable AnnexB and AnnexA support by G.729 and G.723 codecs, respectively. These flags can have the following values: YES, NO (No is the default value).
Audio codecs Codec preference selection on the IP Deskphone The Audio Quality Settings screen on the IP Deskphone allows the user to select an exact codec by name. This grants the user full control over the audio settings used for inbound and outbound calls. The list of codecs is populated with the names of the codecs provided during Device Configuration. If a text descriptor is provided for a codec in the Device Configuration file, it appears after the codec name.
Codecs preferences on the IP Deskphone Supported by IP-set Ordered list of Ordered list of Ordered list of codecs provided by codecs provided by codecs used by the Device user configuration SIP IP Deskphone Configuration A, B, C, D, E, F, G A, B, C, D, E A, D, E A, D, E, B, C A, C, D, E A, B, C, D, E A, C, D, E A, C, D, E A, B, C, E A, C, E, D SIP Software for Avaya 1100 Series IP Deskphones-Administration with Avaya Aura ® Application Server 5300 November 2012 265
Audio codecs 266 SIP Software for Avaya 1100 Series IP Deskphones-Administration with Avaya Aura ® Application Server 5300 November 2012 Comments? infodev@avaya.
Chapter 15: Certificate-based authentication Certificate-based authentication Certificate-based authentication allows the administrator to ensure that the IP Deskphone is authorized to access the enterprise LAN environment and to connect securely to SIP proxy and provisioning servers. Certificates bind an identity to a pair of electronic keys that are used to encrypt and sign digital information, and make it possible to verify someone’s claim that they have the right to use a given key.
Certificate-based authentication mark events, such as Certificate Addition and Deletion. The administrator is to view security and error logs from the user interface, as well. The administrator is able to define the Security policy on the IP Deskphone using the Security Policy file. The Security Policy file contains a set of rules that dictates certificate-based authentication on the IP Deskphone, such as the size of the public and private keys used on the certificates.
OCSP associated with using CRLs in a public key infrastructure (PKI). Messages communicated using OCSP are encoded in ASN.1 and are usually communicated over HTTP. OCSP configuration There are two ways to configure OCSP parameters: 1. Provisioning file The administrator can configure OCSP parameters in the [DEVICE_CONFIG] section of the Provisioning file 11xxeSIP.cfg. 2.
Certificate-based authentication Menu item Description OCSP Check Timeout Enter a value in range 3600 to 86400 seconds (1–24 hours). If the OCSP Enable checkbox is not checked, then the OCSP server and OCSP Check Timeout fields cannot be edited. Trusted Root certificate The customer root certificate is a self-signed certificate (a self-issued certificate where the subject and issue fields contain identical DNs, and are not empty.
Trusted Root certificate • After the certificate file is downloaded, you must authenticate the contents of the certificate file before installing it on the IP Desklphone. There are two possible situations. - If there are no existing customer root certificates on the IP Deskphone, a fingerprint (SHA1 hash) for the file is computed.
Certificate-based authentication In the first scenario, the IP Deskphone only needs the CA certificate which was used to sign the Server certificate. The certificate file must be PEM encoded. In the second scenario, every certificate in the chain must be verified. Root and Intermediate CA certificates of the chain must be installed in the IP Deskphone Trusted Certificates store. Certificates must be PEM encoded and combined into one file.
Installing a device certificate using PKCS12 An example of the [DEV_CERT] section is as follows: [DEV_CERT] FILENAME “*.p12” # must include “*” symbol to be substituted with MAC address or it will be rejected. VERSION PROFILE 1 # profile index PURPOSE -1 # bitflag with all purposes it can be used for # (default is -1 = ALL) • FILENAME attribute points to the PKCS#12 file device certificate name.
Certificate-based authentication The version specified in the [DEV_CERT] section is stored in the profile for future reference when determining if a new device certificate is available for download. Certificate Trust List The IP Deskphone uses Certificate Trust List (CTL) method to verify the various network elements such as proxy servers and provisioning servers. For the IP Deskphone to trust any network element, the certificate of the IP Deskphone must be added to the CTL.
Certificate Trust List content that was used to create the signature. Otherwise the signature becomes invalid and you must create a new signature. 2. The CTL is provisioned to the IP Deskphone in a secure way. Avaya recommends that you use HTTPS as the secure method to download the CTL file to the IP Deskphone. 3. The IP Deskphone checks the validity periods as follows: • Not Valid Before – the CTL file is not used before the validity date.
Certificate-based authentication Procedure Add the [CTL] section to 11xxeSIP.cfg to allow the IP Deskphone to download a CTL file. After the 11xxeSIP.cfg file downloads from the provisioning server, the IP Deskphone executes the [CTL] sections and downloads the CTL file. After the CTL file is downloaded, the IP Deskphone validates the CTL file to ensure that the CTL file is signed by a trusted entity.
Certificate administration Certificate administration The administrator can view and delete certificates and CTLs. Because a certificate can be deleted, it is critical that the administrator password used to access this function is protected and limited to only those who require it. Certificate administration is accessed through the Diagnostics menu . To view the Certificate Administration option in the Diagnostics menu: 1. Create Security Policy file (a text file). 2.
Certificate-based authentication • CRL • CTL To access the Certificates Administration screen from the Network menu, select Device Settings > Diagnostics > Certificate Administration. Figure 47: Certificates Administration main menu The following table describes the function of the context-sensitive soft keys for the Certificates Administration screen. Table 41: Context-sensitive soft keys for the Certificates Administration screen Context-sensitive soft key Action Select Selects the required option.
Certificate administration Figure 48: Trusted Certificates screen The administrator can delete the certificate in the details screen by using the Delete contextsensitive soft key. Deletion does not happen automatically; the IP Deskphone displays a warning confirmation screen. The following table describes the function of the context-sensitive soft keys for the Trusted Certificates screen.
Certificate-based authentication The administrator can delete the certificate in the "Detailed Mode" by using the Delete contextsensitive soft key. Deletion does not happen automatically; the IP Deskphone displays a warning confirmation screen. The following table describes the function of the context-sensitive soft keys for the Trusted Certificates Details screen.
Certificate administration Context-sensitive soft key Action • Common Name (CN) • Serial Number (SN#) • Usage • Expiry Date • certificate profile index • Status (such as, OK or Expired) Back Returns you to the previous screen. Figure 51: Device Certificate details The administrator can delete the certificate in the "Detailed Mode" by using the Delete contextsensitive soft key. Deletion does not happen automatically; the IP Deskphone displays a warning confirmation screen.
Certificate-based authentication Figure 52: CTL certificate screen The following table describes the function of the context-sensitive soft keys for the CTL screen. Table 45: Context-sensitive soft keys for the CTL screen Context-sensitive soft key View Action Displays information on the selected certificate which includes the following: • Common Name CN) • Serial Number (SN#) • Expiry Date • Certificate Status (such as, OK or Expired) Delete Displays a warning confirmation. Deletes the CTL.
Certificate administration Figure 53: CTL Certificate details screen You can use the PDT shell command to view an installed CTL. The following is an example of a command with the output of the command. Figure 54: Example of command output Important: The CTL file size must not exceed 20 Kbytes. CRL screen The CRL is also used to validate a certificate before the IP Deskphone starts to use it by checking it against the CRL lists stored in the phone.
Certificate-based authentication The CRL is always issued by the CA which issues the corresponding certificates. The certificates for which a CRL should be maintained are often X.509/public key certificates, as this format is commonly used by PKI schemes. When CRL is selected from the Certificates Administration menu, the CRL screen displays a list of all serial numbers in the CRL loaded on the phone.
Security Policy KEY_SIZE 1024 KEY_ALGORITHM KEY_ALG_RSA TLS_CIPHER RSA_WITH _AES_256_CBC_SHA Security policy parameters The security policy file parameters and the excepted and default values are as follows: CERT_ADMIN_UI_ENABLE This parameter determines if the Certificate Administration user interface is enabled on the IP Deskphone. The acceptable values are as follows: - YES – Certificate Administration user interface is enabled on the IP Deskphone.
Certificate-based authentication - RSA_WITH_AES_128_CBC_SHA - RSA_WITH_AES_256_CBC_SHA (default) SIGN_SIP_CONFIG_FILES This parameter overrides the file signing of a file, such as the device configuration file and the dial plan file. You cannot override the file signing of the Security Policy and Customer Certificates. The acceptable values are as follows: - YES – Signing is required. - NO – No authentication check is performed (default).
Security Policy Finger Print display with accept or reject options (default). - VAL_MANUAL_B – If the resource file is not signed and if there are no customer certificates, then you must manually enter the Finger Print value and then select Accept. CERT_EXPIRE This parameter is the Certificate Expiration Policy. Acceptable values for this parameter are as follows: - DELETE_CERT –A certificate is deleted when expired. A security log entry is added.
Certificate-based authentication SECURITY_POLICY_PARAM_CHANGE This Parameter defines if configuration files (11xxeSIP.cfg) are forced to be signed if there is a customer certificate installed. This parameter has no effect if there are no installed customer certificates. Acceptable values for this parameter are as follows: - YES– If there is a customer certificate installed, the downloaded file must be signed and fully authenticated.
Security Policy If the authentication of the file is successful, the security policy file parameters is accepted on the IP Deskphone. Example [SEC_POLICY] DOWNLOAD_MODE FORCED PROTCOL HTTP FILENAME SecPolicy.txt.sig Security policy logs and diagnostics Changes made to the security policy file have an entry in the security log file. For example, SECURITY_POLICY_PARAM_CHANGE 0x1055. The security log file stores only the non-sensitive information.
Certificate-based authentication FTP_PASSWORD = **** EAP Authentication EAP-enabled networks allow the administrator to ensure that individual devices or users are authorized to access the enterprise's LAN environment. The following diagram shows the network architecture for 802.1x and EAP. Figure 56: 802.1x and EAP network architecture IEEE 802.1x defines three roles: • a supplicant—an entity that requires access to the network for use of its services.
EAP Authentication Figure 57: EAP configuration menu The administrator can do the following: • When MD5 is selected, the administrator is prompted to enter ID1 and Password. • When PEAP is selected, the administrator is prompted to enter ID1, ID2 and Password. If the administrator enters only ID1, then ID2 has the same value of ID1. • When TLS is selected, the administrator is prompted to enter ID1. Note: Before using EAP-TLS a device certificate must be installed.
Certificate-based authentication EAP Disabled EAP disabled is the factory default setting. The IP Deskphone does not send a message to the authenticator upon startup, and normal network access is attempted. If the IP Deskphone receives a Request-Identity message from the Layer 2 switch, the Request-Identity is ignored. If the Layer 2 switch requires 802.
EAP Re-authentication For more information, seeTrusted Root certificate on page 270. If the IP Deskphone fails to authenticate to the RADIUS server or to install the required certificates, the IP Deskphone displays a EAP Authenticate-Fail message, and the IP Deskphone cannot access the network. EAP Re-authentication The re-authentication process proceeds in the background without disturbing the ongoing operation of the IP Deskphone.
Certificate-based authentication Server authentication A server certificate, user name, and password are required to establish TLS connection between the IP Deskphone and the provisioning server. The server certificate must be signed by a certificate authority. The IP Deskphone uses the server certificate to validate the identity of the provisioning server that the IP Deskphone is connected to; the provisioning server uses the user name and password to authenticate the IP Deskphone.
Security and error logs Security and error logs You can access the Security Log and the Error Log to view errors and failures that may have occurred during the operation of the IP Deskphone. Before you can access the Security and Error Logs, you must configure the Security Policy file with the SECURITY_LOG_UI_ENABLE YES parameter: If configured as yes, you can access the Security and Error Logs from the Network screen by selecting Device Settings > Security and Error Logs.
Certificate-based authentication Table 48: Context-sensitive soft keys for the log item screen Context-sensitive soft key Action Next Navigates to the next log entry. Prev Navigates to the previous log entry. Back Returns you to the Logs main menu.
Security and error logs SLC_CTL_DELETED 0x0015 SLC_CRL_DELETED 0x0016 SLC_DEVICE_CERTIFICATE_DELETED 0x0017 SLC_DEVICE_CERTIFICATE_REVOKED 0x0018 SLC_DEVICE_CERTIFICATE_EXPIRED 0x0019 SLC_CTL_EXPIRED 0x0020 SLC_CTL_DOWNLOAD_ERROR 0x0021 The following is a list of minor errors that are logged in the Security Log.
Certificate-based authentication Creating a signing certificate About this task You can create a signing certificate using OpenSSL. Procedure 1. Add the following section to the openssl.cfg file: [ signing_cert_ext ] subjectAltName=DNS:www.avaya.com basicConstraints=CA:FALSE subjectKeyIdentifier=hash authorityKeyIdentifier=keyid,issuer:always keyUsage=critical,digitalSignature extendedKeyUsage=critical,codeSigning,emailProtection 2.
Creating a signing certificate phone or there must be a certificate chain that can be followed, which ends with a CA root certificate installed on the IP Deskphone. In either case, there must be a trust anchor on the IP Deskphone, which can verify the authenticity of the Signing Certificate.
Certificate-based authentication Examples of two scripts that can be used to sign are resource file (for example, CTL file) are as follows: • OpenSSL-based Linux script for file signing #!/bin/sh # $1 - Input Unsigned File # $2 - Signing Certificate # $3 - Signing Certificate Private Key # $4 – Output Signed File unsigned_file=$1 sign_cert_file=$2 sign_cert_pk_file=$3 signed_file=$4 # Setup temporary files tmp_signature_file="/tmp/resource$$.
Chapter 16: Licensing A license is a "right to use" granted by Avaya, that the customer purchases to enable the features on the IP Deskphone. A license contains at least one entitlement and can contain more than one entitlement. A license usually has an expiry date and is keyed for a specific license server. An entitlement is the most basic component of a license and represents a single instance of a right to a particular feature or capability.
Licensing Accessing the Keycode Retrieval System The Keycode Retrieval System (KRS) User Guide provides important IP Deskphone licensing information. You must register for access to KRS. The ollowing section describes how to access the KRS User Guide. Registering for access to KRS 1. Go to http://support.avaya.com/krs. 2. Click Self-Service 3. Select Keycode Retrieval System 4. Select GLOBAL LOGIN from the list for the login location that you would like to use for access to the Keycode Retrieval System.
Characteristics of the licensing framework Characteristics of the licensing framework The following list describes the characteristics of the licensing framework on the IP Deskphone. • The embedded server relies on a real time clock to calculate when a token expires • The embedded server (node-locked) enables the license server to execute on the IP Deskphone. The IP Deskphone obtains tokens by calling the server locally.
Licensing For more information about provisioning parameters for the IP Deskphone, see Create the SIP provisioning file on the provisioning server on page 32. 2. The IP Deskphone config file must include a [LICENSING] section to enable the IP Deskphone to download the licence file. Add [LICENSING] section to the IP Deskphone .cfg file. Examples of IP Deskphone cfg files are 1120eSIP.cfg, 1140eSIP.cfg, 1165eSIP.cfg, 1220eSIP.cfg, and 1230eSIP.cfg.
[LICENSING] section Deskphone, see Create the SIP provisioning file on the provisioning server on page 32. 2. The IP Deskphone config file must include a [LICENSING] section to enable the IP Deskphone to download the licence file. Add [LICENSING] section to the IP Deskphone .cfg file. Examples of IP Deskphone cfg files are 1120eSIP.cfg, 1140eSIP.cfg, 1165eSIP.cfg, 1220eSIP.cfg, and 1230eSIP.cfg. For example: [FW] DOWNLOAD_MODE AUTO VERSION 3.00.xx.yy PROTOCOL TFTP FILENAME SIP 1140_e03.02.xx.yy.bin ...
Licensing Field name FILENAME Field value X*.Y Description License filename. The IP Deskphone looks for a file with the IP Deskphone MAC address included in the filename. The 1xxxe.cfg file can have one, or all, of the following sections: • [FW] • [DEVICE_CONFIG] • [LICENSING] Although the IP Deskphone [FW] section is not required to activate the token, the provisioning server and the IP Deskphone provisioning server IP configuration must be configured to retrieve, save, and process the license file.
Licensable features Figure 60: License Info Licensable features Licensable features are divided into three groups. 1. Basic Feature Set 2. Enhanced Feature Set - 1 token required 3. Advanced Feature Set - 2 tokens required Basic Features are always enabled on the IP Deskphone. Enabling the Enhanced Feature Set requires an additional token. Enabling the Advanced d Feature Set requires two tokens. When connected to an Avaya Server, the IP Deskphone receives an additional token.
Licensing Figure 61: Licensing menu The Licensable features screen displays. Figure 62: Licensable features screen 308 SIP Software for Avaya 1100 Series IP Deskphones-Administration with Avaya Aura ® Application Server 5300 November 2012 Comments? infodev@avaya.
Node-locked license mode Node-locked license mode In the node-locked license mode, the IP Deskphone uses a license file to acquire the required tokens needed to activate the features. There are two types of tokens: time-based tokens, and standard tokens. Time-based token The following figure is an example of a node-locked time-based token. In this example, the embedded server on the IP Deskphone contains 5 tokens and the IP Deskphone is enabled for Advanced Feature Set and connected to a non-Avaya server.
Licensing Figure 64: Node-locked license mode — License information for time-based token (connected to Avaya Server) Note the extra line Tokens Required: 1. This line is displayed only when the IP Deskphone connects to an Avaya Server.
Node-locked license mode Figure 65: Node-locked license mode — license information for Standard token (connected to non—Avaya Server) The following figure is an example of a node-locked Standard token. In this example, the embedded server on the IP Deskphone contains five tokens. The IP Deskphone is enabled for Advanced Feature Set and is connected to an Avaya server. Note that the extra line Tokens Required: 1 is displayed only when the IP Deskphone connects to an Avaya Server.
Licensing Figure 66: Node-locked license mode — license information for Standard token (connected to Avaya Server) The status of the standard token can be one of the following: • Active • Inactive A standard token can be inactive for one of the following reasons: • Insufficient token • License expired Invalid or no license file The following figure is an example of an invalid or no license file.
Evaluation period Figure 67: License information — Invalid or no license file Evaluation period When the IP Deskphone arrives from the factory, it has a 31–day evaluation period. This period allows users to try licensed features before they actually purchase the tokens. Any time the user loads a valid license file and has tokens granted, the evaluation is terminated immediately. ; Once the evaluation period expires, there is no way to reset it.
Licensing Alarms The license feature provides notifications on the IP Deskphone screen about the licensing status. The license feature provides notification on the IP Deskphone screen if the following conditions apply: • No avaliable tokens • Expired tokens • Evaluation period has ended A notification message is displayed in a pop-up window on top of the IP Deskphone screen. The window can be dismissed by pressing the Stop key or by lifting the handset.
Alarms Figure 69: License not available warning License expiry warning A warning window, indicating that a license has expired, appears on the IP Deskphone screen when a node-locked license expires. The following figure is an example of a warning window indicating that a license is expired.
Licensing Figure 71: Evaluation period expiry warning Evaluation threshold warning A warning window informing you of the approaching evaluation expiration date appears on the IP Deskphone at the following predefined times: • 15 days before expiration date • 7 days before expiration date • 1 day before expiration date The following figure is an example of the evaluation threshold warning.
Licensing expiry threshold warning Licensing expiry threshold warning When the expiration date of the node-locked licence approaches,, a warning window is displayed on the IP Deskphone.
Licensing • Image screensaver and lock • Standard font languages • Multiple calls per user • Server failover redundancy • Session timers • SNTP (time server) • Speed Dial List • Transfer to VM softkey • USB flash drive • Hotline The following extended features are available with a token or if the IP Deskphone is registered to a recognized Avaya server (Avaya, Avaya Communication Server 1000, or IP Office) then extended features are available without a token.
Licensed features • DoD Network • FIPS Certified SIP Software for Avaya 1100 Series IP Deskphones-Administration with Avaya Aura ® Application Server 5300 November 2012 319
Licensing 320 SIP Software for Avaya 1100 Series IP Deskphones-Administration with Avaya Aura ® Application Server 5300 November 2012 Comments? infodev@avaya.
Chapter 17: Internet Protocol version 6 Internet Protocol version 6 (IPv6) is a network layer for packet-switched internetworks and is the successor of IPv4. IPv6 provides larger address space, which allows greater flexibility in assigning addresses. The extended address length used within IPv6 eliminates the need to use Network Address Translation to avoid address exhaustion to simplify the aspects of address assignment and renumbering when changing providers.
Internet Protocol version 6 Table 50: Hexadecimal key sequence Key Sequence 0 0 1 1 2 2abc 3 3def 4 4 5 5 6 6 7 7 8 8 9 9 * . The dot (.) is entered by pressing the asterisk (*) twice. Table 51: Alphanumeric key sequence Key 322 Sequence 0 0+=<>$%&@~^ 1 1 _ - .
IPv6 address format IPv6 address format When an IPv6 address is entered different but equivalent formats can be used for the same address. For example, the following addresses are all equivalent: 2001:0db8:0000:0000:0000:0000:1428:57ab 2001:0db8:0000:0000:0000::1428:57ab 2001:0db8:0:0:0:0:1428:57ab 2001:0db8:0:0::1428:57ab 2001:0db8::1428:57ab 2001:db8::1428:57ab Any of the above formats can be entered.
Internet Protocol version 6 IPv6 Stateless address autoconfiguration The IP Deskphone supports stateless address autoconfiguration as defined by RFC 2463 and RFC 2461. Stateless and stateful (DHCPv6) address autoconfiguration can be used simultaneously. For example, the IP Deskphone IP address can be obtained by stateless address autoconfiguration and configuration information can be obtained by stateful (DHCPv6) address autoconfiguration.
Internet Control Message Protocol for IPv6 If the DHCPv6 server is configured with the SIP proxy IPv4–mapped address, the IP Deskphone registers with its IPv4 address. If the DHCPv6 server is configured with the SIP proxy IPv4-mapped and IPv6 addresses, the DHCPv6 client calls the destination address selection algorithm and selects the address based on the configured preference. If PREFER_IPV6 is configured to YES, the IP Deskphone selects the IPv6 address of the highest precedence.
Internet Protocol version 6 The DHCPv6 configuration file that can be used for the IP Deskphone stateful configuration is as follows: # # Example server configuration file: per-client configuaration # # In this example, some clients receive different parameters than others.
Configuring the DHCP server { #client with DUID 0x001365FEF48D gets this address. #DNS and SIP server addresses are assigned from the common options above address fdde:b1a8:d98d:0000:2F87:9FBC:0A0A:0AC8 } client duid 0x0016ca0081f7 { #client with DUID 0x001365FEF48D gets this address.
Internet Protocol version 6 328 SIP Software for Avaya 1100 Series IP Deskphones-Administration with Avaya Aura ® Application Server 5300 November 2012 Comments? infodev@avaya.
Chapter 18: SIP messages supported by the IP Deskphone SIP methods The table below provides a list of SIP messages supported by the IP Deskphone. Table 52: SIP methods Method Supported? Comments INVITE Yes Mid-call re-invites for media changes also supported.
SIP messages supported by the IP Deskphone Method Supported? Comments support of UPDATE messages is not a configurable feature.
2xx Response—Successful responses 2xx Response—Successful responses 2xx Response Send Receive 200 OK Yes Yes 202 Accepted Yes Yes Comments 3xx Response—Redirection responses 3xx Response Send 300 Multiple Choices No 301 Moved permanently 302 Moved temporarily 305 Use Proxy No Yes Yes 380 Alternate service No Receive Comments Yes When receiving this response, the IP Deskphone redirects the original request to next contact specified.
SIP messages supported by the IP Deskphone 3xx Response Send Receive Comments address in the Contact header field. 4xx Response—Request failure responses 4xx Response 400 Bad request Yes Receive Comments Yes The IP Deskphone generates a 400 Bad Request response for various failure conditions generally when a request is invalid, and a more specific error response does not apply.
4xx Response—Request failure responses 4xx Response Send Receive Comments 408 Request timeout No Yes See default handling. 410 Gone Yes See default handling. No 413 Request entity too large No Yes See default handling. The IP Deskphone does not automatically retry if a retry-after header is present. 414 Request---URL too long No Yes See default handling. Yes The IP Deskphone can send this response when an incorrect content-type is detected for a request.
SIP messages supported by the IP Deskphone 4xx Response Send Receive Comments maximum number of allowed calls and cannot present the incoming call to the user. When this message is received by the IP Deskphone an error is displayed and a busy tone is played. 487 Request Canceled Yes Yes See default handling. 488 Not Acceptable Yes Yes The response is used by the IP Deskphone when a failed media negotiation occurs.
6xx Response—Global responses 6xx Response—Global responses 6xx Response 600 Busy Everywhere Send Yes Receive Comments Yes The IP Deskphone can send this response when the IGNORE setting is configured to NETWORK, and the user chooses to ignore an incoming call. When received, this response falls through the default handling. 603 Decline Yes Yes The IP Deskphone can send this response when the user declines an incoming call. An optional reason can be supplied.
SIP messages supported by the IP Deskphone Header field 336 Supported? Accept-Encoding Yes Accept-Language Yes Alert-Info Yes Allow Yes Allow-Events Yes Authentication-Info Yes Authorization Yes Call-Id Yes Call-Info Yes Contact Yes Content-Disposition Yes Content-Encoding Yes Content-Length Yes Content-Type Yes Cseq Yes Date Yes Expires Yes Error-Info Yes Max-Forwards Yes Mime-Version Yes Organization Yes P-Access-Network-Info Yes P-Asserted-Identity Yes P-
SIP header fields Header field Supported? Priority Yes Privacy Yes Proxy-Authenticate Yes Proxy-Require Yes RAck Yes Reason Yes Record-Route Yes Refer-To Yes Referred-By Yes Remote-Party-ID Yes Replaces Yes Reply-To Yes Require Yes Resource-Priority Yes Retry-After Yes Route Yes RSeq Yes Server Yes Service-Route Yes Subject Yes Supported Yes Timestamp Yes To Yes Unsupported Yes User-Agent Yes Via Yes Warning Yes WWW-Authenticate Yes SIP Software for
SIP messages supported by the IP Deskphone Session description protocol usage SDP Headers Supported? v--Protocol version Yes o--Owner or creator and session identifier Yes s--Session name Yes t--Time description Yes c--Connection information Yes m--Media name and transport address Yes a--Media attribute lines Yes SDP and Call Hold The IP Deskphone can support sending and receiving of hold using the method specified by RFC2543 and RFC3261/3264.
SIP security authentication SIP security authentication Authentication Supported? Digest Authentication Yes Proxy-to-User Authentication Yes User-to-User Authentication No S/MIME No AKA No Comments The IP Deskphone responds to a 401, but never challenges incoming requests with a 401 response. SIP DTMF Digit transport Transport type Supported? RFC2833 Yes In-band tones Yes Out-of-band tones Yes (vnd.avaya.
SIP messages supported by the IP Deskphone Subscription type Supported Avaya Call Server specific ua-profile Partial Yes service-package Yes Yes network-redirectionreminder Yes Yes Supported instant messaging Message type 340 Supported? plain text Yes Avaya unencrypted Yes Avaya encrypted Yes SIP Software for Avaya 1100 Series IP Deskphones-Administration with Avaya Aura ® Application Server 5300 November 2012 Comments? infodev@avaya.
Chapter 19: Diagnostics and troubleshooting This chapter contains the following topics: • IP Deskphone diagnostics on page 341 • Local diagnostic tools on page 343 • How to access the Diagnostics menu on page 344 • IP Set and DHCP information on page 346 • Network Diagnostics tools on page 348 • Ethernet Statistics on page 351 • IP Network Statistics on page 354 • USB Devices on page 355 • Advanced Diag Tools on page 356 • Test key on page 358 • Logging System on page 361 • Problem Determination Tool (PDT)
Diagnostics and troubleshooting • Enter requested information in the menu fields by pressing the number keys on the dialpad. Press the asterisk (*) key to enter a period (.) when entering an IP address. • To record the entry and advance the initialization to the next parameter, press OK. • To abandon the manual configuration process and restart the power-up, press Cancel. • To manually enter parameters, use the BKSpace or Clear context-sensitive soft keys to edit the default entry.
Local diagnostic tools Software conversion failures There are four different boot loaders in the FLASH and application load. Various boot loaders are used to recover the IP Deskphone if a failure occurs. • If a conversion fails before anything is written to FLASH, the IP Deskphone reboots with the previous software load.
Diagnostics and troubleshooting Diagnostics option Description Ethernet Statistics Provides some Ethernet statistics for Network Interface and PC port. IP Network Statistics Provides IP Network statistics. USB Devices Provides information about USB devices attached to the IP Deskphone . Certificates Administration Supports administration of available certificates.
How to access the Diagnostics menu Figure 74: Network menu screen After you access the Network menu, the following options are available: • 1. Server Settings • 2. Device Settings • 3. Diagnostics • 4. Disable screensaver • 5. Licensing • 6. Lock Select Diagnostics, or press Back to return to the Network menu. The following screen appears: Figure 75: Diagnostics menu screen The following table describes the function of the Navigation keys for the Diagnostics screen.
Diagnostics and troubleshooting Table 54: Navigation Key Action Up and down arrows Use the up and down arrows to change the selected item in the list. Enter Invokes the Select context-sensitive soft key. Digital keys (number associated with option) Invokes an appropriate option. * Selects the first option Server Settings, but does not activate it. # Selects the last option Lock, but does not activate it.
IP Set and DHCP information Voice VLAN Enable: No Voice VLAN Config: No VLAN Voice VLAN Discovered: No Primary Server: S1 PC Port is: ON 2. Software Version: 3.00.09.02 Hardware ID: xxxxxx 3. Set IP: xxx.xxx.xxx.xxx (could be in IPv4 or IPv6 format) 4. Sub-Mask: xxx.xxx.xxx.xxx (could be in IPv4 or IPv6 format) 5. GateWay: xxx.xxx.xxx.xxx (could be in IPv4 or IPv6 format) 6. Voice VLAN Priority: 6 7. Voice VLAN ID: 6 8. DHCP Respond String: .... 9. Servers' Information: S01 IP: xxx.xxx.xxx.
Diagnostics and troubleshooting Table 56: Navigation Key Action Return Press the Return context-sensitive soft key to cancel this screen and return to the Diagnostics menu. Network Diagnostics tools The Network Diagnostics Tools menu provides access to ping and tracert testing routines. To access the Network Diagnostics Tools screen, from the Diagnostics menu, choose Network Diagnostics Tools.
Network Diagnostics tools • Packet Size—Size of the network packet used by the ping routine. • Ping—The number of ping packages. The following services are available: • activate the ping routine • activate the tracert routine The following table describes the function of the context-sensitive soft keys for the Network Diagnostics tools screen. Table 57: Context-sensitive soft keys for the Network Diagnostics Tools screen Context-sensitive soft key Action Ping Activates the ping routine.
Diagnostics and troubleshooting Figure 78: Network Diagnostics tools (Config) screen The screen contains the following configurable fields: 1. IP—The user can enter an IP address. 2. Hops—The number of hops used as a configurable parameter for tracert routine. 3. Packet Size—Size of the network packet used by the ping routine. 4. Ping—The number of ping packages. The following table describes the function of the context-sensitive soft keys for the Network Diagnostics tools (Config) screen.
Ethernet Statistics Ethernet Statistics The Ethernet Statistics (NI Port) screen displays ethernet statistics information for Network Interface (NI) or PC ports, such as the number of incoming and outgoing network packages and network settings. To access the Ethernet Statistics (NI Port) screen from the Diagnostics menu, choose Ethernet Statistics. The following screen appears: Figure 79: Ethernet Statistics (NI Port) screen The following is an example of Ethernet Statistics for the IP Deskphone: 1.
Diagnostics and troubleshooting 7. Packet Collision: 0 8. CRC Errors: 1 9. Frame Errors: 1 A. Unicast Packets Tx: 1 B. Unicast Packets Rx: 1 C. Broadcast Packets Rx: 1 D. Multicast Packets Rx: 1 === 802.1x Status === EAP Status: Disabled The following table describes the function of the context-sensitive soft keys for the Ethernet Statistics (NI Port) screen.
Ethernet Statistics Figure 80: Ethernet Statistics (PC Port) screen The following is an example of Ethernet Statistics for the PC Port: 1. PC Link Status: Up 2. Duplex Mode: Full 3. Network Speed: 10 Mb 4. Auto Sense/Negotiate Auto-Negotiate Capability: Yes Auto-Negotiate Completed: Yes 5. Port VLAN Priority: 0 6. Port VLAN ID: 0 7. Packet Collision: 0 8. CRC Errors: 1 9. Frame Errors: 1 A. Unicast Packets Tx: 1 B. Unicast Packets Rx: 1 C. Broadcast Packets Rx: 1 C. Broadcast Packets Rx: 1 D.
Diagnostics and troubleshooting Table 63: Context-sensitive soft keys for the Ethernet Statistics (PC Port) screen Context-sensitive soft key Action Reset Resets statistics values. PC Port Switches to the NI Port Ethernet statistics. Back Returns you to the Diagnostics menu. The following table describes the function of the Navigation keys for theEthernet Statistics (PC Port) screen.
USB Devices 2. Packet Received: 0 3. Incoming Packets Error: 0 4. Outgoing Packets Error: 0 5. Incoming Pkt Discarded: 0 6. Outgoing Pkt Discarded: 0 7. Unknown Protos: 0 8. Last ICMP Type/Code: 1 The following table describes the function of the context-sensitive soft keys for the IP Network Statistics screen. Table 65: Context-sensitive soft keys for the IP Network Statistics screen Context-sensitive soft key Action Reset Resets statistics values. Refresh Refreshes the IP Network statistics.
Diagnostics and troubleshooting Figure 82: USB Devices screen Important: The USB Devices screen contains a list of the USB devices attached to the IP Deskphone. The following table describes the function of the context-sensitive soft keys for the USB Devices screen. Table 67: Context-sensitive soft keys for the USB Devices screen Context-sensitive soft key Back Action Returns you to the Diagnostics menu. The following table describes the function of the Navigation keys for the USB Devices screen.
Advanced Diag Tools The following screen appears: Figure 83: Advanced Diag Tools screen The following table describes the function of the context-sensitive soft keys for the Advanced Diag Tools screen. Table 69: Context-sensitive soft keys for the Advanced Diag Tools screen Context-sensitive soft key Action Apply Invokes the selected service. Return Dismisses the dialog box and returns you to the Diagnostics menu.
Diagnostics and troubleshooting The command determines whether or not the option can be managed: • If PORT_MIRROR_ENABLE is Yes, then you can activate or deactivate the option. The Port Mirroring prompt in the Network >Diagnostics >Advanced Diag Tools menu is enabled and can be modified. • If PORT_MIRROR_ENABLE is No, then you cannot manage the option. The Port Mirroring prompt in the Advanced Diag Tools menu is disabled (dimmed); Port Mirroring is disabled.
Reset Factory Settings support Figure 84: Test key screen After you activate the test mode, the key event appears on the screen: • Key pressing: "Test key: xx pressed" • Key pressing: "Test key: xx pressed" The following table describes the function of the context-sensitive soft keys for the Test key screen. Table 71: Context-sensitive soft keys for the Test key screen Context-sensitive soft key Quit Action Dismisses the Services menu.
Diagnostics and troubleshooting 1. by entering a Special Key Sequence (SKS), or 2. remotely using SSH-PDT. Activating Reset to Factory Settings does not affect files stored in the USB flash drive. After you activate Reset to Factory Settings the action is registered in the ECR-log file. Activating Reset to Factory Setting by SKS 1. At any point while the IP Deskphone is operating, press the Special Key Sequence (SKS). 2.
Logging System If you select Y, the PDT displays the prompt: >Enter MAC-address: 3. Type in the IP Deskphone MAC-address. > For example, if the IP Deskphone MAC-address is A1B2C3D4E5F6 , you enter: >A1B2C3D4E5F6 4. Click Enter. • If the MAC-address is correct, the IP Deskphone is reset and the remote telnet client is restarted. • If the MAC-address is incorrect, the IP Deskphone displays: >Incorrect MAC-address. Action is rejected . Return to Step 1.
Diagnostics and troubleshooting Figure 85: Logging Systems screen The Logging Systems screen displays the SIP Logging subsystem. Press the Enter key in the Navigation key cluster to switch the value of the selected sign from ON to OFF, or OFF to ON. Then press the Apply context-sensitive soft key to apply the settings. The following table describes the function of the context-sensitive soft keys for the Logging Systems screen.
Problem Determination Tool (PDT) You can enable or disable SIP-logging using the following command in the Device configuration file: LOGSIP_ENABLE [Yes | No] If the parameter is Yes, the SIP-logging Manager is active and starts logging SIP incoming and outgoing packages into the log file in FFS. If the parameter is No, the SIP-logging Manager is not active and there is no logging of incoming and outgoing packages into the log file in FFS. The default parameter is No.
Diagnostics and troubleshooting Task Monitor The Task Monitor performs the following functions: • Tracks the switch of any task to the suspended state. If the task gets to the suspended state, the Task Monitor logs the error-related information (including the suspended task information and summary information about all running tasks), and then initiates recovery of the IP Deskphone. • Monitors important tasks.
The PDT commands automatically by the tool), and reduces the effort required to send the appropriate log information to technical support. The PDT provides remote access to the IP Deskphone with the problem, using a SSH session. Access is restricted by admin ID and password. Steps to enable SSH on a SIP phone manually: 1. Open Device Settings dialog. 2. Check Enable SSH checkbox if it is visible. If it is invisible, do the following: • Press Auto soft key and uncheck the 18.
Diagnostics and troubleshooting Command Description If the input parameter is incorrect, the following notification appears: >prtlog: incorrect type of manager clearLogFile Clears a content of the ECR-log file setLogLevel Configures log level, where the loglevel is in the range 0...
The PDT commands Command Description lsr List directory contents (similar to unix Is) and the contents of a directory and any of its subdirectories ping [# of pings] Ping any host (ping) tracert [max hops] Traceroute to any host (tracert) netinfo Print common network information routeshow Display host and network routing tables and stats arp Display entries in the system ARP table listcerts List all trusted certificates printcert Display certificate details sip
Diagnostics and troubleshooting Command Description reset2factory >reset2factory Resets the IP Deskphone to the default setting. See Activating Reset to Factory Setting using SSH_PDT on page 360. routePrint Displays GW IPv6 addresses. ifShow Displays IPv4 interface. ping Sends ICMPv6 Echo Request messages and records the receipt of ICMPv6 Echo Reply messages. With ping, the IP Deskphone can detect network or host communication failures and troubleshoot common IPv6 connectivity problems.
PDT for USB flash drive tt 0x checkStack 0x To print out the list of all supported commands and short description you can enter the "?" command when PDT prompt is displayed, for example PDT> ?. PDT for USB flash drive The PDT contains commands that allow the IP Deskphone to display file system information on the first valid USB flash drive attached to the IP Deskphone.
Diagnostics and troubleshooting Figure 86: PDT output on usbFsShow command Update PDT device configuration information The PDT device configuration is updated with USB port lock information. You can remotely monitor the individual USB device configuration status using the PDT. 370 SIP Software for Avaya 1100 Series IP Deskphones-Administration with Avaya Aura ® Application Server 5300 November 2012 Comments? infodev@avaya.
Device configuration file Figure 87: USB Device information from PDT Device configuration file The following table describes the configuration commands in the device configuration file for alarms, logs and diagnostics. Table 78: Alarms, logs and diagnostics configuration commands Component Flag Description PC Port Mirroring parameter PORT_MIRROR_ENAB Determines whether the option can be managed or not. which can be modified in the LE Advanced Diag Tools dialog.
Diagnostics and troubleshooting Component Flag Description monitor wakes up (after start-up or the last memory check attempt). • The values are 1800 (0.5 hrs) to 86400 (24 hrs). The default value is 86400 (24 hrs). SIP-traffic monitor DOS_PACKET_RATE Determines the maximum number of packets per second that is allowed. SIP_traffic monitor DOS_MAX_LIMIT Specifies how many packets past DOS_PACKET_RATE the IP Deskphone can receive before packets are dropped.
Diagnostic Logs Diagnostic Logs The IP Deskphone supports two types of log files: • ECR-log • SIP-log ECR-log file The ECR-log file registers and provides detailed information on the errors or bugs that occur during the operation of the IP Deskphone. The ECR-log also contains records indicating some events, such as restart. Each error is logged as a record. The format of the record is the same regardless of the monitor that generates it or the level of severity of the error.
Diagnostics and troubleshooting The third section includes the supplementary information. The content depends on the flag in the calling function.
Diagnostic Logs Figure 88: Example of the supplementary information in the ECR-log file SIP Software for Avaya 1100 Series IP Deskphones-Administration with Avaya Aura ® Application Server 5300 November 2012 375
Diagnostics and troubleshooting Figure 89: Example of the supplementary information in the ECR-log file (continued) The following is an example of the ECR-log file. PDT>prtlog 0 (-----------------> example of the ECR-log file) 376 SIP Software for Avaya 1100 Series IP Deskphones-Administration with Avaya Aura ® Application Server 5300 November 2012 Comments? infodev@avaya.
Diagnostic Logs Figure 90: Example of the ECR-log file SIP Software for Avaya 1100 Series IP Deskphones-Administration with Avaya Aura ® Application Server 5300 November 2012 377
Diagnostics and troubleshooting Figure 91: Example of the ECR-log file (continued) 378 SIP Software for Avaya 1100 Series IP Deskphones-Administration with Avaya Aura ® Application Server 5300 November 2012 Comments? infodev@avaya.
Diagnostic Logs SIP-log file The SIP-log file registers incoming and outgoing SIP-packages, and each package is logged as a record. There are two sections: • The first section requires mandatory information for each record including: - type of the package (incoming or outgoing) - time stamp - software version • The second section contains the content of the package in the text format. The following is an example of the SIP-log file.
Diagnostics and troubleshooting Figure 92: Example of the SIP-log file 380 SIP Software for Avaya 1100 Series IP Deskphones-Administration with Avaya Aura ® Application Server 5300 November 2012 Comments? infodev@avaya.
Diagnostic Logs Figure 93: Example of the SIP-log file (continued) Three ways to get SIP-logs from a phone: 1. Online — connect to the phone through SSH and enter the dbgshell PDT command. The log messages are printed out during a call to SSH console. 2. Offline— connect to the phone through SSH and enter the prtlog 1 PDT command. The active SIP log file is printed out to SSH console. 3. Offline Log File — Log files are stored on phone flash device.
Diagnostics and troubleshooting SSHID SSHPWD SFTP YES SFTP_READ_PATTERNS .txt,.zip,.log SFTP_WRITE_PATTERNS .txt,.zip,.log You can then connect through SFTP and take the most recent/logs/SIPLogFile.log and the archive:/logs/SIPLogFile.log.zip files. AS 5300 UC Client Softphone interworking with the IP Deskphone If the user does not have access to the pre-authorization configurations in the Feature Options menu, the feature is not enabled.
Logging and errors Media negotiation failure SSH If a logon failure for SSH Authentication occurs, the following event is posted in the security log: 1040[Minor][TUE JAN 02 20:12:14 2007][4189][i:/fw/buil d/../util/ sshapp/sshServer.
Diagnostics and troubleshooting 384 SIP Software for Avaya 1100 Series IP Deskphones-Administration with Avaya Aura ® Application Server 5300 November 2012 Comments? infodev@avaya.
Index Numerics 1165E IP Deskphone with SIP Software illustration ...23 802.1ab Link Layer Discovery Protocol (LLDP) ........ 214 802.1x (EAP) authorization .......................................214 802.1x (EAP) device ID ............................................214 802.1x (EAP) password ............................................214 A Animated screensaver ..............................................177 Application Server 5300 .............................................
I Identify the current version of UNIStim Software ......133 Ignore redirect ............................................................13 Images ......................................................................176 Installation overview ...................................................26 Installing the IP Deskphone ......................................129 IP Deskphone diagnostics ........................................341 IP Deskphone Getting Started Card ...........................
SRTP ........................................................................237 SSH ...................................................................237, 238 Support instant messaging .......................................340 Supported subscriptions ...........................................339 System commands ...................................................116 Upgrade the SIP Software ........................................131 Upgrade the UNIStim software version ....................