
Instruction manual


16
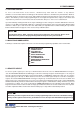
1) Press and hold the “Set” button.
2) Press and release the “Reset” button.
3) Release the “Set” button.
4) Press “Down” or “Up” to move the text block.
5) When the choice is made, press and release the “Set” button.
Changing the Horizontal Position
1. Press and hold the “Up” button.
2. Press and release the “Reset” button.
3. Release the “Up” button.
4. Press “Down” or “Up” to move the text block.
5. When the choice is made, press and release the “Set” button.
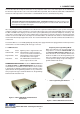
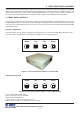
VSI-Pro Max POS / Cash Register Interface
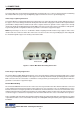
4. USER FRONT PANEL CONTROLS
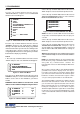
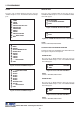
Down
Up Set Reset
Figure 8: Four Front Pannel Push Buttons of VSI-Pro Max (Up)
Accessing the PC Programming RS-232 Connection
Hold in the “Up” and “Set” buttons for longer than 3 seconds and the VSI-Pro Max will temporarily be configured for RS-
232 Register Input at 9600 baud. If you have video connected you will see this message on-screen as well. This mode is
also signified by the REGISTER LED and NETWORK LED flashing. This allows the user to connect the PC Program-
ming cable and program the unit without worrying about what the internal setups are. This mode can be exited at any
time by pressing the “Reset” button and the unit will return to the internal programmed settings. Do note that if you
download new firmware the unit will be revert to factory default settings. If you download or change and settings via the PC
Programming software these new settings will take effect upon exit.
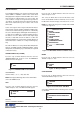
Down
Up Set Reset
Figure 9A: Four Front Panel Push Buttons of VSI-Pro Max for PC Programming Temporary Access
Changing the Vertical Position
Down
Up Set Reset
Figure 9: Four Front Pannel Push Buttons of VSI-Pro Max (Set)