
Specifications


2-12 System Administrator’s Guide
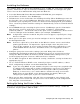
Setting the IP Address
This option sets the printer’s IP address.
1. From the Network Configure menu, select IP Address.
2. Press D or U to increase or decrease the highlighted number. Press L or R to
highlight a different number.
3. When you are finished, press R until you see e. Then press e to save the address
and return to the Configure menu. Press X to exit without saving changes.
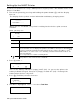
Setting the Subnet Mask
T
his option sets the printer’s subnet mask.
1. From the Network Configure menu, select Subnet Mask.
2. Press D or U to increase or decrease the highlighted number. Press L or R to
highlight a different number.
3. When you are finished, press R until you see e. Then press e to save the address
and return to the Configure menu. Press X to exit without saving changes.
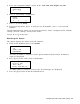
Setting the Gateway
T
his option sets the printer’s router (gateway) address.
1. From the Configure menu, select Gateway.
2. Press D or U to increase or decrease the highlighted number. Press L or R to
highlight a different number.
3. When you are finished, press R until you see e. Press e to save the address and
return to the Configure menu. Press X to exit without saving changes.
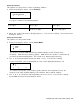
Setting the Power Mode
T
his option sets the power mode to CAM (Continuous Awake Mode) or PSP (Power Save
Protocol). PSP conserves battery power. CAM means the printer is continuously
receiving and transmitting data. This mode uses battery power quickly.
1. From the Configure menu, select Power Mode.
A checkmark indicates the current option.
2. Press U or D until you see the power mode you need. Press e to enable it.