FRESHMARX™ 9415™ Labeling System TC9415SA Rev. AE 5/09 ©2007 Avery Dennison Corp. All rights reserved.
Each product and program carries a respective written warranty, the only warranty on which the customer can rely. Avery Dennison reserves the right to make changes in the product, the programs, and their availability at any time and without notice. Although Avery Dennison has made every effort to provide complete and accurate information in this manual, Avery Dennison shall not be liable for any omissions or inaccuracies. Any update will be incorporated in a later edition of this manual.
TA B L E O F C O N T E N T S INTRODUCTION ............................................................... 1-1 Using This Manual ....................................................... 1-1 Audience .................................................................... 1-1 About the Printer ......................................................... 1-2 CHANGING PRINTER SETTINGS ....................................... 2-1 Configuring the Printer .................................................
USING THE EDIT UTILITY ..................................................3-1 Installing the Edit Utility ................................................3-2 Creating and Editing the Data File .................................3-3 Editing home keys .....................................................3-3 Creating and editing product buttons...........................3-4 Updating with USB .......................................................3-6 Killing Data Files .............................................
1 INTRODUCTION The FreshMarx™ 9415™ Labeling System prints labels for product freshness and inventory. Information in this document supercedes information in previous versions. Check our Web site for the latest documentation and release information. Using This Manual Following is a summary of the contents of this manual: Chapter Contents 1 Introduction Information you should know before using the printer.
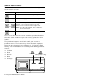
About the Printer There are five control buttons located on the right side of the touch screen. Button Action Stops/cancels the current print job. Advances supply for the selected printer. or Selects which printer feeds the supply. Printer 1 is located on the left side. Printer 2 is located on the right side. Note: For the 9415™SP, these buttons do not function. Enters the printer configuration menu.
CHANGING PRINTER SETTINGS 2 This chapter tells you how to ♦ ♦ ♦ ♦ ♦ ♦ ♦ ♦ ♦ configure the printer. assign formats (dual printer only). select formats (single printer only). set the time and date. adjust the touch screen display. change the Manager Password. adjust the distance to the tear bar. adjust the horizontal print position. adjust the vertical print position.
Configuring the Printer Use the Configure screen to set the date and time, assign formats, adjust the touch screen settings, and update the printer. Instructions for configuring the printer are located under Manager Help. To access the Manager Help: 1. 2. Press . Enter the Manager Password and press Enter. The default password is 1234. The Configure screen appears. Note: This screen appears differently on the single printer version.
3. Press Manager Help. Scroll through the text to the instructions you need. Assigning a Format (Dual Printer Only) These instructions apply to the dual printer version only. See “Selecting a Format” for single printer instructions. Assign one of six preset label formats to each menu category, then assign those formats to a printer to print freshness labels. See Appendix A, “Label Formats,” for the size and content of each format.
Assigning a format to a category To assign a format to a menu category: 3. . Press Enter the Manager Password and press Enter. The default password is 1234. The Configure screen appears. Press Assign Format. 4. Press Assign Format To Category. 1. 2. The currently selected format number appears across the top of the screen.
5. 6. 7. 8. Select a format from the Format list, then press the category for that format in the Home Key list. Repeat for each format or category you need. The assignments appear in the Assigned list. When you are finished, press OK. Assign the format to a printer. See “Assigning a format to a printer” for more information. When you are finished, press Return to return to the menu screen. Your assigned format and printer appears in the status bar.
Assigning a format to a printer Assign the formats you need to a category before assigning them to a printer. See “Assigning a format to a category” for more information. 1. 2. 3. Press . Enter the Manager Password and press Enter. The default password is 1234. The Configure screen appears. Press Assign Format. 4. Press Assign Format To Printer.
5. 6. Select a format from the Format# list, then press P1 (Printer 1) or P2 (Printer 2) from the Printer# list. Repeat for each format you need. The assignments appear in the Assigned Fmt/Prn list. When you are finished, press OK, then press Return to return to the menu screen. Your assigned format and printer appears in the status bar. Resetting the formats and printers You can reset all the format/printer assignments to the default setting (Format 1, Printer 1 for all categories). 3. .
Selecting a Format (Single Printer Only) These instructions apply to the single printer version only. See “Assigning a Format” for dual printer instructions. Choose from six preset label formats for your freshness label. See Appendix A, “Label Formats” for the size and content of each format. 1. 2. Press . Enter the Manager Password and press Enter. The default password is 1234. The Configure screen appears. 3. Press Select Format.
4. Press the button of the format you need. The currently selected format number appears across the top of the screen. Note: If you select a format larger than the loaded labels, some information may not print. 5. Press OK. 6. Press Return to return to the product menu. The label format number appears on the status bar at the top of the product menu screen.
Setting the Time and Date You may have a custom application that differs slightly from the examples in this section. The screens shown are for reference only. 1. 2. Press . Enter the Manager Password and press Enter. The default password is 1234. The Configure screen appears. Note: 3. This screen appears differently in the single printer version. Press System.
4. Press Set Time/Date. Set the date format using the drop-down menu in the mm/dd/yy field. Select a 12-hour or 24-hour time format. The default is 12-hour. Press the button to change the time format to 24-hour. Use the left and right arrows to set the month, day, year, day of the week, hour, and minute fields. 5. 6. 7. Press Set. You return to the System screen. Press OK. Press Return to return to the product screen.
Adjusting the Touch Screen To adjust the screen contrast and backlight: 1. 2. 3. . Press Enter the Manager Password and press Enter. The default password is 1234. The Configure screen appears. Press System. Use the buttons as follows: 4. 5. Button Function Contrast + Increases screen contrast. Contrast – Decreases screen contrast. Backlight + Makes the screen brighter. Backlight – Makes the screen darker. When you are finished, press OK. Press Return to return to the product screen.
Changing the Password A password is required to make any changes to the printer settings or product screens. To change the Manager Password: 1. 2. 3. Press . Enter the Manager Password and press Enter. The default password is 1234. The Configure screen appears. Press Change Password. 4. Enter the new password. 5. Press Enter. 6. Press Return to return to the product screen. Note: If you forget the Manager Password, enter password 5675 . The configure screen appears.
Adjusting the Distance to Tear Bar You can set the distance the labels feed past the tear bar to remove the labels. The adjustments are in 0.01-inch increments and the default is 0.25. 1. 2. 3. Press . Enter the Manager Password and press Enter. The default password is 1234. The Configure screen appears. Press Printer. Use the buttons as follows: 4. 5. Button Function Tear bar+ Feeds labels further past the tear bar. Tear bar– Feeds labels closer to the tear bar.
Adjusting the Print Position You can adjust the horizontal (X) and vertical (Y) position of the text on a label. The adjustments are in dots (0.0049 inch) and the defaults are +10 for horizontal and +5 for vertical. 1. 2. 3. Press . Enter the Manager Password and press Enter. The default password is 1234. The Configure screen appears. Press Printer. Use the buttons as follows: 4. 5. Button Function Print X Position+ Moves printed text right. Print X Position– Moves printed text left.
2-16 System Administrator’s Guide
3 USING THE EDIT UTILITY This chapter tells you how to ♦ ♦ ♦ ♦ ♦ ♦ install the Edit Utility. create and edit the product data file. configure the network settings. upload printer data files to your computer. update the printer. delete and reload data files.
Installing the Edit Utility Install the Edit Utility on a computer with the Microsoft Windows XP operating system. 1. 2. 3. Download the Edit Utility from our Web site to your computer. Open the downloaded file and follow the on-screen instructions to complete the installation. Start the Edit Utility. The Main screen appears. A status bar is located across the bottom. Status Bar 4.
Creating and Editing the Data File You can create new product screens or make changes to existing product screens with the Edit Utility. See “Uploading the Data File” to upload the existing data file for editing. Editing home keys The home keys have default category captions that you can use or change as needed. To edit home keys: 1. Check Edit “Home” Buttons on the right. This disables the home keys so you cannot change categories. 2. Click a home key to edit. 3. Enter a new caption and click OK.
Creating and editing product buttons 1. Click File, then New to create a new data (.dat) file from a blank template, or click File, then Open… to edit an existing data file. You see a blank template or your data file. 2. Click a blank button to add a new product, or click an existing product button to edit. The Edit screen appears.
3. Enter a button caption, description, and expiration time. The information you include in the item description field depends on your label format. See Appendix A, “Label Formats” for information on each format’s content and maximum number of characters printed. 4. 5. 6. Click the home keys on the right to edit product buttons in other categories. Click OK when finished. Click File, then Save to save changes. The data file must be saved as a Unicode text file (.dat) to be loaded into a printer.
Updating with USB Use a jump drive no greater than 1 GIG capacity and formatted to FAT or FAT32. 1. 2. Save the latest application and data file on a thumb drive. Application updates are available for download on our Web site. Plug the thumb drive into the USB port on the side of the printer. The printer detects the thumb drive automatically. USB Port 3. 4. Press . Enter the Manager Password and press Enter. The default password is 1234. The Configure screen appears.
5. Press Update. 6. Press Product Data to update the data files. The file browser appears. 7. Select the data file and press OK. This may take several minutes. The USB Update screen indicates when the update is complete. Press OK. The printer does not restart.
8. Press Software to update the application file. The file browser appears. Select the application file and press OK. This may take several minutes. When the update is complete, the printer restarts. Note: For firmware updates, contact Service at the number listed on the back of this manual. 9 . Remove the thumb drive. Killing Data Files The Kill Data Files option in the Configure menu deletes all data files from the printer.
3. Press Kill Data Files. 4. Press Yes. The printer deletes all data files and loads the default data files. The printer does not restart. Note: All data files are deleted when you press Kill Data Files and they cannot be recovered. You cannot select a specific file to delete.
Configuring the Network Settings The Edit Utility’s IP address must match the IP address of the printer to upload the data file from the printer to your computer, or to download a new data file to the printer. On the printer: 1. Connect the printer to your computer’s Internet port through a network hub. 2. 3. . Press Enter the Manager Password and press Enter. The default password is 1234. The Configure screen appears. Press Internet. 4.
5. 6. 7. 8. 9. Press the first numeric field and enter the first value for a valid Terminal (printer) IP address. Press Enter. You return to the Internet Setup screen. Press the next field for the IP address, enter the value, and press Enter. Continue entering field values until all fields are completed for IP address, Subnet Mask, and your network’s Default Gateway. Press OK to save the settings. The printer restarts with the new network settings.
On your computer: 1. 2. 3. 4. 5. 6. Connect the printer to your computer using a network cable. Turn on the printer. Start the Edit Utility. Click Setup, then Internet. Enter the IP address of the printer in the IP address field. Click OK.
Uploading the Data File You can upload the data file from the printer to your computer to make changes using the Edit Utility and save it on a thumb drive to update other printers. See “Creating and Editing the Data File” and “Updating with USB” for more information. 1. 2. 3. 4. Connect the printer to your computer using a network cable. Turn on the printer. Start the Edit Utility. Click Update, then Upload. The ProdData.dat file appears in the drop down menu. 5. Click OK. 6.
Updating with Ethernet You can also download files directly to the printer from your computer. Updating the data file 1. 2. 3. Start the Edit Utility. Click Update, DataFile. The File Open dialog box appears. Open the updated product data (.dat) file. The printer enters download mode and “Updating Data Please Wait…” appears on the printer’s touch screen. The printer automatically renames the data file to ProdData if necessary.
Updating the application 1. Download the latest application from our Web site on your computer. Note: Save the file to your computer’s hard drive, not a network drive. 2. Connect the printer to your computer using a network cable. 3. Turn on the printer. 4. Start the Edit Utility. 5. Click Update, Software. 6. Open the freshmarxVxx.bff (“xx” indicates the version number) file you downloaded from the Web site. The printer enters download mode. This may take several minutes.
3-16 System Administrator’s Guide
A L A B E L F O R M AT S Format 1 Prints 1.2” wide x 1.1” long labels. Enter the following information for each field: Field Description Description 1 Prints up to 17 characters. Description 2 Prints up to 17 characters. Description 3 Prints up to 17 characters. EMPL Employee ID must be 2-10 characters. Must Use By Numbers only. Days 0-365, hours 0-23, minutes 0-59.
Format 2 Prints 2.2” wide x 1.1” long labels. Enter the following information for each field: Field Description Description 1 Prints up to 35 characters. Description 2 Prints up to 35 characters. EMPL Employee ID must be 2-10 characters. Must Use By Numbers only. Days 0-365, hours 0-23, minutes 0-59.
Format 3 Prints 2.2” wide x 1.5” long labels. Enter the following information for each field: Field Description Description 1 Prints up to 25 characters. Description 2 Prints up to 25 characters. EMPL Employee ID must be 2-10 characters. Expire Date/Time Numbers only. Days 0-365, hours 0-23, minutes 0-59.
Format 4 Prints 2.2” wide x 2.0” long labels. Color-Coded Block Note: A box prints around the color-coded block that corresponds to the day-of-week expiration date. Enter the following information for each field: Field Description Description 1 Prints up to 15 characters. Description 2 Prints up to 15 characters EMPL Employee ID must be 2-10 characters. Use By Numbers only. Days 0-365, hours 0-23, minutes 0-59. Blue Use by Monday. Yellow Use by Tuesday. Red Use by Wednesday.
Format 5 Prints 2.2” wide by 3.0” long labels. Enter the following information for each field: Field Description Description Prints up to 16 characters. Shelf Life Prints up to 13 characters. EMPL Employee ID must be 2-10 characters. Use By Numbers only. Days 0-365, hours 0-23, minutes 0-59.
Format 6 Prints 2.2” wide x 4.0” long labels. Enter the following information for each field: Field Description Store Name Prints up to 17 characters. Description 1 Prints up to 23 characters. Description 2 Prints up to 23 characters. Description 3 Prints up to 23 characters. Ingredients Prints up to 656 characters. Note: Does not print semicolons or returns. Use By Prints the date in MM/DD/YY format. Net Weight Prints up to 8 characters.
Visit www.monarch.com for sales, service, supplies, information, and telephone numbers for our International locations. TOLL FREE: 1-800-543-6650 (In the U.S.A.) 1-800-387-4740 (In Canada) For FreshMarx sales: 1-877-774-6829 (In the U.S.A.