
7.0

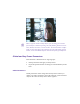


Table Of Contents
- Title Page
- Contents
- Preparing to Work with Effects
- Basics of Effects Editing
- Working in Effect Mode
- Entering Effect Mode
- Understanding the Effect Preview Monitor
- Using Big Effect Mode
- Working with the Effect Grid
- Using the Effect Editor
- Using Key Frames
- Adjusting Basic Parameters
- Using an Effect Template
- Playing an Effect
- Rendering an Effect
- Managing Your Media Files
- Creating Vertical and Nested Effects
- Creating Titles and Graphic Objects
- Task Overview — Creating and Editing Titles
- Downstream Keying of Titles and Graphics
- Opening the Title Tool
- Understanding the Title Tool Window
- Setting Up the Drawing Environment
- Working with Text
- Creating Graphic Objects
- Creating Rolling or Crawling Titles
- Page Count Limits for Rolling or Crawling Titles
- Using Auto Size Mode
- Setting Up Text Formatting for Rolling Titles
- Workflow Options for Creating Crawling Titles
- Typing the Rolling or Crawling Text
- Resizing a Rolling or Crawling Title
- Scrolling Through a Title
- Going to a Page
- Adding Pages
- Deleting Additional Pages
- Formatting Rolling or Crawling Titles
- Choosing Colors and Setting Transparency
- Working with Shadows
- Manipulating Objects
- Saving Titles and Title Styles
- Exporting a Title as a Graphics File
- Editing with Titles
- Task Overview — Editing with Titles
- Before You Begin
- Editing a Title into a Sequence
- Trimming the Duration of Rolling and Crawling Titl...
- Removing Titles
- Replacing Titles
- Fading a Title
- Adjusting Title Effect Parameters
- Revising a Title in a Sequence
- Replacing Fill Tracks
- Rendering Titles
- Re-creating Title Media
- Promoting a 2D Title to 3D
- Troubleshooting Titles
- Intraframe Editing
- Editing with Intraframe Capability
- Using an Optional Pen Tool
- Editing with Single-Field Step
- Rendering Intraframe Effects
- Applying the Paint Effect to a Sequence
- Applying an AniMatte Effect to a Sequence
- Working with the Intraframe Editing Interface
- Using Effect Templates with the Intraframe Effects...
- Working with Intraframe Editing Parameters
- Working with Vector-Based Objects
- The Elements of Vector-Based Objects
- Getting Started with Bezier Curves
- Modifying Lines and Curves Summarized
- Painting a New Object with Bezier Curves
- Moving a Control Point
- Adding a Control Point
- Moving to Adjacent Control Points
- Moving Control Points and Objects in Small Increme...
- Removing a Control Point
- Using the Paint Tools
- Moving and Manipulating Painted Objects and Mattes...
- Using the Paint and AniMatte Effects
- Using the Paint Effect
- Using the AniMatte Effect
- Working with 3D Effects
- About the 3D Effects Option
- Accessing 3D Effects
- Understanding the 3D Effects Interface
- Creating Custom 3D Effects
- Using Avid Xpress 3D Effects
- 2D Effects Reference
- 2D Effect Parameters Reference
- Motion Effect Parameters
- Plug-in Effects
- Blend Effects
- Conceal Effects
- Film Effects
- Image Effects
- Key Effects
- L-Conceal Effects
- Motion Effects
- Peel Effects
- Push Effects
- Spin Effects
- Squeeze Effects
- Wipes
- Comparison of Similar Effects
- 3D Effects Reference
- Basic 3D Effects Parameters
- Setup Versus Key-Frame Parameters
- Corner Pinning
- Crop — Cropping the Image
- Scaling — Changing the Size
- Axis — Moving the Center of Rotation
- Skew — Tilting the Image
- Rotation — Rotating an Effect
- Position — Moving the Image
- Acceleration — Smoothing Out Key-Frame Transitions...
- Spline — Moving the Image Along a Smooth Path
- Perspective — Moving the Perspective Point
- Target — Post-Transformation Position and Scaling
- Border
- Highlight
- Defocus — Controlling the Sharpness of Focus
- Shadow
- Trail — Adding a Trail to a Moving Image
- Stamp
- Foreground — Selecting Between Full, Chroma, and L...
- Background — Add a Background Color
- Profile
- 3D Shape Effects
- Avid Xpress 3D Effects
- Basic 3D Effects Parameters
- Index
- Movies

246
To pop a painted object or matte key onto the screen:
1. Paint an object with the Paint effect or draw a matte with the
AniMatte effect on a segment or transition.
2. Select the object with the Selection Tool.
3. Drag the position indicator to the position in the effectÕs Timeline
where you want the object to pop onto the screen, and click the
Add Key Frame button.
n
There must be at least one more key frame in the segment or transition follow-
ing the one you created in step 3.
4. Click the Object Visible button if it is not selected already.
5. Click the previous key frame to select that key frame, and then
deselect the Object Visible button.
6. Repeat steps 1 to 5 for each object you want to pop onto the screen.
n
You can perform this procedure on different objects, or mattes in a segment or
transition, to create an effect in which the objects or mattes pop onto the
screen at the intervals and positions you determine.
Feathering
Feathering adds soft edges to a painted object or a matte key. Adding a
soft edge can make a composited object look more natural against the
background. Feathering softens edges by diffusing the border of the
object by the pixel width you want.