
2.7


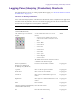
Table Of Contents
- Title Page
- Contents
- Using This Guide
- Getting Started
- Working with Assets
- The Assets Pane
- Working with News Assets
- Working with Interplay | Production Assets
- Identifying Interplay | Production Systems and Media Assets
- Navigating the Interplay | Production Database
- Adding or Removing Property Columns
- Resizing Columns
- Moving Columns
- Moving or Copying Assets
- Duplicating Assets
- Renaming Assets
- Creating a New Folder
- Displaying or Hiding Referenced Assets
- Viewing and Editing Interplay | Production Metadata
- Viewing Interplay | Production Thumbnails
- Restoring an Asset from an Interplay Production Archive
- Working with Interplay | MAM Assets
- Navigating the Interplay | MAM Workspace
- Identifying Interplay | MAM Media Assets
- Creating a New Folder
- Renaming a Folder
- Moving a Folder
- Deleting a Folder
- Creating Assets
- Adding Assets to a Folder
- Triggering the Rights Evaluation for a Basic Sequence
- Selecting Assets
- Moving or Copying Assets
- Renaming Asset References
- Removing Asset References
- Deleting Assets and Basic Sequences
- Viewing and Editing Interplay | MAM Metadata
- Viewing Interplay | MAM Thumbnails
- Working with Projects
- Building a Script
- The Queue/Story Pane
- Creating a Story
- Segmenting Stories
- Writing Stories in Right-to-Left Languages
- Using Annotation to Dictate a Story
- Editing a Story
- Copying Stories
- Locking and Unlocking a Story
- Inserting Script Templates
- Inserting MOS Placeholders
- Adding Media to a Story
- Associating a Sequence with a Story
- Creating a Text-Only Story Segment
- Copying and Sending iNEWS Links
- Recovering Stories In Case of Disconnect
- Deleting or Recovering a Deleted Story
- Dragging a Script Sequence from MediaCentral | UX to Media Composer
- Production Tasks
- Using the Sequence Pane
- Displaying the Sequence Pane
- The Sequence Pane
- Understanding Basic and Advanced Sequences
- Offline Media in the Timeline
- Selecting a Horizontal or Vertical Timeline
- Navigating in the Sequence Timeline
- Using the Sequence Zoom Bar
- Timeline Paging During Playback
- Viewing Sequence Information
- Creating a Sequence
- Creating an Interplay | Production Sequence
- Rules for Creating a Script Sequence (Interplay | Production)
- Associating a Video ID with a Script Sequence
- Sequences Associated with Stories in Instinct and NewsCutter
- Audio-Only and Video-Only Advanced Sequences (Interplay | Production)
- Creating an Interplay | MAM Sequence
- Audio-Only Basic Sequences (Interplay | MAM)
- Saving a Sequence
- Saving a Version of a Sequence
- Exporting a Basic Sequence (Interplay | MAM)
- Recovering Sequences
- Opening and Editing an Existing Sequence in the Sequence Pane
- Opening a Sequence Associated with a Story
- Editing a Sequence Associated with a Story
- Editing a Sequence
- Locking a Basic Sequence (Interplay | MAM)
- Performing an Insert Edit in a Basic Sequence
- Performing an Insert Edit in an Advanced Sequence
- Performing an Overwrite Edit in a Basic Sequence
- Performing an Overwrite Edit in an Advanced Sequence
- Position Indicator Placement After an Insert or Overwrite Edit
- Performing a Replace Edit
- Enabling an Audio Track
- Using a Basic Sequence as a Source for a Sequence
- Using Match Frame to Add Media to a Sequence
- Undoing and Redoing an Action in the Sequence Pane
- Moving or Deleting Segments in the Timeline
- Adding and Removing Audio Segments
- Creating an Audio-Only NAT or SOT Segment
- Snapping in the Timeline
- Trimming Segments in the Timeline
- Using L-Cuts in the Timeline
- Splitting a Segment
- Adding Markers to a Sequence
- Inserting Video Dissolves (Advanced Sequences Only)
- Enabling Audio Scrubbing
- Modifying the Start Timecode
- Working with Video Media
- The Media Pane
- Playing Assets
- Using the J-K-L Keys for Playback
- Stepping Through Assets
- Playing Recently Viewed Assets
- Selecting the Aspect Ratio
- Changing the Maximum Size of the Proxy Video
- Updating the Media Status
- Playback of Simple and Complex Sequences
- Selecting the Playback Quality
- Adjusting for Playback Latency
- Selecting Frame-Based Playback or File-Based Playback
- Working with Remote Assets (Interplay Production)
- Working with Remote Playback (Interplay | MAM)
- Marking In and Out Points
- Working with Markers and Restrictions
- Displaying Captions and Segments
- Using the Timecode Displays
- Entering Timecode to Cue a Frame
- Working in the Media Timeline
- Using the Media Zoom Bar
- Reviewing in the STP Target Resolution
- Playing Back at the Highest Resolution
- Using Match Frame
- Opening an Enclosing Folder
- Transcoding Assets
- Viewing and Editing a Clip During Ingest
- Saving a Frame as an Image
- Viewing an Image
- Exporting an MP4 File
- Using Audio
- Working with Group Clips
- Searching for Assets
- Logging Interplay | Production Assets and Creating Subclips
- Workflows for Logging
- Understanding Markers and Restrictions
- The Log Layout
- The Logging Pane for Interplay | Production Assets
- Adding, Saving, and Deleting Markers
- Working with Restrictions
- Cutting, Copying, and Pasting Text
- Navigating by Markers in the Log Layout
- Filtering the Markers List
- Exporting Markers
- Entering Marker Text in Right-to-Left Languages
- Unicode Support for Marker Text
- Creating Subclips
- Customizable Logger
- Logging Interplay | MAM Assets
- Understanding Strata
- Logging Overview (Interplay | MAM Assets)
- The Logging Pane (Interplay | MAM)
- Understanding Segmentation Principles
- Locking a Stratum
- Working with Segments
- Navigating by Segments
- Annotating Text Fields
- Entering Segment Text in Right-to-Left Languages
- Annotating Using Tags
- Defining Merge Rules for Annotated Segments
- Exporting Strata
- Working with Associations (Interplay | MAM)
- Understanding Associations
- The Associations Pane
- Working in the Associations Pane
- Viewing Associated Assets
- Filtering the Displayed Associated Asset Types
- Opening Associated Assets in Other Panes
- Reusing Associated Assets in Other Panes
- Switching Between Associated Assets
- Creating Associations
- Deleting Associations
- Working with the File Info Pane (Interplay | MAM)
- Working with Closed Captions in MediaCentral | UX
- Sharing MediaCentral | UX Messages
- iNEWS Messaging
- Sending to Playback
- Delivering Assets and Media
- Working with Interplay | MAM Processes and Tasks
- Understanding Processes, Tasks, and Actions
- Creating Processes
- Using File Attachments During Process Creation
- Getting Information on Allowed Attachments
- Using the Quick Send Feature
- Monitoring Processes in the Progress Pane
- Working with Tasks
- The Tasks Pane
- Working in the Tasks Pane
- Filtering Displayed User Tasks
- Delegating User Tasks
- Assigning User Tasks to Users and Groups
- Applying Actions to User Tasks
- Displaying and Editing User Task Data
- Adding and Editing User Task Attachments
- Uploading Files as Attachments
- Downloading File Attachments
- Deleting Attachments
- MediaCentral | UX Mobile Application for the iPhone
- Connection Basics
- Installing MediaCentral | UX on the iPhone
- Starting MediaCentral | UX on the iPhone
- The Sidebar
- Buttons of the User Interface
- Customizing MediaCentral | UX Settings
- Changing Roles
- Accessing the iNEWS Database
- Editing Stories
- Approving Stories
- Working with Favorites
- Working Offline with Cached Queues and Stories
- MediaCentral | UX and Interplay | Production
- MediaCentral | UX Tablet Application for the iPad
- Connection Basics
- Installing MediaCentral | UX on the iPad
- Starting MediaCentral | UX on the Tablet
- The Sidebar
- Buttons of the User Interface
- Customizing MediaCentral | UX Settings
- Changing Roles
- Accessing the iNEWS Database
- Editing Stories
- Approving Stories
- Entering Presenter Mode
- Working with Favorites
- Working Offline with Cached Queues and Stories
- MediaCentral | UX and Interplay | Production
- MediaCentral | UX for Android Devices
- Connection Basics
- Installing MediaCentral | UX on Your Android Device
- Starting MediaCentral | UX on the Android Device
- The Navigation Drawer and Directory Panel
- Buttons of the User Interface
- Customizing MediaCentral | UX Settings
- Accessing the iNEWS Database
- Viewing Video Associated with a Script
- Working with Stories
- MediaCentral | UX and Interplay | Production
- User Settings
- Keyboard Shortcuts
- Icons
- Pane Type Icons
- Launch Pane Icons
- Assets Pane Icons
- Associations Pane Icons
- File Info Pane Icons
- Media Pane Icons
- Logging Pane Icons (Interplay | Production Assets)
- Logging Pane Icons (Interplay | MAM Assets)
- Logging Controls Pane
- Progress Pane Icons
- Sequence Pane Icons
- Tasks Pane Icons
- Media | Distribute Icons
- MediaCentral Glossary
- Index

B Keyboard Shortcuts
The following main topics provide information about keyboard shortcuts:
• Queue/Story Pane Shortcuts
• Assets Pane Shortcuts
• Media Pane Shortcuts
• Logging Pane (Interplay | Production) Shortcuts
• Logging Pane (Interplay | MAM) Shortcuts
• Sequence Pane Shortcuts
• Closed Captioning Pane Shortcuts
n
These keyboard shortcuts can be used on Windows systems or Macintosh systems, unless otherwise
noted. The Macintosh generally uses the Command key in place of the CTRL key, however, you can
still use the CTRL key shortcut. For example, on a Macintosh, you can save a story by pressing either
CTRL+S or Command+S.
n
Safari on the Macintosh currently has a known issue with Command (CMD) keyboard shortcuts. In
some cases complex key combinations with more that one additional key (CMD+J+K) fail to register
correctly when one of the additional keys is held for a longer time. This should not occur if all keys
are pressed approximately at the same time and released immediately.
Using the Tab Key in a Browser Window
By default, the Tab key works differently in Chrome and Safari:
• In both browsers, you can use the Tab key to move from one text field to the next text field.
• In Chrome, you can also use the Tab key to move from one screen object to the next, such as
tabbing from a text field to a button. To match this behavior in Safari, do one of the following:
-Use Option+Tab
- In the Preferences > Advanced settings panel, select the following setting: “Press Tab to
highlight each item on a Webpage.”
The behavior described for Chrome also applies to Chrome Frame in Internet Explorer.