
2.0


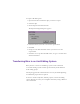


Table Of Contents
- Title Page
- Contents
- List of Tables
- Understanding MediaLog
- Getting Started
- Logging Source Material
- Organizing Clips and Bins
- Creating MediaLog Output
- Avid Log Specifications
- Using Help
- Opening and Closing the Help System
- How Help Windows Work
- Finding Information with the Help Topics Dialog Box
- Using Buttons in a Help Topic
- Printing Help Topics
- Copying Information from a Help Topic
- Changing the Font Size of Help Topics
- Keeping Help on Top
- Changing the Color of Help Windows
- Adding a Note to a Help Topic
- Regulatory and Safety Notices
- Index
91
5. Do one of the following:
• To move t he clips, drag the clips to the destination bin.
• To copy the clips, press and hold the Alt key while you drag
them to the destination bin. Be sure to continue holding the
Alt key as you release the mouse button to drop the clips in
the destination bin.
The clips appear in the new bin.
When you copy clips from one bin to another, the custom columns
you created in the first bin are also copied to the second bin. The
custom columns appear in the order in which you created them.
The copied clip is displayed in the destination bin’s current format
(Frame view or Text view).
n
If you set the destination bin’s display to show reference clips, the referenced
object types do not appear until you save the bin.
Modifying Clip Data in a Bin
You can modify data for m aster clips, subclips, tapes, and other objects
stored in a bin to correct data input errors or to add additional infor-
mation required for editing your project later.
Understanding Procedures for Modifying Clips
Two methods are available for modifying data in a bin.
• Modifying the data directly
You can change one item at a time by highlighting the data and
typing updated information. For example, you can t ype a new
name for a tape or correct the start and end timecodes for a clip.