
Specifications

Chapter 28: Automation 475
Trimming Automation
(TDM Systems Only)
If you have already written automation, you can
modify automation data for track volume and
send levels in real time by using Trim mode.
When a track is trim-enabled, you are not re-
cording absolute fader positions, but relative
changes in the existing automation. See “Trim
Mode” on page 454 for more information.
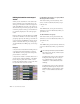
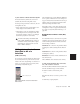
To enable Trim mode:
■ Click the Automation Mode Selector and
choose Trim from the pop-up menu.
When Trim mode is enabled for a track, its vol-
ume and send level faders turn yellow, and its
Automation Mode button is outlined in yellow.
This outline flashes to indicate that the track is
trim-enabled, and appears solid whenever trim-
ming is occurring on the track’s volume or send
levels.
To trim track volume or send levels in real time:
1 In the Automation Enable window, make sure
the automation type (volume or send level) is
write-enabled.
2 Click the Automation Mode Selector, and
choose an Automation mode:
• Use Auto Touch or Auto Latch to have the
faders follow existing automation, so you
can “chase” them during the automation
pass.
• Use Auto Write if you want to disengage
the faders from existing automation.
3 Click the Automation Mode Selector on the
tracks you want to automate and select Trim
from the pop-up menu.
4 Click Play to begin trimming automation, and
move the volume or send level faders.
5 When you have finished, click Stop.
Creating Snapshot
Automation
(TDM Systems Only)
Pro Tools lets you write automation data values
for multiple parameters in a single step. You can
write snapshot automation in two ways:
To a selection Automation data is written to the
Timeline selection (as well as the Edit selection
if linked). Anchor breakpoints are placed just be-
fore and after the selection so that data outside
the selection is not affected.
To a cursor location Automation data is written
at the insertion point. After the insertion point,
the automation ramps to the next breakpoint
value, or if no breakpoints exist, remains at the
newly written value for the remainder of the ses-
sion.
For more information on cutting, copying, and
pasting automation data within a session, see
“Writing Automation to the Start, End or All of
a Selection” on page 473.
To write snapshot automation:
1 In the Edit window, click the Track View but-
ton to show the automation you want to edit.
2 In the Automation Enable window, make sure
that the parameters you want to edit are write-
enabled. Deselect any parameters whose auto-
mation you want to preserve.
Enabling Trim mode