Avira Security Management Center User Manual
Contents 1. About this Manual .......................................................................4 1.1 Introduction ............................................................................................................................... 1.2 Structure of the Manual ............................................................................................................ 1.3 Signs and Symbols .........................................................................................................
6.3 Creating Filtered Computer Groups ....................................................................................... 69 6.4 Displaying Information about a Computer or Group ............................................................ 72 6.4.1 Displaying Information about a Node/Computer .......................................................72 6.4.2 Displaying Information in the Details panel ...............................................................73 6.5 Viewing Events.......................
About this Manual 1 About this Manual In this Chapter you will find an overview of the structure and contents of this manual: • • 1.1 Structure of the Manual – Page 4 Signs and Symbols – Page 5 Introduction In this manual, we have included all the information you need on Avira Security Management Center. For further information and assistance, please refer to our website, to our Technical Support hotline and to our regular Newsletter (see Service – Page 104). Your Avira Team 1.
About this Manual 1.3 Chapter Contents 8 Troubleshooting Workarounds and solutions for Avira SMC. 9 Products Supported by Avira SMC Avira products, supported by Avira SMC. 10 Service Avira GmbH Support and Service. Signs and Symbols The following signs and symbols appear in this manual: Symbol Meaning ... shown before a condition that must be met prior to performing an action 3 ... shown before a step you have to perform ... shown before the result that directly follows your action ...
About this Manual 1.4 Emphasis in text Explanation Signs and Symbols – Page 4 Cross references within the document setup.
About this Manual 7 Avira Security Management Center Avira GmbH
Product Information 2 Product Information Avira Security Management Center (Avira SMC) is used for remote installation and management of Avira products via the network. Components and Services Avira SMC consists of three components: z SMC Server, which runs on a central network server with three services: – Server – Event Manager – Avira Internet Update Manager – two integrated databases for storing Avira products and for events management.
Product Information 2.1 Functions The main application, SMC Server, comprises three services with different tasks that communicate with each other through an SSL encrypted TCP/IP connection. The Server service manages information on: • • • the computers integrated into the Security Environment of Avira SMC, the Avira products installed on the computers and the repository of software packages supported by Avira SMC.
Product Information 2.2 Features Avira SMC can manage and monitor all computers in the Security Environment of your company's network (Windows and Linux desktops and servers). Consequently, the computers are integrated into the Security Environment under a customized tree structure, arranged in hierarchical groups.
Product Information 2.3 Licensing Usually you receive an SMC license file by email when you buy Avira products and purchase Avira SMC. When installing SMC Agents on network computers, the license is checked: for example, if you have a license for 500 Clients, you can add up to 500 computers in the Security Environment. You will insert your license after installing Avira SMC (see Licensing Avira SMC – Page 19). Evaluation Mode 2.
Installation 3 Installation 3.1 Important Information on Installation Before installation Usually you will install Avira SMC Server on a central Windows network server and the SMC Frontend user interface on a computer in the network on which you can manage the Avira SMC as administrator. You can also install both components on the same computer. The services and program components of Avira SMC require the IP addresses of the computers and certain open ports for communication.
Installation Installation Steps You will perform the following installation steps: 1. SMC Server installation; 2. SMC Frontend installation. After carrying out these steps, you will configure the SMC, add computers into the Security Environment, install and manage SMC Agents and Avira products over the network, as described in the following Chapters. 3.2 Performing Installation 3.2.1 Installing SMC Server 3 You need administrator access to the server.
Installation In the next window, you have to set the user and password for SMC login. If you want to use a different account for SMC login through SMC Frontend, disable the option Reuse account of SMC-Server service as SMC user account and enter the SMC-User and SMC/ IUM - Password, else, just leave the option activated and click Next. Then you can configure the scheduler of the integrated updater. Make the settings and click Next.
Installation The program is ready to be installed. Click Install. The main application SMC Server, the other services and database will be installed. The dialog window for completing installation appears. Click Finish. SMC Server is installed. The SMC Server, Event Manager and Avira Internet Update Manager services start on your server. 3.2.2 Installing SMC Frontend 3 You need administrator access to the computer.
Avira SMC Frontend 4 Avira SMC Frontend You can manage the services and components of Avira SMC using the SMC Frontend (graphical user interface), which has been developed as an MMC snap-in. The MMC appearance, structure and menu options may vary according to your operating system. Avira SMC runs on MMC1.2 or newer. The following screenshots were made with MMC3.0 for MS Windows operating systems. This section will only describe proprietary elements of SMC Frontend.
Avira SMC Frontend Connecting to SMC Server Click on Avira Security Management Center Frontend. The SMC Frontend initiates connection to the SMC Server. The Login window appears: Type in the Login username and Password you provided at SMC setup. Select Local Computer, if SMC Frontend is installed on the same computer as the SMC Server, or If you installed the Frontend on a different computer, select Remote computer and type the server’s name or use the Browse button to select the server.
Avira SMC Frontend If you use a proxy for network Internet connection or if you have changed the ports when installing Avira SMC: Click Settings in the Login dialog. Select Use proxy and specify address and ports. Optional: After you have created an individual certificate for your SMC Server and want the clients to authenticate the Server (see “SSL Certificates Management” on page 51), click the SSL Configuration tab and activate the Server authentication options: Click OK .
Avira SMC Frontend The SMC Frontend connects to the SMC Server. The nodes will appear in the navigation window. 4.2 Licensing Avira SMC 3 The main application SMC Server and the SMC Frontend (graphical user interface) are installed (see Installation – Page 12) 3 License file is available (saved locally) Start the SMC Frontend and connect to the SMC Server (see Starting SMC Frontend and Connecting to SMC Server – Page 16).
Avira SMC Frontend The license window appears, displaying the Invalid entry marked in red in the Status field. Click New License and enter the path to the license file. Select the license file (default: hbedv.key) and confirm with OK . The license file is read and the license window appears: Licensing is complete.
Avira SMC Frontend 4.3 SMC Frontend User Interface Using SMC Frontend, you can configure and operate: - SMC Server and its modules - SMC Agents in the Security Environment - Avira software in the Software Repository - Avira software installed on computers in the Security Environment. After you login to Avira SMC, you will see the main window. Avira SMC manages users with various access rights. Consequently, the SMC Frontend may display limited features.
Avira SMC Frontend network user groups. Under the Security Environment node, the following nodes appear: • • • Network neighborhood Events Reports Configurations User Management Avira Internet Update Manager The Group nodes, with all computers included in the group; The computer nodes and the group New computers, with sub-nodes corresponding to all Avira products and SMC Agents. Filtered security environment, when you set certain filter types to create filtered groups.
Avira SMC Frontend Computer nodes Events Reports Using the Views menu settings (Action/ Views in the menu bar or Views in the context menu) or using the toolbar, the following information is displayed for every computer: z Product status: Displays products’ names and status icons, state and details. z Product version: Displays products’ names and version numbers. z Error messages: Displays errors issued by Avira products on a computer (with details of product name, error status and message).
Configuration 5 Configuration 5.1 Overview You will configure the main application SMC Server and its services using the SMC Frontend graphical user interface.
Configuration 5.2 Configuring Network and SMC Server Connections You can configure the connection so that these processes are simplified when the computer reboots and SMC Frontend starts. You can also add and manage users, set or remove access rights and thus control the connection of all users to SMC Server (see 5.9 User Management) Configuring the Network Connection Right-click the Avira Security Management Center Frontend node and select Settings.
Configuration 5.3 Setting the Security Environment In the Security Environment, Avira SMC uses so-called virtual groups of computers in order to perform installation, configuration and monitoring tasks. Only computers integrated into the Security Environment can be managed with Avira SMC.
Configuration Light blue monitor, orange arrow: computer started, SMC Agent installed, but no access rights granted. Dark monitor, orange arrow: computer off or not connected to network, SMC Agent installed, but disconnected from SMC Server. Dark monitor, red arrow: computer off or not connected to network, SMC Agent not installed.
Configuration Type the group name and click OK . The new group will appear in the console tree under the Security Environment node. Displaying Computer Names or IP Addresses Right-click Network Neighborhood in the console tree and select Display IP Addresses. The option is checked in the context menu: the computers list shows the IP addresses. Or, if your action deactivates the option in the context-menu: the list only shows the names of the computers.
Configuration described above. Importing Computers in the Security Environment You can also import a list of computers into the Security Environment using the Synchronize option from the context menu of the Security Environment. It offers the following three options: • • • Network neighborhood Network neighbourhood Comma separated file Active directory To import the computers from your Network neighborhood: Right-click on Security Environment and select Synchronize - Synchronize.
Configuration Set the lists of Computers to be added and Computers to be removed. You can apply the whole list, or first select certain computers and press the Remove... button, to adjust the desired list. Press Next to import the computers in the Security Environment. Comma separated file To import a computers list: Create the list in a text editor and save it on your system. You can give any name to the file (*.txt).
Configuration Under How do you want to represent your Active Directory in the SMC? select one of the options. The computers list from the ADS is imported according to your choice. You can adjust the list as described above. Press Next to import the computers in the Security Environment. In order for the import to work, the ADS communication ports must be open (default setting). See Prerequisites for ADS synchronization – Page 101.
Configuration Depending on the interval you selected, you can choose the time and day of the week in the following window: Press Finish. The SMC uses a poll mechanism, at a static synchronization interval. When synchronization errors occur, this may lead to node database corruption. To view and edit the scheduled import tasks: Right-click on Security Environment and select Views. Select Synchronization tasks.
Configuration Environment is the IP Address filter, in the context menu of a group. You can provide an IP range and, when connecting to SMC, the new computers with corresponding IPs, are automatically imported into that group, instead of being shown under the New computers group. Renaming Virtual Groups Right-click a group and select Rename. The name field appears. Edit the name and then click somewhere outside the field. The new name is saved and displayed.
Configuration The new update server is added in SMC Frontend, under Avira Internet Update Manager. For more details on the configuration of Avira IUM servers, see Configuring the Avira Internet Update Manager – Page 47. Then you can choose which server to use for automatic updates of Avira SMC components and virtual groups or computers. See Updating Avira Products – Page 94 5.
Configuration z (optional) Manual installation with setup file - Installing SMC Agent manually (Win XP Home Edition, optional: Windows 2000/ XP Professional/ Vista) – Page 36 z (optional) Silent Agent setup on Windows, using a logon script - Silent Agent Setup on Windows – Page 38 z (optional) UNIX: manual installation with setup file - Installing SMC Agent Manually on UNIX Systems – Page 39 After you have set the structure of your Security Environment, you can use the automatic installation feature,
Configuration In case you connect to the client computers (for example Linux) over SSH, you can activate the option "Use SSH public/ private key authentication" and then specify the Key file in putty format using the browse [...] button. Click OK . SMC Agent will be installed on the required computers and groups. Start the SMC Frontend (see Starting SMC Frontend and Connecting to SMC Server – Page 16).
Configuration Select I accept... and click Next. The next window asks for SMC-Server Configuration data. Enter the server’s IP or Hostname and click Next. The following window contains SMC-Agent Configuration data. Enter the data for the local computer (Computer name, as it appears in the Security Environment, and Port for communication with the Server).
Configuration You will see the Ready to install window. Click Install. The SMC Agent will be installed and then the final window appears. Click Finish. SMC Agent is locally installed. Start the SMC Frontend on the SMC Server (see Starting SMC Frontend and Connecting to SMC Server – Page 16). Computers/groups appear in the Security Environment with the status icon: green monitor, green arrow. Agent status is Ok.
Configuration 5.5.4 Installing SMC Agent Manually on UNIX Systems If required, you can install SMC Agent manually. You can find the SMC Agent installation kit for UNIX systems (AntiVir_Security_ Management_Center_UNIX_Agent.tgz) in the SMC archive on our website http://www.avira.com . 3 Computers/groups must be integrated into the Security Environment and the status must be: light-blue monitor, red arrow.
Configuration Then you are asked if you want the Agent to start: Would you like to start the SMC UNIX Agent now? [y] Press y or Enter. The Agent installation is complete. To check the status of SMC Agent: Change to the installation directory: cd /usr/lib/AntiVir/agent Type the command: ./smc-agent status If SMC Agent is not running, type: ./smc-agent start Check that all computers have the SMC Agent status Activated in the Details panel. 5.5.
Configuration 5.6 Configuring Avira SMC Avira SMC includes the following services: Server, Event Manager, Avira Internet Update Manager as well as the SMC Agent client service. All services are automatically configured when Avira SMC is installed. The default configuration of the services and the configuration made during Avira SMC installation on the server are optimized for the current network. We recommend that you change them only if absolutely necessary and with extreme caution.
Configuration General configuration Registration attempts The number of attempts for the SMC Agent to connect to the SMC Server. You should keep the default value "-1" for continuous attempt. Registration delay The time interval for the Agent to start, after the OS on client computers starts, to avoid traffic overload. Drop events The type of events (Info or Info & Warning) the Agent would not forward, to reduce the traffic and the size of the Events Manager’s database.
Configuration Communication Enterprise Event manager HTTP address and communication port on which the Event Manager service is installed. Enterprise Server URL HTTP address and communication port on which the Server is installed. Update URL Request Server authentication validate Common Name (Host) HTTP address and communication port on which the Update service is installed. Activation of SSL Server authentication. Validate the Common Name of the Host in the Server certificate. 5.6.
Configuration This only takes a few seconds. If SMC Server or Frontend are disconnected, you have to login to SMC again. General Settings To configure the Server to send email notifications about error status and events, use the General Settings options: SMTP Server Name of the mail server. Sender email address The email address, which the SMC uses to send notification emails.
Configuration Display agent synchronization command When this option is activated, the context menu of Security Environment or computer groups will have an additional command: Force agent synchronization. See Push and Pull Mechanisms – Page 81. Minimize GUI refresh You can use this option, if you have numerous clients in your Security Environment, to limit the refresh instances of the Frontend and thus to increase SMC performance.
Configuration Email Address Show warnings Show critical events Avira GmbH Email address of the recipient, for example the administrator or the collective address for system administration, so that more team members receive the message. The SMTP server settings from the General Settings tab are used. If you want to receive notifications about warnings via email activate this option. Select Email to specify a minimum number of events to occur, for a message to be sent.
Configuration 5.6.3 Configuring the Avira Internet Update Manager Avira Internet Update Manager (Avira IUM) is integrated in the SMC Frontend and it manages the updates for Avira software packages and installed products.
Configuration IUM Server - General Settings Directories To set the target directory in which updated files and program packages are to be stored: under Root directory for update files, enter the target directory on the server. The target directory may also be in the network. Shares are not possible. NOTE: If the target directory is on a computer in the Intranet, you must enter the path manually in the form of a UNC path. Ensure that you have sufficient rights on the target computer.
Configuration If you are in test mode and want to update via IUM, please commit the files before update. Otherwise you will not be able to update the SMC Server and Frontend afterwards. Log level To set the level of events to be logged in the IUM logfile, use the Log level dropdown and select: Info, Warning, Error, Trace or Debug.
Configuration IUM Server - Email Settings How to set the notifications sent by Avira Internet Update Manager: Email messages In the Email messages area, activate the option Activate email notification and fill in the following fields: • • • Authentication SMTP Server: Name of the mail server. The host name must not be more than 127 characters long. Example: 192.168.1.100 or mail.testcompany.com Return address: Email address of the sender (optional). Example: sendername@testcompany.
Configuration IUM Frontend Settings Activation of SSL server authentication: Avira SMC supports signed SSL certificates for all its server applications, including Avira IUM Server. Avira IUM Frontend, as client application, supports SSL server authentication (more details on the SSL feature below). 5.7 SSL Certificates Management SSL provides secure communication using data encryption and server/ client authentication.
Configuration Double-click the file SSLCertRequester.exe (located in C:\Program Files\Avira\Avira Security Management Center Server\), and press Next. Select the first option - Create a SSL Certificate Request and Private Key. Fill in the data fields and press Create Certificate. Along with the CSR ( YourNameReq.pem) the tool also creates a private key ( YourNameKey.pem) for the SMC Server. 2. Keep the private key in a safe place and send the CSR to a trusted Certificate Authority for signing. 3.
Configuration Select the second option Import a signed Certificate and Private Key pair. Press Browse and navigate to choose the Private Key and the Certificate from where you saved them on your system, fill in the Password, then press Import. The tool stores the certificate and the private key in the SSL directory of SMC Server. 4.
Configuration Apart from executing direct updates (see below), the Security Management Center supports automatic updates: • • via Avira Internet Update Manager (see Connecting to SMC Server – Page 17)or through scheduled update tasks (see Creating an SMC Server Update Task – Page 55), if the automatic mode is inactive. 5.8.1 Updating SMC Server and Frontend Performing Direct Updates Right-click Avira Security Management Center Frontend and select Update.
Configuration If the test mode is active for the IUM server assigned to SMC, the server will always be updated from the Released products folder. Please commit the test files first (see Test mode – Page 97). Go to the Avira Internet Update Manager node and select an IUM server. Right-click the Released Products node and select Update mirrored products, if you want to update the entire Avira software in your Security environment.
Configuration 5.8.2 Displaying and Changing Update Tasks for SMC Server Right-click Avira Security Management Center Frontend and select Update/ Show tasks. The details for the update server task are displayed in the Details panel (see Displaying Tasks for software packages or for SMC Server updates – Page 84). In order to modify a task: Double-click the task. The window Create a task appears. Make the changes and save the task again. 5.8.
Configuration The New user window appears: Type the user name, complete name and optionally a description and email address. If you do not want the account to be active yet, check the option Account is deactivated. Configure the user rights in the Permissions tab. Click OK and enter the password, to add the user. The new user appears in the Details panel.
Configuration You can set the following rights for every user: • Display network neighborhood • Display reports • Modify/delete reports • Manage users • Display events • Delete events • Manage Software Repository • Change own login password • Configure SMC • Configure IUM • Create filtering groups • Display filtering groups Set password Right-click a user icon in User Management and select Set password. The Password window appears. Type the password, confirm it and click OK .
Configuration The tab opens. Select or deactivate the rights of the user and confirm with OK . Delete user Right-click a user icon in User Management and select Delete. Click Yes. The user is deleted. Configuring User Rights in Virtual Groups You can set access and rights to virtual groups or to computers in the Security Environment for all users. These rights are assigned in cascading form and inherited downwards in the hierarchy of the virtual groups.
Configuration The rights for the Administrator user cannot be modified. Right-click the node of a computer or virtual group in the Security Environment and select User permissions. The User permissions window appears. Select a user and configure the rights in the Permissions area. Manage users Avira GmbH You can configure the users and their rights for every node. When settings are inherited from superior nodes, parts of the window are gray (inactive).
Configuration Use Parent Settings In the Available users area, select the users that should have access to the node and confirm with Add – OR – Select the users that should not have access to the node and confirm with Remove. The users are added in/removed from the Selected users area. In order to inherit the settings from its superior node: select the option Use parent settings. The settings for users and rights are inherited.
Operation 6 Operation 6.1 Overview This chapter describes the integral functions of Avira SMC. They may vary slightly according to the operating system and MMC version on your computers.
Operation 6.2 Managing the software packages Using Avira SMC Frontend, you can easily and conveniently install, configure and uninstall Avira products in virtual groups of the Security Environment. Avira SMC treats Avira products as so-called software packages in its own database. Software Repository Node The software packages are displayed in the SMC Frontend under the Software Repository node.
Operation Adding a Software Package 3 The Avira product must be saved on a computer in the local network. Right-click Software Repository and select New/Software. The window for Selecting the Software Package opens. Select the path to the software package and click Open. The software package will be integrated into SMC. The Details panel will display the data contained in the package’s info file. Click on the browse […] button, enter the path to the software license file and click Open.
Operation Deleting a Software Package We recommend that you do not delete the existing software packages because you may accidentally delete related files from the hard disk of the server and you cannot manage the products in Security Environment anymore. Expand the Software Repository node. The stored software packages are displayed. Right-click the software package and select Delete. The software will be deleted from the Avira SMC database. 6.2.
Operation Example of Install window for Avira AntiVir Professional (Windows): Right-click the computer/group on which you want to install the software. You can also use the Search function in the context menu for Security Environment, to locate a computer or group, by hostname or IP. Select Installation/[product name]/Install. An Install window is displayed, with program-specific dialogs and messages. The options are similar to those in the installation dialogs of every Avira product.
Operation Click Yes. The product is uninstalled. The entries of this product will be deleted from the computer details in the Details panel. Automatic product installation You can set automatic installation routines for computers or groups, to have the SMC Agent and certain Avira products installed, immediately after new computers are added to the group. To install products automatically, the SMC user account must have administrative access rights on the new computers.
Operation 6.2.3 Changing the Configuration of an Avira Product The configuration of the products is specific to the tree structure of the Security Environment. The settings are inherited from the parent node on each level. You can change the settings for every node, if you deactivate the option Inherit configuration. It is recommended to configure the Avira products starting from the root node Security Environment. All the computers in the group will inherit the settings.
Operation In the case of offline computers or Agents set with pull mechanism, actions and commands (such as configuring an installed Avira product) are saved in SMC as pending operations and automatically triggered by the program immediately after the computers are online, or when the Agent makes the synchronization. The computers will have the status for pending operations: red marker on the left side and/or orange arrow.
Operation The filter wizard starts. Type the name of the filtered group you want to create (for example errors) and press Next. The Filter type window appears. Error states Avira GmbH Select the first filter type, if you want to create a sub-group with all computers reporting an error, and press Finish.
Operation The errors sub-group appears under Filtered security environment node. Product which reports an error Select the second filter type, if you want to create a sub-group with all computers on which a product reports an error, and press Next. The Module error window appears. Select the module errors you want to group and press Finish. The sub-group appears under Filtered security environment node.
Operation The Product filter window appears. Select the product, to group computers on which it is not installed, and press Finish. The sub-group appears under Filtered security environment node. 6.4 Displaying Information about a Computer or Group 6.4.1 Displaying Information about a Node/Computer You can use the right-click menu to view some basic information on a node or computer. The information on a virtual group: • • • Computer amount in group: number of computers in the group.
Operation The Properties window appears: Right-click on a computer in the Security Environment and select Properties. Computer Properties The Computer properties window appears: 6.4.2 Displaying Information in the Details panel Avira SMC stores various information on every computer or group in the Security Environment, which you can display and also sort in the Details panel.
Operation Select View> List or View> Details from the right-click menu, to display the items or item details in table form. Using the option Add/Remove Columns from the View menu, you can customize the view in the Details panel. You can also sort the table by clicking the column headers. Status View This displays the following information on every group: Name Computer name. Operating system Information on the operating system.
Operation The Status View for the Filtered security environment shows the group name, source group and filter type: Product Version View This will display information on all modules of Avira programs installed on the computer: Module name Module version Module details 75 List of installed Avira products on the computer. File version information. File description.
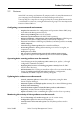
Operation Events View Every Avira product on a computer will issue product-specific events, which the SMC Agent retrieves and saves: Computer name Level Product Actor Message Time The name of the computer on which the event has been reported by the Avira product. Avira products assign a level to every event (degree of importance), such as Critical, Warning or Info. The name of the Avira product reporting the event. The name of the program component reporting the event.
Operation Node Computer or group name. Name Custom name of the task. Task type Period Server task: the task is server-managed. The selected frequency: Daily, Weekly, etc. Start The date and time for the first task performance. Actor The Avira product performing the task. Status Information on the status of the task. Command Product-specific command for the task (exp: update). The parameters are not shown here. Weekdays The days of the week, for a daily command (Mon, Tue, Wed...).
Operation Operation Product Remarks Created The type of task (for example, installation or command). The product related to the task. Information on the pending task, such as the command type and creation date. The date and time, when the task was created.
Operation 6.5 Viewing Events Every Avira product triggers specific events, which are collected by Avira SMC and displayed in SMC Frontend. First, the SMC Agent collects the events issued by Avira products and saves them to the local database. Then you can see these events in the SMC Frontend: z You can view and sort the events that have occurred on every computer in the Security Environment node (see Displaying Information about a Computer or Group – Page 72).
Operation z Product: shows the events produced by a certain Avira product. The products available for filtering are listed in the Filter/Product menu; z String: only displays the events containing a given string. The Events node shows the events received by SMC Agent and from the Avira products in the Security Environment, for example events produced by virus scanning. Click on Events. The Details panel will show all events in the Security Environment, unfiltered.
Operation 6.6 Performing Commands and Planning Tasks For every Avira product there are various ways of performing actions such as scan and update, using specific parameters or schedules. You can configure, activate and plan these actions using Avira SMC for computers and groups in the Security Environment. An action initiated by Avira SMC (e.g. Scan) is referred to as a Command, while the planned, single or periodical action is called a Task (e.g. weekly update).
Operation In the Console tree, click on Configurations/ Server, click on General settings tab and activate the option Display agent synchronization command. As a result, in the context menu of the Security Environment or for each computer, a new command appears: Commands/ Force agent synchronization. Performing Commands 3 Computers/groups must be integrated into the Security Environment and the status must be: green monitor, green arrow. Right-click the computer/group and select Commands.
Operation If the command accepts parameters, the Commands dialog window asks for application path and parameters. Type the required parameters and click Schedule this command. The dialog window for Creating a task appears: Type a name for the task and select the frequency. Click Next. The window with time and date settings appears: Select the start time and date and click Finish. The task is set and displayed in the Details panel of the computer/group (see Tasks View – Page 76).
Operation Displaying Tasks or Pending Operations The planned tasks are listed in the Details panel of the computer/group on which they are scheduled to run. Right-click the computer/group and select Tasks or Pending operations. You will see the tasks listed in the Details panel with more information (see Tasks View – Page 76).
Operation 6.7 Creating and Listing Reports You can create reports on single computers/groups in the Security Environment using SMC Agent. First you should create a report template for a certain report type.
Operation Reports Node Both reports and report templates are displayed in the Details panel when selecting Reports. Template name Template type Group Timeframe Start time The report name defined by the user. Schedule The selected reporting time interval. The selected report type. The virtual computer/group on which the report is run. The frequency of the report (where applicable). The time of the first reported results.
Operation The following window appears: Select the report type and time interval for the report and click Next. The Configure report window appears: Enter a name for the report template. If you want to run the report regularly: Activate the option Schedule report, enter a start date and time and the report frequency. Click Finish. The report template is created. The report is either run immediately or scheduled periodically and is displayed in the Reports node.
Operation Editing the Settings for Report Templates You cannot change the selected report type in the template. If you want the report to be of a different type, you must create a new template. Right-click on a report template in Reports and select Properties. The window Select Report Type appears. Here you can edit the time frame and click Next. The Configure Report window appears. You can edit the Name and Scheduler settings and click Finish. The changes are saved.
Operation Printing Reports When selecting HTML view, Avira SMC structures the reports as HTML pages using an HTML editor provided with your operating system (e.g. Microsoft Word or Microsoft Internet Explorer). Select a report in the HTML view, as in the above section. Right-click the report and select Print. The report is opened in the HTML editor. Use the Print command of the editor. 6.
Operation z You can send a command to SMC Agents, to run a program in the Agent application folder. Or you can schedule these tasks (see also Planning Tasks – Page 82). When shared, the files are copied to the installation directory of Avira products that you selected ( \\\C:\Program Files\Avira\Avira Security Management Center Agent\). This directory will be the root for this kind of actions in Avira SMC. You can also create subdirectories (e.g. ...
Operation The Copy files window appears: Click <-add and select the file(s)/program(s) to be copied from the standard Open window. You can enter a Subdirectory for the copied files, relative to the product installation directory. If you want to execute the copied files immediately: Activate the Execute … option and type the required Parameters. Sharing License Files In order to renew the license for an Avira product, you have to distribute the new license file using the Copy files function.
Operation The Commands window appears. Enter the path and the file name (e.g. Shared Files\). If you want to run the program immediately and only once: Click OK . The program is executed – OR – If you want to run the program at regular intervals as a scheduled task: Click the button Schedule this command (see Planning Tasks – Page 82). The task is displayed in the computer/group Details panel. 6.
Operation Right-click on the computer and select View Logfile. The window Logfile of [computer name] appears. Select a logfile from the drop-down list in the Choose logfile section: The logfile is listed in the window. Select a filter from the filter drop-down list: The logfile is filtered and listed in the window. Resetting the Error Status When an error occurs in Avira SMC, the affected Security Environment areas are marked with a red Stop icon in the console tree.
Updating Avira Products 7 Updating Avira Products Avira SMC offers more ways to update Avira products: z Activate automatic package synchronization You can automatically update the Software Repository and the installed Avira products, using Avira Internet Update Manager (activated by default). Automatic update mode (activated by default): Automatic synchronization of the software packages and installed Avira products, from the integrated IUM servers.
Updating Avira Products installed on the Security Environment computers are not updated.
Updating Avira Products 7.1 Using the Internet Update Manager Avira Internet Update Manager service is a component of Avira SMC and its role is to keep all Avira products over the entire enterprise up to date. It brings the advantage of deploying over the network the updated files, so that the client computers do not need to access the Internet.
Updating Avira Products Click the option Inherit settings from parent node, to deactivate it, if still active. Click the option Use for updating. Test mode You can also use the IUM in automatic test mode (which can be enabled under Avira IUM - Server Settings - General - Updates: Activate test mode). In test mode, new files are downloaded to a special test directory (Test products), hosted by a second HTTP server. Here they are waiting for approval.
Updating Avira Products – OR – Right-click on a single software package in Software Repository and select Update/Execute update. Avira SMC connects to the default SMC-configured IUM, downloads the available software updates and then saves them in the Software Repository node. Scheduling Regular Updates for software packages You can also schedule regular update tasks for software packages in the SMC Server. Via the Software Repository nodes you can update all or individual software packages.
Updating Avira Products 7.4 Update overview To update all Avira products via an IUM server right-click Released products or Test products and select Update mirrored products. Alternatively you can use the IUM scheduler for IUM updates. 7.4.1 Updating the SMC using the IUM automatic mode You can receive automatic SMC updates via the IUM by selecting Server Settings - General Updates and activating the option Automatic mode for SMC updates. The automatic mode is activated by default.
Updating Avira Products – how to select which IUM should be used to update each module Update module Update procedure Update IUM Configuration SMC Server Right-click on SMC Frontend node: Update - Server - Start update Right-click on SMC Frontend node: Update - Frontend Right-click on Software Repository node: Update - Start update Right-click on Agent node: Commands Start update Any IUM included in the SMC Configurations Update - Default IUM for all updates Configurations Update - Default IUM for a
Troubleshooting 8 Troubleshooting Please make sure you keep all SMC components and Avira products up to date, in order to ensure effective communication between them over the Security Environment. 8.1 Prerequisites for communication between SMC Agents and SMC Server 3 If there is a firewall installed on a client computer, the following ports (TCP) have to be open: 7000, 7001, 7010, 7030, 7080, 7100. Furthermore, ICMP requests must be allowed.
Troubleshooting A warning message appears, to inform you it may take some minutes. Press Yes. An explorer window will allow you to navigate on the Frontend computer and to select a name and a location for the backup archive, as .zip file. A message appears at the end of the backup process, telling you how to use the archive if necessary: 8.
Products Supported by Avira SMC 9 Products Supported by Avira SMC 9.1 Supported Avira Products Avira Security Management Center currently supports the following Avira products, which must be purchased separately. For further details, please visit our website: http://www.avira.com. • • • • • • 9.
Service 10 Service 10.1 Support Support Service Our website http://www.avira.com contains all the necessary information on our extensive support service. Our developers' expertise and experience is available to you. The experts from Avira answer your questions and help you with difficult technical problems. Every Avira product comes with Avira Basic Support. During the first 14 days after you have purchased a license, you can use our Avira Installation Support by phone, email or by online form.
Service 10.2 Online Shop Would you like to buy our products by mouse-click? You can visit Avira Online Shop at http://www.avira.com and buy, upgrade or extend Avira licenses quickly and safely. The Online Shop guides you step by step through the order menu. A multi-lingual Customer Care Center explains the order process, payment transactions and delivery. Resellers can order by invoice and use a reseller panel. 10.
Avira Security Management Center www.avira.com Avira GmbH Lindauer Str. 21 88069 Tettnang Germany Telephone: +49 (0) 7542-500 0 Fax: +49 (0) 7542-525 10 Internet: http://www.avira.com AntiVir® is a registered trademark of the Avira GmbH. All other brand and product names are trademarks or registered trademarks of their respective owners. Protected trademarks are not marked as such in this manual. However, this does not mean that they may be used freely. © Avira GmbH. All rights reserved.