
User Guide

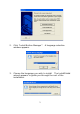
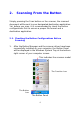
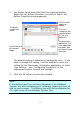
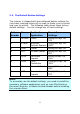
Table Of Contents
- 1. Installing the Button Manager
- 2. Scanning From the Button
- 2.1. Checking the Button Configurations Before Scanning
- 2.2. The Default Button Settings
- 2.3. Scanning From A Simple Touch of the Button
- 2.4 Performing Continuous Scan From the Flatbed
- 3. Configuring the Buttons
- 3.1. A Glance of the Button Properties Window
- 3.2. Choosing New Settings For A Button
- 3.3. Choosing a Proper File Format
- 3.4 Adding A New Destination Application
- 3.5 Deleting A Current Destination Application
- 3.6 Creating A New Scan Configuration
- 3.7 Deleting A Current Scan Configuration
- 3.8 Selecting Options For a Button
- 3.9 Removing a Blank Page
- 3.10 Setting the Power Saving Mode
- 3.11 Saving and Loading Profiles
- 3.12 Solving A Problem
- Index

1
1. Installing the Button Manager
System Requirements
• IBM compatible PC 586, Pentium or higher
• Microsoft Windows 2000/XP
• USB port 2.0 (compatible with USB 1.1)
• At least 100 MB of free hard disk space
• At least 128 MB of system memory
• A CD-ROM drive
Button Manager provides you an easy way to scan your
document and then link the scanned image to your designated
software application. All this can be done with a simple touch
of the button on the scanner. Installing the Button Manager is
easy. Please follow these steps:
Note:
To ensure the Button Manager work properly, please install the
Button Manager FIRST before installing the scanner driver.
1. Insert the supplied CD into your CD-ROM drive. The
following installation graphic appears. If not, please
choose the Button Manager folder and double click
“Setup.exe”.