
Installation manual


Important Information
Required Installation Tools
Voltmeter
Wire Strippers
Electric Drill & Bits
Phillips Screw Driver
Convoluted Tubing *
Solder Gun *
Wire Crimpers
Shrink Tube or Electrical Tape
* Optional
Recommended Procedures
1. Test all circuits with a voltmeter.
2. Make all wiring connections with the supplied solderless crimp
connectors. DO NOT twist wires or use “scotch-lok” connectors.
3.
Route RED , RED/WHITE and BLACK wires from the control unit directly
to the battery.
4. Keep extensions as short as possible. Use same gauge wires for short
extensions and larger gauge wires for longer extensions.
5. Before installing, discuss the placement of the LED indicator and valet
switch with the vehicle owner.
6. Make all battery connections by removing the bolts from the cable
clamps. DO NOT disconnect the battery cables.
7. Turn off dome light(s) or remove dome light fuse to prevent battery drain.
8. Making secure connections is a very important part of your installation.
Solderless crimp connectors are supplied in your hardware accessory
package. This type of connection is sufficient for most of your installation.
However, soldering of the starter disable wires is recommended whenever
possible. For a more secure installation, solder all of your connections and
insulate with heat shrink tubing.
This device complies with Part 15 of the FCC rules. Any changes or modifications
made to the system without the express approval of Prime Security could void the
user’s authority to operate this equipment.
2
Phoenix2 Rev. A - Installation Manual 0399
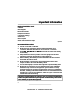
Important Information
Required Installation Tools
Voltmeter
Wire Strippers
Electric Drill & Bits
Phillips Screw Driver
Convoluted Tubing *
Solder Gun *
Wire Crimpers
Shrink Tube or Electrical Tape
* Optional
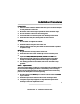
Recommended Procedures
1. Test all circuits with a voltmeter.
2. Make all wiring connections with the supplied solderless crimp
connectors. DO NOT twist wires or use “scotch-lok” connectors.
3.
Route RED , RED/WHITE and BLACK wires from the control unit directly
to the battery.
4. Keep extensions as short as possible. Use same gauge wires for short
extensions and larger gauge wires for longer extensions.
5. Before installing, discuss the placement of the LED indicator and valet
switch with the vehicle owner.
6. Make all battery connections by removing the bolts from the cable
clamps. DO NOT disconnect the battery cables.
7. Turn off dome light(s) or remove dome light fuse to prevent battery drain.
8. Making secure connections is a very important part of your installation.
Solderless crimp connectors are supplied in your hardware accessory
package. This type of connection is sufficient for most of your installation.
However, soldering of the starter disable wires is recommended whenever
possible. For a more secure installation, solder all of your connections and
insulate with heat shrink tubing.
This device complies with Part 15 of the FCC rules. Any changes or modifications
made to the system without the express approval of Prime Security could void the
user’s authority to operate this equipment.