
User Manual


Record & Disk Management
NVR User Manual
58
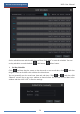
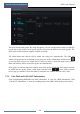
Go to “Edit Schedules” interface and then click to edit the schedule. The settings of “Edit
Schedule” are similar to that of the “Add Schedule”. Click to delete the schedule.
7.4 Record Mode
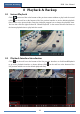
7.4.1 Manual Recording
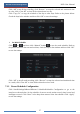
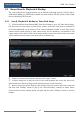
Method One: Click on the tool bar at the bottom of the live preview interface to enable
recording of the camera.
Method Two: Go to live preview interface and then click the right-click menu “Manually
Record On” in the camera window or click on the tool bar under the camera window to
start recording.
7.4.2 Timing Recording
Timing Recording: the system will record automatically according to the schedule.
Set the timing record schedule of each camera. See 7.3 Schedule Setting for details.
7.4.3 Motion Based Recording
Motion Based Recording: the system will start motion based recording when the motion
object appears in the setup schedule. The setup steps are as follows:
① Set the motion based recording schedule of each camera. See 7.3 Schedule Setting for
details.
② Enable the motion and set the motion area of each camera. See 9.2.1 Motion
Configuration for details.
The camera will start motion based recording once you finish the above settings.
7.4.4 Sensor Based Recording
① Set the sensor based recording schedule of each camera. See 7.3 Schedule Setting for
details.
② Set the NO/NC type of the sensor, enable the sensor alarm and then check and configure
the “Record”. See 9.1 Sensor Alarm for details.
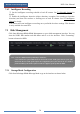
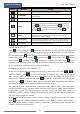
Note: Click Start
Settings
Record
Mode Settings and then set the manual record time in the
interface. Click “Apply” to save the settings.