
User Manual
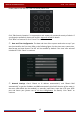
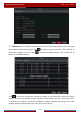
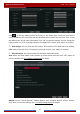
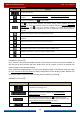
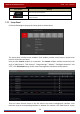
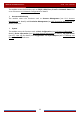
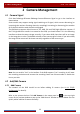
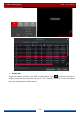
Table Of Contents
- Contents
- 1 Introduction
- 2 Basic Operation Guide
- 3 Wizard & Main Interface
- 4 Camera Management
- 5 Live Preview Introduction
- 6 PTZ
- 7 Record & Disk Management
- 8 Playback & Backup
- 9 Alarm Management
- 10 Account & Permission Management
- 11 Device Management
- 12 Remote Surveillance
- Appendix A FAQ
- Appendix B Calculate Recording Capacity
- Appendix C Compatible Device List

Camera Management
DVR User Manual
23
4 Camera Management
4.1 Camera Signal
Click StartSettingsCameraManage CameraCamera Signal to go to the interface as
shown below.
Some models may support analog signal switching to IP signal, which means decreasing (or
increasing) the number of analog channels, accordingly increasing (or decreasing) the number
of IP channels with the total channels unchanged.
The DVR device supports hybrid access of TVI, AHD, CVI and CVBS high definition cameras. If
the TVI high definition camera is accessed to the DVR, you should select TVI in the following
interface to show the camera image normally; if you select AHD, then there will be no image
or the image has no color. The default selection of the camera signal is Auto. If you select Auto,
the image of the camera will be shown normally regardless of the camera type.
Note: You can enable “Lite” in the interface if the DVR supports “Lite” recording. It will lower
the recording resolution and increase the recording frame rate. Please enable or disable the
Lite as you wish.
4.2 Add/Edit Camera
4.2.1 Add Camera
The network of the DVR should be set before adding IP camera (see 11.1.1 TCP/IP
Configuration for details).
Refer to the pictures below. Click Add Camera in the setup panel or in the top right
corner of the preview window to pop up the “Add Camera” window as shown below. You can
quickly add or add the IP camera manually.