
User Manual

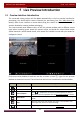
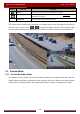
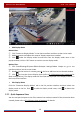

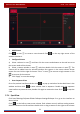
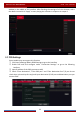
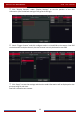
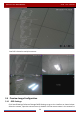
Table Of Contents
- Contents
- 1 Introduction
- 2 Basic Operation Guide
- 3 Wizard & Main Interface
- 4 Camera Management
- 5 Live Preview Introduction
- 6 PTZ
- 7 Record & Disk Management
- 8 Playback & Backup
- 9 Alarm Management
- 10 Account & Permission Management
- 11 Device Management
- 12 Remote Surveillance
- Appendix A FAQ
- Appendix B Calculate Recording Capacity
- Appendix C Compatible Device List

Live Preview Introduction
DVR User Manual
33
⑤ Click “Display Position” under “Display Settings” to set the position of the POS
information (Use the default settings of the general settings).
⑥ Check “Trigger Camera” and click configure under it to bind POS to the camera. One POS
can be bound to multiple channels, but one channel can only be bound to one POS.
⑦ Click “Apply” to save the settings and then the trade information will be displayed on the
preview image in real-time.
One POS is bound to one camera: