
User's Manual


AXIS Q1602 Network Camera
Video and Audio
Important
Adding many privacy masks may affect the product’s performance.
Focus
You can focus the Axis product under Video & Audio > Focus. For most app lications, the adjustments on the Basic tab are suffi cient.
If required, additional adjustments can be made on the Advanced tab. Before focusing, always click Open iris to open the iris to its
maximum. This gives the smallest depth of field and thus best conditions for c orrect focusing. Click Enable iris when finished focusing.
Basic
Follow the on-screen instructions on the Basic tab to adjust zoom and focus. The pixel counter is used to determine the number of
pixels in an area of the image, for example to ensure that the image size fulfills specific requirements. To position the pixel counter,
click o n the text and drag the window to the de sired position.
Note
• The back focus (step 2) should only be reset if the camera has been focused previously.
• Set focus as precisely as possible u sing the focus puller on the lens (step 3) before starting the automatic fine-tuning
(step 4).
• If the camera is placed so that it is difficult to look at the image and move the pullers at the same time, you can use the
Focus Assistant to focus the camera; for instructions , see the Instal lation Guid e s upplie d w ith the product.
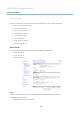
Advanced
The tools on this page c an be used to find the o p tim al focus position. Alwa ys open the iris before focusing and enable it when finished
focusing. Focus is measured in the part of the image covered by the Focus window. Use the mouse to move and resize the window
and then click Fine-tune focus automatically. If needed, click in the Focus position baroronthearrowsattheendsofthebar,to
further adjust the focus. The b uttons < and > move the focus position one step in either direction. The buttons << and >> move the
focus position multiple steps in eithe r direction. Clicking on the bar s ets focus to that po sitio n. If the cam er a is not focused after
completing the above instructions, try the Full range focus scan. The scan, w hich can take s everal minutes, transforms the focus
position bar to a graph where peaks indicate the best focus positions. Click in the graph to set focus to the desired position.
Audio Settings
The audio functionality for each video stream is enabled under Video & Audio > Video Stream > Audio.
Audio Modes
The Axis product supports the following audio modes:
Full duplex - Simultaneous two-way audio allowing the Axis prod u ct to transmit and receive audio at the same time. There is no
echo cancellation; if feedback loops appear
, try moving the microphone or the speaker.
Half-duplex - Audio can be trans
mitted to and from the Axis product but only in one direction at a time. To transmit audio using the
Live View page, use the Ta lk and Listen buttons, see
AMC A udio Controls, on page 10
.
Simplex — speaker only - A u dio is transmitted from a client to the A xis product and can be played by a speaker connected
to the product. To transmit audio using the Live View page, the Talk and Microphone buttons must both be active, see
AMC
Audio Controls, on pag
e10
.
Simplex — microph
oneonly-Audio captured by the product microphone is transmitted from the Axis product to one or more clients.
To set the audio mode, go to Video & Audio > Audio Settings and select the desired mode from the Audio mode drop-down list.
Audio Input
An external microphone or a line source can be connected to the product’s Audio-in connector. Config ure the audio input settings
under Video & Audio > Audio Settings.
20