
User's Manual


Management and Configuration
AXIS 5500 / AXIS 5550 User’s Manual 93
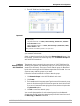
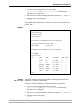
5. The AXIS ThinWizard interface appears:
Important!
The first time you use AXIS ThinWizard, set the Preferences to reflect
your network environment:
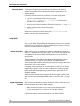
Select a network group from the list on the Manage Network page. If the
list is empty, you must first create a group. Click the Network Groups tab
and follow the instructions.
Creating a
Network Group in
AXIS ThinWizard
The network group concept is the corner stone of AXIS ThinWizard. By
dividing your network into network groups, you can monitor your print
servers more efficiently. The scope of each network group is determined
by the Axis server types and IP address ranges that are included. You can
create as many network groups as you want.
Follow the instructions below to create a network group:
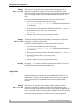
1. Click Network Groups in the AXIS ThinWizard main menu.
2. Click Create.
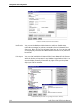
3. The Create Network Group page opens. Type the name of the network group,
enter the IP address ranges and Axis server types that should be included.
If you are only interested in managing print servers, deselect all options but
the print server option.
4. Click OK to create the network group.
You can edit the properties of each network group from the Network
Groups page. Simply select the network group from the list and use one of
the Edit, Copy or Remove commands.
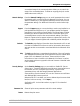
These parameters must be enabled in the print server’s Web interface for AXIS ThinWizard to
function properly:
• FTP_ENB (FTP enabled): click Admin | Network Settings | Detailed View | TCP/IP Net-
work| FTP Enabled => Yes.
• SNMP_ENB (SNMP Enabled): click Admin | Network Settings | Detailed View | SNMP |
SNMPv1 Enabled => Yes
These parameters are enabled by default in the print server.