M32–LVE Network Camera Series M3205–LVE Network Camera M3206–LVE Network Camera User Manual
M32–LVE Network Camera Series Table of Contents About this manual . . . . . . . . . . . . . . . . . . . . . . . . . . . . . . . . . . . . . . . . . . Get started . . . . . . . . . . . . . . . . . . . . . . . . . . . . . . . . . . . . . . . . . . . . . . . . Find the device on the network . . . . . . . . . . . . . . . . . . . . . . . . . . . . . . . . . . . . Access the device . . . . . . . . . . . . . . . . . . . . . . . . . . . . . . . . . . . . . . . . . . . . . . . Webpage overview . . . . . . . . . . .
M32–LVE Network Camera Series About this manual About this manual This user manual describes multiple products. Some of the instructions may not be relevant for your product.
M32–LVE Network Camera Series Get started Get started Find the device on the network To find Axis devices on the network and assign them IP addresses in Windows®, use AXIS IP Utility or AXIS Device Manager. Both applications are free and can be downloaded from axis.com/support. For more information about how to find and assign IP addresses, see the document How to assign an IP address and access your device on the device page at axis.com.
M32–LVE Network Camera Series Get started Secure passwords Important Axis devices send the initially set password in clear text over the network. To protect your device after the first login, set up a secure and encrypted HTTPS connection and then change the password. The device password is the primary protection for your data and services. Axis devices do not impose a password policy as they may be used in various types of installations.
M32–LVE Network Camera Series Get started 7 Settings tabs 6
M32–LVE Network Camera Series Setup Setup Adjust the image To find out more about what you can do with the image, see Learn more on page 16. Level the camera To adjust the view in relation to a reference area or object, use the leveling guide in combination with a mechanical adjustment of the camera. . 1. Go to Settings > System > Orientation and click 2. Adjust the camera mechanically until the position of the reference area or object, is aligned with the leveling guide.
M32–LVE Network Camera Series Setup Note A high max shutter value can result in motion blur. • To slow down the shutter speed, set max shutter to the highest possible value. • Reduce sharpness in the image. • Set the max gain to a lower value. Reduce motion blur in low-light conditions To reduce motion blur in low-light conditions, you can adjust one or more of the following settings: Note Image noise will increase if you increase the gain. • Increase shutter speed and gain.
M32–LVE Network Camera Series Setup Image with WDR. Note WDR may cause artifacts in the image. Find out more about WDR and how to use it at axis.com/web-articles/wdr. Monitor long and narrow areas Use corridor format to better utilize the full field of view in a long and narrow area, for example a staircase, hallway, road, or tunnel. 1. Depending on your device, turn the camera or the 3-axis lens in the camera 90° or 270°. 2.
M32–LVE Network Camera Series Setup Note You can use an object of a known size in the view as a reference to decide how much resolution is needed for recognition. In addition, you can try to adjust the following to optimize license plate recognition: • Shutter speed • Gain • Zoom Hide parts of the image with privacy masks Create a privacy mask to hide a part of the image: 1. Go to Settings > Privacy mask. 2. Click New.
M32–LVE Network Camera Series Setup Create a guard tour with preset positions A guard tour displays the video stream from different preset positions either in a predetermined or random order, and for configurable periods of time. 1. Go to Settings > PTZ > Guard tours. 2. Click +. 3. Select Preset position. 4. To edit the guard tour’s properties, click . 5. Type a name for the guard tour and specify the pause length in minutes between each tour. 6.
M32–LVE Network Camera Series Setup 2. Change the HDMI settings under Settings > System > HDMI. Important In order to view the video stream via the HDMI connector, be sure to select a capture mode that supports HDMI. Set up network storage To store recordings on the network, you need to set up network storage: 1. Go to Settings > System > Storage. 2. Click Setup under Network storage. 3. Enter the IP address of the host server. 4. Enter the name of the shared location on the host server. 5.
M32–LVE Network Camera Series Setup Record video when the camera detects motion This example explains how to set up the camera to start recording to the SD card five seconds before it detects motion and to stop one minute after. Make sure the AXIS Video Motion Detection application is running: 1. Go to Settings > Apps > AXIS Video Motion Detection. 2. Start the application if it is not already running. 3. Make sure you have set up the application according to your needs. Create a rule: 1.
M32–LVE Network Camera Series Setup Provide visual indication of an ongoing event You have the option to connect the AXIS I/O Indication LED to your network camera. This LED can be configured to turn on whenever certain events occur in the camera. For example, to let people know that video recording is in progress. Required hardware • AXIS I/O Indication LED • An Axis network video camera Note AXIS I/O Indication LED should be connected to an output port.
M32–LVE Network Camera Series Setup Configure the input port 1. Go to Settings > System > I/O ports. 2. For Port 1: 2.1 Select Closed circuit (NC) in the drop-down menu . Create a rule 1. Go to Settings > System > Events and add a rule. 2. Type a name for the rule. 3. In the list of conditions, under I/O, select Digital input. 4. In the list of ports, select Input 1. 5. In the list of actions, under Notifications, select Send notification to email. 6.
M32–LVE Network Camera Series Learn more Learn more View area A view area is a cropped part of the full view. You can stream and store view areas instead of the full view to minimize bandwidth and storage needs. If you enable PTZ for a view area, you can pan, tilt and zoom within it. By using view areas you can remove parts of the full view, for example, the sky. When you set up a view area, we recommend you to set the video stream resolution to the same size as or smaller than the view area size.
M32–LVE Network Camera Series Learn more Streaming and storage Video compression formats Decide which compression method to use based on your viewing requirements, and on the properties of your network. The available options are: Motion JPEG Motion JPEG, or MJPEG, is a digital video sequence that is made up of a series of individual JPEG images. These images are then displayed and updated at a rate sufficient to create a stream that shows constantly updated motion.
M32–LVE Network Camera Series Learn more X Y X Y Bitrate Time Maximum bitrate (MBR) The maximum bitrate option allows you to set a target bitrate value to be able to handle system bitrate limitations. To keep the instantaneous bitrate below the specified target bitrate, there may be a decrease in image quality or the frame rate may decrease. You have the option to prioritize either image quality or frame rate.
M32–LVE Network Camera Series Learn more You have also the option to turn on maximum bitrate to specify a bitrate limit.
M32–LVE Network Camera Series Troubleshooting Troubleshooting If you can’t find what you’re looking for here, try the troubleshooting section at axis.com/support. Reset to factory default settings Important Reset to factory default should be used with caution. A reset to factory default resets all settings, including the IP address, to the factory default values. To reset the product to the factory default settings: 1. Disconnect power from the product. 2.
M32–LVE Network Camera Series Troubleshooting Upgrade the firmware Important Preconfigured and customized settings are saved when the firmware is upgraded (provided that the features are available in the new firmware) although this is not guaranteed by Axis Communications AB. Important Make sure the product remains connected to the power source throughout the upgrade process.
M32–LVE Network Camera Series Troubleshooting The device cannot be accessed from a browser Cannot log in When HTTPS is enabled, ensure that the correct protocol (HTTP or HTTPS) is used when attempting to log in. You may need to manually type http or https in the browser’s address field. If the password for the user root is lost, the device must be reset to the factory default settings. See Reset to factory default settings on page 20.
M32–LVE Network Camera Series Troubleshooting Problems retrieving additional video streams ‘Video Error’ displayed in AXIS Companion, or ‘Stream: Error. Something went wrong. Maybe there are too many viewers.’ in Chrome/Firefox, or ‘503 service unavailable’ error in Quick Time, or ‘Camera not available’ displayed in AXIS Camera Station, or ‘Error reading video stream’ message in browser when using the Java applet This camera is designed to deliver up to four different streams.
M32–LVE Network Camera Series Troubleshooting Contact support Contact support at axis.com/support.
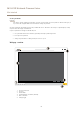
M32–LVE Network Camera Series Specifications Specifications To find the latest version of the product’s datasheet, go to the product page at axis.com and locate Support & Documentation. Product overview 1 2 3 4 5 6 7 Status LED indicator IR illumination Control button I/O HDMI connector microSD card slot Network connector (PoE) LED indicators Status LED Indication Unlit Connection and normal operation. Green Shows steady green for 10 seconds for normal operation after startup completed.
M32–LVE Network Camera Series Specifications This product supports microSD/microSDHC/microSDXC cards. For SD card recommendations, see axis.com. microSD, microSDHC, and microSDXC Logos are trademarks of SD-3C LLC. microSD, microSDHC, microSDXC are trademarks or registered trademarks of SD-3C, LLC in the United States, other countries or both. Buttons Control button The control button is used for: • Resetting the product to factory default settings. See Reset to factory default settings on page 20.
M32–LVE Network Camera Series Specifications Digital Input 3 Connect to pin 1 to activate, or leave floating (unconnected) to deactivate. 0 to max 30 V DC Digital Output 4 Internally connected to pin 1 (DC ground) when active, and floating (unconnected) when inactive. If used with an inductive load, e.g., a relay, connect a diode in parallel with the load, to protect against voltage transients.
User Manual M32–LVE Network Camera Series © Axis Communications AB, 2019 Ver. M1.8 Date: October 2019 Part No.