
User guide

ProJet
®
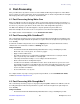
860Pro User Guide Additional Operations
3dscentral.3dsystems.com 42 All Rights Reserved
5/12/13
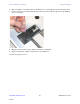
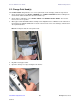
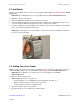
9. Remove the new printhead from its packaging. Be sure to pull the tape tab off of the new printhead.
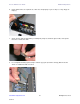
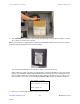
10. Insert each new printhead. Press down firmly on the top of the printhead, at the same side as the pogo
pins, to securely fit a printhead into its slot.
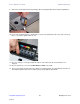
11. Close the carriage cover by pressing down until you hear it click shut. Be sure both latches are
engaged.
12. Close the printer top cover. Select
CONTINUE then EXIT on the LCD.
13. The fast axis reparks and the printer goes Online. The printer purges the new printheads and runs an
auto-alignment pattern before the next print job to properly align the print heads.