
User guide


ZPrinter
®
850 User Manual Printer Maintenance
3dscentral.3dsystems.com 53 All Rights Reserved
5/12/13
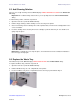
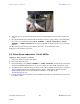
8. Spread the grease up and down the Piston Screw to evenly distribute it over the entire length of the
screw.
9. Move the Build Bed up and down through its full range of travel a couple of times to finish lubricating
the screw. Use the LCD menu items
BUILD CHAMBER > RAISE PLATFORM and BUILD
CHAMBER > LOWER PLATFORM
. Don’t forget to hold down the Control Knob to raise or lower the
platform.
10. Wipe off any grease that may collect at the bottom of the screw with a paper towel.
11. Replace the side and back cover panels.
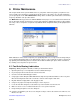
12. Reset the Maintenance Counter in 3D Print.
6.4 Slow Axis Bearing Lubrication
Frequency: When prompted in 3D Print, or when you receive an Error 2303-0.
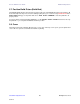
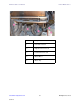
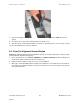
1. Locate the round plastic cover on the Deck to the left of the Build Bed and close to the Service Station.
2. Take a flat head screwdriver or a Pick Tool and pop the round cover off to expose the grease fitting. Be
careful not to scratch the deck surface. An alternative method is to reach your fingers under the left
side of the deck and pop the cover off from underneath.
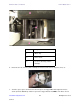
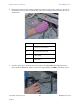
3. Pull the Fast Axis forward until you see the Slow Axis bearing in the center of the opening on the Fast
Axis.
4. Assemble the grease gun that is part of your Accessories Kit according to the instructions.
5. Squeeze the handle until grease dispenses from the tip. Wipe clean with a clean paper towel.
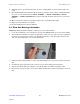
6. Place the tip of the grease gun over the grease fitting. Push down to snap the gun into place on the fit-
ting.