
User`s manual

Section 5: Setup for OS/2
42 Axis NPS 550 User’s Manual
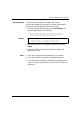
OS/2 Version 2.x The print queue assignment procedure under OS/2 version 2.x is done in
one operation – the definition of a printer will automatically create a
queue. Follow these steps to create a print queue and assign it to an NPS
550 printer port:
1. Double-click the Templates folder.
2. Drag the Printer icon out to the Workplace Shell (or into a folder),
while holding the right mouse button down.
3. Type a name in Printer Name field.
4. Select a printer driver from the Standard printer list suitable for the
attached printer.
5. Select a pipe name (e.g. \PIPE\AX100086.LP1) from the Port list.
6. Click OK to confirm the new printer definition.
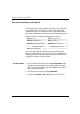
Sharing Print Queues
To access a print queue from other computers in the network (either
clients or other servers), the queue must be made a shared resource. Open
an OS/2 window and issue the following command (you will need
administrator privileges to do this):
<Queue name> is the queue created above. Note that the queue name
equals the printer name for OS/2 version 2.x, while queue and printer
names may differ for version 1.x.
For further information on queue sharing, please refer to your LAN
Server or LAN Manager documentation.
NET SHARE <queue name> /PRINT