Code 501262 AWDE5002 Dust Extractor Axminster Tool Centre, Unit 10 Weycroft Avenue, Axminster, Devon EX13 5PH axminster.co.
Index of Contents Page No Index of Contents Declaration of Conformity What’s in the Box General Instructions for 230V Machines Specific Safety for Dust Extractors Specification Assembly Identification and Parts Description Illustration and Parts Description Routine Maintenance Parts Breakdown Parts List Notes 02 02 03 04 05 06 07 08 09-10-11 12 13 14 15 Declaration of Conformity Copied from CE Certificate The undersigned, P. Seidel authorised by Laizhou Planet Machinery Co.
What’s in the Box Model Number: FM230 1 No. Dust Extractor, ready mounted on the base plate 1 No. Dust Bag 1 No. Handle 1 No. Outlet Duct and Gasket 1 No. Inlet Grill 2 No. Wall Mounting Brackets 1 No. Jubilee Clip 4 No. Castor Wheels 1 No.
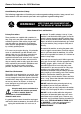
General Instructions for 230V Machines Good Working Practices/Safety The following suggestions will enable you to observe good working practices, keep yourself and fellow workers safe and maintain your tools and equipment in good working order. ! WARNING!! KEEP TOOLS AND EQUIPMENT OUT OF THE REACH OF YOUNG CHILDREN Mains Powered Tools and Machines Primary Precautions These machines are supplied with a moulded 13 Amp. Plug and 3 core power cable.
Specific Safety for Dust Extractors DO NOT use this machine as a vacuum cleaner, try to keep the waste medium to wood by products. Do not uplift workshop floor debris (stones, nails, screws, paper etc., etc). Be aware that wood dust is an explosive medium. and a very firm feel means that the bag is clogged and the air is having difficulty passing through the cloth). DO NOT allow any ‘naked light’ source to occur anywhere near the machine.
Specification Model Product Code Rating Power Air Flow Hose Diameter Bag Capacity Overall L x W x H Weight 06 AWDE5002 501262 Hobby 0.
Assembly Please read through the Section entitled Identification and Description of Parts, this will enable you to more readily identify those parts of the machine to which we will be referring. Please Note that with the exception of the jubilee clip for attaching the dust bag; all the nuts, bolts, fasteners etc, for assembling the various components together are pre-positioned in the machine or the component.
Identification and Parts Description Base plate (See fig 2) Pressed steel plate that carries the fan unit and the motor bolted to it. It has numerous holes bored or cut into it, these are to mount the castor wheels (if you elect to make the machine movable) or the cutout slots for the wall mounting brackets if you elect to have it wall mounted. Fan housing (See fig 1) Mainly circular metal box with a rectangular outlet duct.
Illustration and Parts Description Fig 1a Emergency stop NVR Switch Fig 1b Switch shroud Outlet duct Handle Dust bag Fig 1 Fan housing Inlet duct Access plate Base plate 09
Illustration and Parts Description Jubilee clip Handle Fig 2 Dust bag Emergency stop Switch shroud Power cable Motor Typ. 4 screws Base plate Fig 2a Fig 2b Cutout slots for the wall mounting brackets 10 Typ.
Illustration and Parts Description Fig 3 172mm Wall mounting bracket 1100mm 100mm hosing 11
Routine Maintenance ! DISCONNECT THE MACHINE FROM THE MAINS SUPPLY Weekly •Check the inlet and outlet ducts, remove any accumulated debris. •Check the inlet hoses for splits and cracks, repair as necessary. •Check the bag for wear and tear, especially around the neck at the jubilee clip. If wear or fraying is occurring, move the position of the jubilee clip slightly. •Check the motor for dust, sawdust, shavings etc, build up. If this has occurred, blow out with L.P. air or clean with a vacuum cleaner.
Parts Breakdown 13
Parts List 14
Notes 15
Please dispose of packaging for the product in a responsible manner. It is suitable for recycling. Help to protect the environment, take the packaging to the local recycling centre and place into the appropriate recycling bin. Only for EU countries Do not dispose of electric tools together with household waste material.