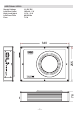
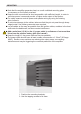
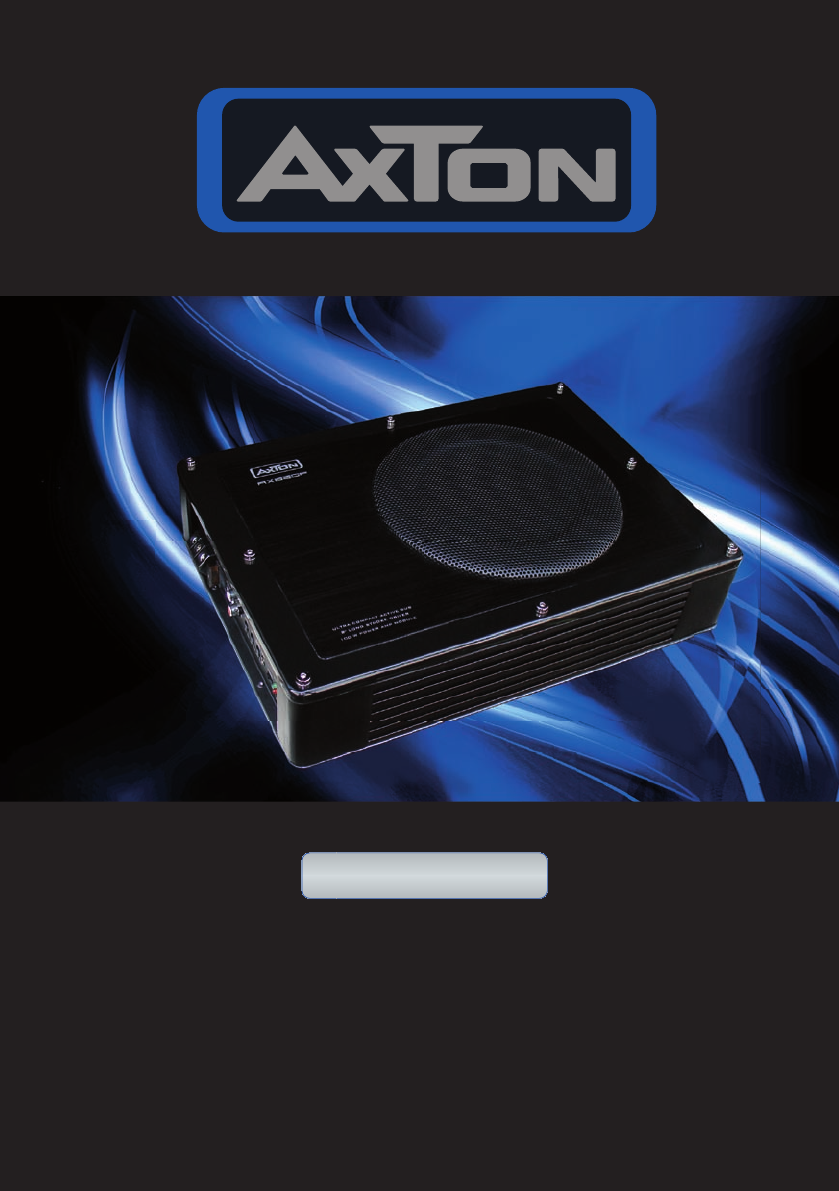
AXB20P 8"/20 CM ACTIVE SUBWOOFER EINBAUANLEITUNG/INSTALLATION GUIDE
Dear Customer Thank you and congratulations on your purchase of the AXTON AXB20P. This active subwoofer system exclusively uses very high quality parts and components. As with all highquality car audio components, professional installation is highly recommended. If you plan on installing this active subwoofer by yourself, please read the following installation guide carefully, before you attempt the installation. You should retain this manual, the packing and the purchasing receipt for future reference.
ADDITional Specs 11-15V DC 165 mV - 5 V 1.0 V - 10 V 40-200 Hz 7.
SAFETY INSTRUCTIONS 1. This unit is designed to be used in a vehicle with a 12V battery and negative ground. 2. Before any wiring, always remove the negative terminal of the battery to prevent shortcircuiting. This is also the last lead to be (re-)connected. 3. Do not disassemble or alter the unit in any way, because that will also void your warranty. Do not attempt to repair or to service the unit yourself, but contact an authorized AXTON dealer instead. 4.
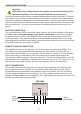
Interference n All advice on controls and adjustments is based on the assumption that you are also thouroughly acquainted with all the requirements and features of the entire audio equipment – especially the head-unit – connected to this amplifier! All cables are sources of interference. The power cable and RCA audio cable are very prone to interference; the remote cables far less.
MOUNTING n Note that the amplifier generates heat, so a well ventilated mounting place is necessary or it will easily overheat. n Keep the wire connections as short as possible, with sufficient length, in order to minimize power losses and provide a higher audio output of the system. n For safety reasons route all power and speaker wiring by using the existing wire channels. n To minimize damage to the cables, take care that they do not pass through sharp edged metal.
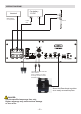
Wiring instructions Important: Before any wiring, always remove the negative terminal of the battery to prevent short-circuiting. This is also the last lead to be (re-)connected. Connect this lead only after having completed and checked all other connections. The battery terminal (+12V) must be connected directly to the positive terminal of the vehicle battery to provide an adequate voltage source and minimize noise.
Wiring Diagram Car battery 12 VDC Headunit REM ON/OFF i.e. Amp remote FUSE 60 A Ground 7.5 A L+R from Low Level Audio Out of the headunit. Use a Y Adapter if you want to directly connect to a mono subwoofer output. Mount the Bass boost regulator at an easily accessible place. DANGER: Use the specified amperage fuse only. Higher amperage may cause serious damage or even a fire.
Operation Turn-on your head-unit keeping your volume at the lowest setting. The green status LED on the front of the amplifier should light up now. If not, turn-off your head-unit and re-check all wiring to and from the amplifier for missing or faulty connections.
Sehr geehrter Kunde Vielen Dank für das Vertrauen, das Sie uns mit dem Kauf dieses AXTON-Qualitätsprodukts entgegengebracht haben. Der AXTON Aktiv-Subwoofer wurde speziell für den Einsatz in mobilen Soundsystemen mit einer 12-Volt-Stromversorgung (mit negativer Chassis Masse) entwickelt.
Zus. technische daten 11-15V DC 165 mV - 5 V 1.0 V - 10 V 40-200 Hz 7.
Zu Ihrer Sicherheit 1. Dieses Gerät ist nur für den Betrieb an einem Bordnetz mit 12V (DC) und Minus gegen Masse geeignet. 2. Wichtig: Um Kurzschlüssen vorzubeugen, sollten Sie vor sämtlichen Installations- oder Verdrahtungsarbeiten immer den Minus(–) Pol der Batterie von der Stromversorgung des Fahrzeugs abtrennen. Machen Sie sich zur Regel: Erst nach Beendigung aller anderen Installationsschritte wird die Verbindung zwischen dem -12V-Anschluss der Batterie und dem Bordstromnetz wiederhergestellt. 3.
Störeinstrahlungen n Alle Hinweise in diesem Kapitel richten sich an eine im Bereich Car-Audio fachkundige Person. Jegliche Verkabelung kann Störungen verursachen. Insbesondere Stromversorgungskabel, sowie Audiokabel mit Cinch Steckern sind davon aktiv und passiv betroffen. Bei Fernsteuerungskabeln ist das Problem weitaus geringer. Als Störungsursachen treten oft die Lichtmaschine (Pfeifen), die Zündung (Knistern) und auch andere Bauteile auf.
MOntage n Montieren Sie das Gerät an einem geschützten, jedoch möglichst gut belüfteten Platz. Bedenken Sie das der Leistungsverstärker erhebliche Abwärme produziert, die zur Vermeidung von Überhitzungen auch abgeführt werden muss. n Halten Sie Leitungslängen so kurz wie gerade nötig, um unnötige Leistungsverluste, sowie Störeinstrahlungen zu vermeiden. n Aus Sicherheitsgründen verlegen Sie sowohl die Stromversorgungs- als auch die Lautsprecherkabel durch die vorhandenen Kabelkanäle.
VerDrahtung Wichtig: Vor jeglichen Verdrahtungsarbeitung lösen Sie immer den nega- tiven Pol der Batterie um Kurzschlüsse, durch Unterbrechung der Masseverbindung, zu verhindern. Verbinden Sie den negativen Batteriepol erst, wenn Sie alle anderen Verbindungen hergestellt und überprüft haben. Die Spannungsversorgung (+12V) wird direkt am positiven Batteriepol abgegriffen, um ausreichende Leistung bei minimalem Rauschen zu gewährleisten. Jeder +12 V Spannungsabgriff an einer anderen Stelle, wie z.B.
Schaltplan Autobatterie 12 V-- Headunit REM ON/OFF i.e. Amp remote Sicherung 60 A Masse/GND 7.5 A L+R des LowLevel Ausgangs der Headunit. Benutzen Sie einen Y-Adapter, falls Sie einen mono sub-out anschliessen wollen. Montieren Sie den Bass Boost Regler an einer leicht erreichbaren Stelle. VORSICHT: Benutzen Sie ausschließlich die angegebenen Werte für die Sicherungen. Höhere Werte können unvorhersehbaren Schaden, oder sogar ein Feuer verursachen.
Betrieb Schalten Sie ihre Autostereo ein und begrenzen die Lautstärke auf ein geringes Niveau. Nun sollte die grüne LED am Frontpanel des Verstärkers aufleuchten. Falls das nicht der Fall ist, schalten Sie das Gerät sofort aus und überprüfen Sie Anschlüsse und Verkabelung. PROTECT = LED SCHUTZANZEIGE Dieser Aktiv-Subwoofer ist mit einem schnell ansprechendem Überlastschutz ausgerüstet, der sofort bei einem auftretendem internen Kurzschluss oder einer Überhitzung aktiviert wird.
WARRANTY CONDITIONS AXTON warrants this active subwoofer to be free of defects in materials and workmanship for two years from the date of purchase at retail, contingent upon being properly installed and approved by an authorized AXTON dealer, granted to the original purchaser. AXTON Inc. will at its own discretion, repair or replace defective units during the warranty period. Should your AXTON product require warranty service, please return it to the retailer from whom it was purchased.
WARRANTY CARD 8 inch/20 cm Active Subwoofer Model name: AXB20P Date of purchase: Your name: Your address: City: State: ZIP or Postal Code: Country: Your Dealer: – 19 –