
Installation manual


Sailmon Installation Manual V1.4 Page 44
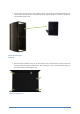
STEP 4: FIT THE RIVETS OR CUT THE THREADS
You can now fit the rivets for the top holes to the mast. Make sure you consider the rivet manufacturers
instructions. If you have chosen to cut a thread into the mast do so now.
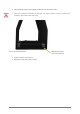
STEP 5: FIX TEMPORARY AND ADJUST THE MAST SUPPORT ON THE MAST
Mount the support on the mast with the 2 top screws.
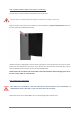
STEP 6: MARK THE BOTTOM HOLES
The next step is to mark the position of the bottom drill holes on the mast. Make sure the mast support is in
parallel to the mast.
STEP 7: DRILL THE BOTTOM HOLES
Remove the mast support and drill only the 2 bottom holes now. Mount the rivets or cut the threads.
STEP 8: DRILL THE REMAINING HOLES
Temporary fix the mast support again and fix the 2 top screws and the 2 bottom screws.
Drill the remaining holes, keeping the mast support installed. This makes sure all holes have a perfect fit.
STEP 9: MARK THE HOLE FOR THE CABLE
Do not forget to mark a proper entry for the mast power cable now.
STEP 10: REMOVE THE MAST SUPPORT
Remove the mast support, fit the rivets or cut the thread, and drill the cable hole.