
Specifications


Instruction 0024-9460 24
Fyrite
®
INSIGHT
4.2 Analyzer Power On & Warm Up
1. Connect the probe and make sure that the analyzer is properly set
up per Section 3.
IMPORTANT! DO NOT insert probe into stack before powering ON
the analyzer.
2. Place the probe in an area that contains fresh air. This ensures
that the sensors will be properly zeroed during the warm-up cycle.
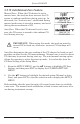
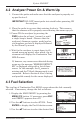
3. Power ON the analyzer by pressing the
PWR button for at least 1 second, or until
a single beep is heard. Observe that the
analyzer's firmware version, model and se-
rial numbers are briefly displayed followed
by the Warm Up screen.
4. Wait for the analyzer to count down its 60
second warm-up period; after which, the in-
strument will display the Combustion Test
HOLD screen.
If, however, any errors were detected during
warm-up, the message "ERRORS DETECT-
ED" is displayed along with a list of those
errors. In this example, the O
2
sensor is
missing and the T-Stack thermocouple is not
connected. Refer to Section 6.8 for a listing
and possible remedy for the errors displayed.
4.3 Fuel Selection
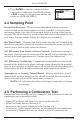
The top line of Combustion Test HOLD screen shows the fuel currently
selected. If necessary, change the fuel as follows:
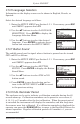
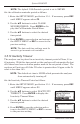
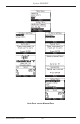
1. Display the MAIN MENU by pressing the
MENU (F2) button. If necessary, press ESC
until MENU appears above F2
2.Usethe▲▼buttonstoselectFUEL.Press
ENTER to display the Fuel Selection screen.
3.Usethe▲▼buttonstoselectthedesiredfuel.
24-8250
V1.00