
Specifications


8
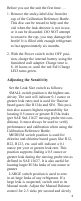
this procedure until the green OK LED
briefly glows.
If the red HIGH LED glows, the heat is set
too high and the Heater Adjustment should
be turned slightly counterclockwise. Allow
the unit to stabilize and then repeat the test.
Continue this procedure until the proper
green OK LED indication has been achieved.
NOTES:
A. After initial check for correct adjustment,
disregard the LOW / OK / HIGH LEDs. Their
indication is meaningless during subsequent leak
testing activity.
B. Check for proper heat adjustment the first time
the unit is turned on and repeat on a daily basis.
This assures the product is calibrated for the correct
sensitivity in all leak size switch positions for your
daily test activity.
C. Frequency of sensor heat adjustment is a
function of how much exposure the sensor has
to refrigerant. Adjustment may be required every
couple of weeks for heavy duty service and once
every few months for light duty
service. The sensor LED status indicators will
accurately tell you when adjustment is necessary
during the daily check.
D. Over the usable sensor life, when heater
adjustment is fully clockwise and the green OK
LED will not come on, it is time to replace the
sensor. Before plugging in a new one, turn the
Heater Adjustment fully counterclockwise then
plug in the new sensor and test and adjust as
described above to calibrate the instrument.
Application Notes
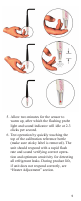
1. Start leak checking anywhere and con-
tinue in a logical progression through the
entire system to locate all leaks. If sur-
faces are particularly dirty, or wet, wipe
them off with a clean, dry cloth to reduce