
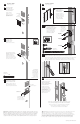
Installation Guide


Make sure the edges of
the deadbolt are parallel
to the door edge.
Asegúrese de que los bordes
del cerrojo son paralelos
al borde de la puerta.
U*
Make sure the
deadbolt interior’s
turnpiece is vertical.
Asegúrese de que
la perilla del cerrojo
interior este vertical.
Locate the mounting screws
and keep them within reach.
Localice los tornillos y
mantengalos al alcance.
interior torque blade
paleta de torsión interior
curve
points up
la curva
apunta
hacia arriba
fully extended
completamente
extendido
D-shaped hole
oricio en
forma de D
interior
interior
The mounting plate
should be pre-installed
on the deadbolt interior.
If removed, re-install.
La placa de montaje
debe ser pre-instalada en
el cerrojo interior. Si se
removio, reinstale la placa.
Insert the interior
deadbolt’s torque
blade through the
D-shaped hole in
the top latch.
Inserte la paleta de
torsión del cerrojo
interior a través del
oricio en forma de D
en el pestillo superior.
TROUBLESHOOTING
Solución de problemas
curve on bottom
la curva en la parte inferior
If the screws are difcult to tighten, make
sure the latch is installed correctly.
Si los tornillos son difíciles de ajustar,
asegúrese de que el pestillo se
ha instalado correctamente.
If the turnpiece does not rotate, make
sure the turnpiece is vertical, the
latch bolt is extended, and the curve
of the exterior torque blade faces up.
Si la perilla no gira, asegúrese que
la perilla este vertical, el pestillo
esté completamente extendido, y
la curva apuntando hacia arriba
en la paleta de torsión exterior.
Secure the deadbolt
with mounting screws.
Fije el cerrojo con
los tornillos.
U
U
62093
U
62093
actual size
tamaño real
actual size
tamaño real
actual size
tamaño real
* Additional installation steps are required for this
component when installing a service kit for 2-1/4"
(57 mm) thick doors. See thick door kit instructions.
* Se requieren pasos adicionales de instalación para este
componente cuando se instala un kit de servicio para puertas
gruesas con un espesor de entre 57 mm (2-1/4"). Consulte las
instrucciones para el kit de servicio para puertas gruesas.
* A special order thick door
handleset must be used
in conjunction with the
thick door service kit.
* Un conjunto de manija para
puertas gruesas de pedido
especial debe ser utilizado
conjuntamente con el kit de
servicio de puertas gruesas.
semicircular
hole
oricio de
medio círculo
J
Press
Presione
Insert the post into the
bottom hole in the door.
Inserte el poste inferior en el
oricio inferior de la puerta.
H*
U (x2)*
Hold the handleset
on the exterior side
of the door and make
sure the round edge
of the spindle faces
the door edge.
Press the bottom latch bolt
to insert the spindle and
install the handleset.
Presione el perno para
insertar el husillo y instale
el conjunto de manija.
If adjustment is required,
pull and rotate the spindle.
Si el ajuste es necesario,
tire y gire el husillo.
door edge
borde de la puerta
spindle
husillo
Insert the spindle into
the semi-circular hole
in the bottom latch.
Inserte el husillo en el
oricio de medio círculo
en el pestillo inferior.
Insert the torque blade
below the top latch.
Inserte la paleta de torsión
debajo el pestillo superior.
180°
Post is adjustable and can be moved
to any position within the slot.
El poste es ajustable y se puede mover
a cualquier posición dentro de la ranura.
H
M*
Y
X*
X*
W
H
exterior
exterior
Mantenga el
conjunto de
manija en el
lado exterior
de la puerta.
Asegúrese
que el borde
redondo del
husillo este
hacia el borde
de la puerta.
interior
interior
A
48006
W
X
49031
Y
* If installing the thick door
service kit, use the screws
provided in the kit.
* Si va a instalar el kit de servicio
de puertas gruesas, utilice los
tornillos suministrados en el kit.
* If installing the thick door
service kit, use the screw
provided in the kit.
* Si va a instalar el kit de servicio
de puertas gruesas, utilice el
tornillo suministrado en el kit.
3 / 4
Secure the handleset
with the washer, screw,
and screw cover.
Fije el conjunto
de manija con la
arandela, el tornillo,
y la tapa del tornillo.
A
B
B
C
C
D
E
F
Make sure that the curve of the
EXTERIOR torque blade is facing up and
that the latch bolt is fully extended.
Asegurese que la curva apunta hacia arriba
en la paleta de torsión EXTERIOR y que
el pestillo esté completamente extendido.
INSTALL DEADBOLT INTERIOR
Instale el cerrojo interior
INSTALL HANDLESET
Instale el conjunto de manija
9 10