
Installation Instructions

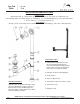

Table Of Contents
INSTALLATION INSTRUCTIONS
P 847•244•1234 www.barclayproducts.com
1/8/08
To Assemble Tubes
1. Assembled #3 and #8 screw into #2.
#7 is on top of #2 beneath the tub.
Place a bead of plumbers putty around
bottom of #3, to seal to tub and protect
from leaks. Then tighten #3 into #2.
2. Assemble overflow. (Follow diagram)
3. Set #1 in place.
4. Place Tee (#5) on shoe.
5. Trim bottom of tube #1 to fit into Tee (#5).
6. Trim tube #11 to fit.
7. Tighten the nuts.
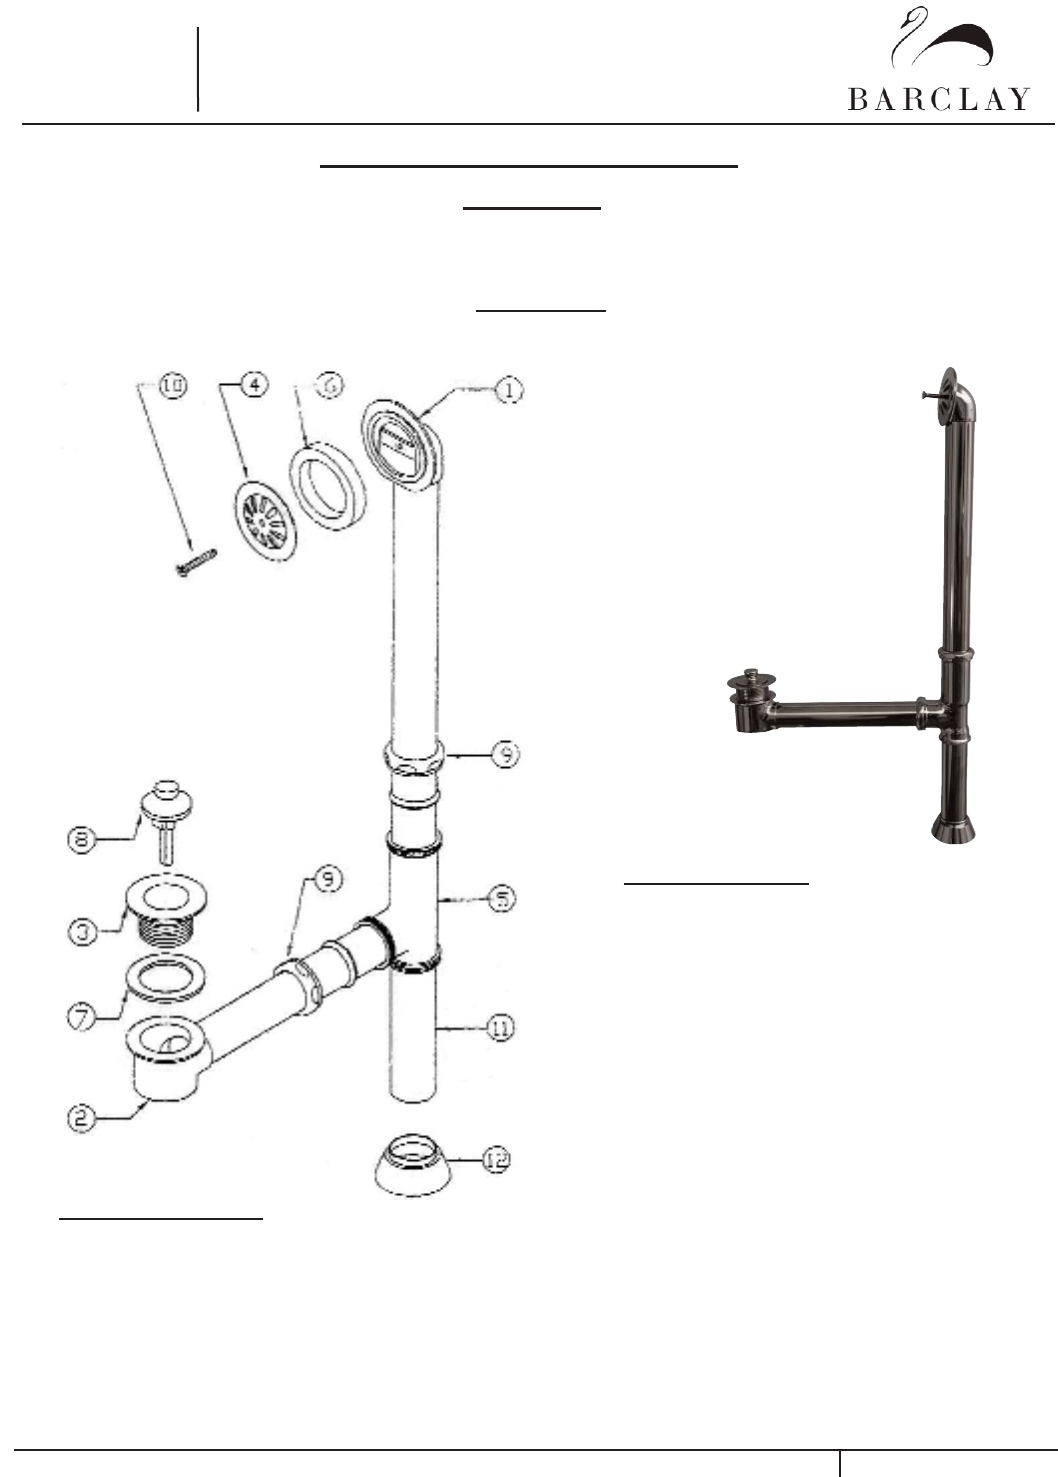
Parts Included
• Top Overflow Tube (1) • Bottom Shoe (2) • Top Waste Flange (3) • Face Plate (4) • Exposed Tee (5) •
• Face Sponge Gasket (6) • Waste Gasket (7) • Lift Stop (8) • 2- 1 1/2” Nut and Washers (9) • Face Plate Screw (10) •
•1 1/2” x 6” Tube (11) • 1 1/2” O.D. Escutcheon (12) •
Leg Tub
Drain
Tools Needed
• Wrench • Pliers • Teflon Tape (use as a sealant on all male threaded tubing) • Tube Cutter • Plumbers Putty •
Cat. No.
5599
Cleaning Instructions
Wipe this whole set off with warm water and a
soft cloth. DO NOT use soaps, cleansers, or
brass cleaners as they will disintegrate the
protective lacquer coating and leave the brass
exposed causing it to tarnish.
NOTE: Please seek professional help if you have copper plumbing in your home.