
user manual


DX-700 • User’s Guide • Rev 02 77
4. Operation
Power-Up Initialization
mçïÉêJré=fåáíá~äáò~íáçå
Use the following steps to power-up the DX-700:
1. After connecting AC to the DX-700, locate the Power Switch on the rear of the
chassis, and turn the power
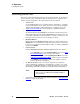
ON. While the system is initializing, the DX-700
splash screen appears.
Figure 4-1. DX-700 Splash Screen
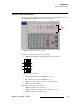
During this interval, the DX-700 discovers how your system’s banks and modules
are configured. After a brief pause, the
Home Menu appears.
2. When using the DX-700 for the first time or when using a system that has just
returned from a show, perform a
Factory Reset. For details, refer to the
“
Performing a Factory Reset” on page 146.
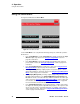
If the above prompt occurs, and provided that a System Module is properly installed, on the
Startup Diagnostic Menu you can press {DX-700 Management} and access a subset of
management functions:
• {Properties}
• {Ethernet}
• {Diagnostic}
• {System Reset}
Refer to the “
Using the DX-700 Management Menu” section on page 134 for details on all
DX-700
management functions.
Important
With the exception of “spare” modules, if the system
determines that any modules are incorrectly installed or
missing, a
Startup Diagnostic Menu appears which prompts
you to power down the system and re-configure the modules.