
User's Guide
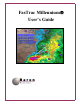


Table Of Contents
- Table of Contents
- Preface
- 1.Overview
- 2. Setting Up Your System
- 2.1Setting Up Map Layers
- 2.2Setting Up Display Levels (for clients without .psf mapping data)
- 2.3Adding Water-Fill Points (for clients without .psf mapping data)
- 2.4Fixing Floods with Anti-Fill Points (for clients without .psf mapping data)
- 2.5Editing the Places Database
- 2.6Adjusting the Color Palette
- 2.7Using the Baron Chart
- 2.8Editing Colors for 256-Color Palettes
- 2.9Customizing Font Displays
- 2.10Manipulating the Automatic Legend
- 2.11Using Overlays
- 2.12Setting Up Icons
- 2.13Points to Remember
- 3.Adjusting Views
- 3.1Using the View Main Panel
- 3.2Setting Map Parameters
- 3.3Editing Topographical Data
- 3.4Saving and Organizing Views
- 3.5Using the View Options
- 3.5.1Adding Text to a View
- 3.5.2Zooming In and Out From a View
- 3.5.3Pointing to Features on a View
- 3.5.4Panning on a View
- 3.5.5Labeling Streets with Street Spotter
- 3.5.6Controlling Display of Radar Data
- 3.5.7Utilizing TeleTrac
- 3.5.8Displaying Lightning Strikes on a View
- 3.5.9Displaying Storm Spotter( Van data
- 3.5.10Toggling High-Definition Data Processing
- 3.5.11Displaying NEXRAD forecast data
- 3.5.12Displaying Neighborhood Weather Net( Sensor Data
- 3.5.13Zooming to a Specific City
- 3.5.14Adding Fronts and Pressure Markers
- 3.5.15Creating Temporary Pixel Query Points
- 3.5.16Creating Fixed Pixel Query Points
- 3.5.17Displaying Precipitation Type Maps
- 3.5.18Saving the Current View as a Bitmap
- 3.5.19Printing the Current View
- 3.5.20Highlighting Your Spotter Network On-Air
- 3.5.21Displaying National Weather Service Warnings
- 3.5.22Displaying Wind Speed and Direction
- 3.6Points to Remember
- 4.Managing Storm Tracks
- 5.Using SEQUENCER
- 6.Controlling Your Radar
- Glossary