
Server User Manual

IM
Barracuda Enterprise IM Server - Quick Start Guide
The Barracuda Enterprise IM Server is an IM gateway and server appliance that is
installed between your internal network and the Internet. It provides a secure internal IM
service for your company, as well as a way to log and manage all public IM traffic. The
Barracuda Enterprise IM Server provides identity management, keyword notification, and
integrates with your existing LDAP or Active Directory server to provide IM security and
management capabilities at the organizational, group, or even user level.
Getting Started
This guide provides you with setup instructions for the Barracuda Enterprise IM
Server. We recommend reading these instructions fully before starting the setup.
To begin setting up your Barracuda Enterprise IM Server, you need the following
items:
Barracuda Enterprise IM Server
AC Power Cord
(2) Ethernet Cables
Mounting Rails (model 620/820 only)
VGA Monitor (recommended)
PS2 Keyboard (recommended)
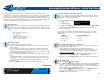
Physical Installation
To install the Barracuda Enterprise IM Server:
1. Fasten the Barracuda Enterprise IM Server to a 19-inch rack or place it in a
stable location.
2. Connect an Ethernet Cable from your network switch to the LAN ethernet
port on the front panel of the Barracuda Enterprise IM Server. When the
Barracuda Enterprise IM Server is configured using the inline setup, you will
use both the LAN and WAN ports to connect.
3. Connect a Standard VGA Monitor, PS2 Keyboard, and AC power cord to the
unit.
Note: Immediately after connecting an AC Power Cord to the unit, it may
power ON for a few seconds and then power OFF. This is because the unit is
designed to automatically return to a powered ON state in the event of a
power outage.
4. Press the POWER button on the front panel to turn the unit on.
Configure IP Address and Network Settings
If you have a monitor connected, the Barracuda Enterprise IM Server displays
the Boot Menu initially and the Administrative Console login prompt once it is
fully booted. To begin the configuration:
1. Login to the Administrative Console using the admin login:
Login: admin
Password: admin
2. Configure the IP Address, Subnet Mask, Default Gateway, Primary DNS
Server and Secondary DNS Server as appropriate for your network.
3. Save your changes.
If you do not have a monitor and keyboard and want to set the IP using the
RESET button on the front panel, press and hold the RESET button per the
following table:
IP address Press and hold RESET for…
192.168.200.200 5 seconds
192.168.1.200 8 seconds
10.1.1.200 12 seconds
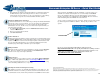
Barracuda Enterprise IM Server Configuration
Use a computer with a Web browser that is connected to the same network as
the Barracuda and follow these steps:
1. In your Web browser’s address bar, enter http:// [Barracuda’s IP
address]:8000 (the default Web Interface HTTP Port). For example, if you
configured the Barracuda with an IP address of 192.168.200.200, enter:
http://192.168.200.200:8000
2. Login to the Web interface of the Barracuda Enterprise IM Server as the
administrator: Use Username: admin Password: admin
3. Click any one of the Save Changes buttons to save all of the information.
Update the Firmware
1. Go to Advanced
Firmware Update.
2. Press Download Firmware. Click OK to acknowledge the download duration
message. To avoid damaging the Barracuda, do not power OFF during an
update or download. To view download progress, refresh your browser. You
will be notified when the download is complete.
3. On the Advanced
Firmware Update page, click the Apply Now button to
apply the firmware. This will take a few minutes to complete.
4. Click OK when prompted to reboot.
Power button